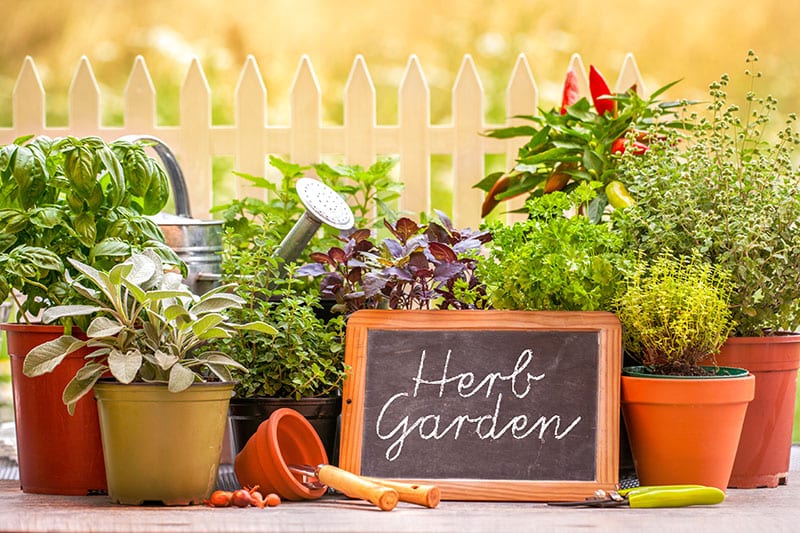
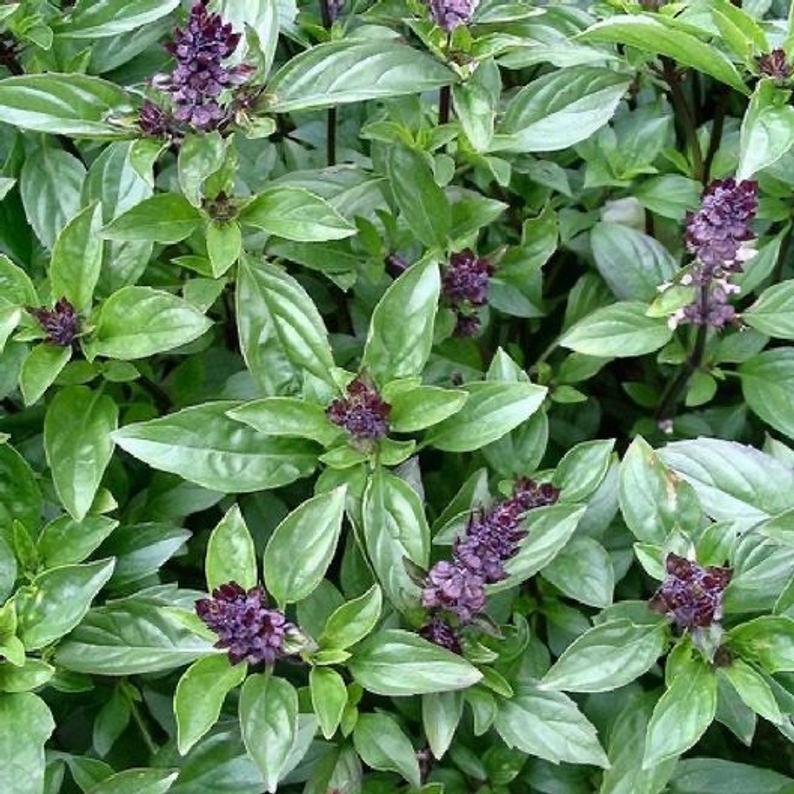
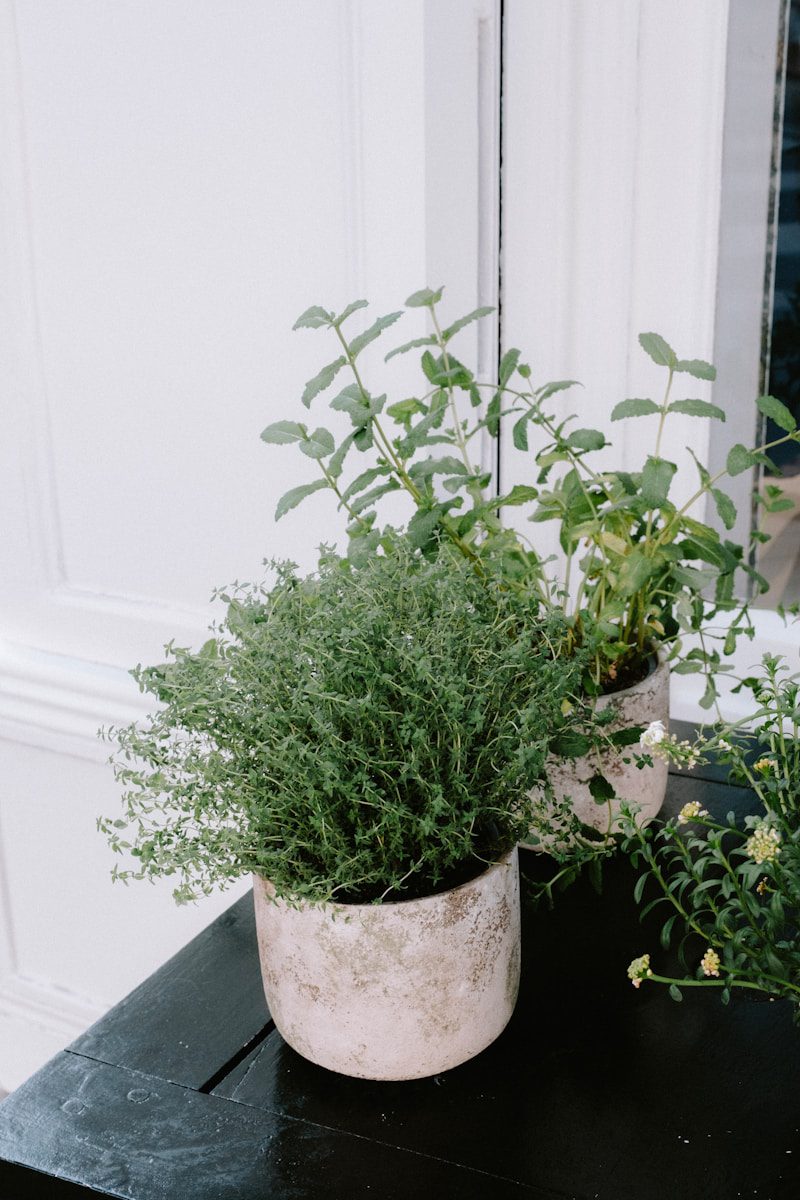
Posted on

Herb Garden Kit – Indoor Kitchen Herb Garden

Herb Garden Kit - Indoor Kitchen Herb Garden

Creating a thriving herb garden in your kitchen is more than just a way to add fresh flavor to meals. It’s an invitation to bring the beauty and aroma of the garden inside your home. An indoor herb garden kit offers an easy way to get started. It simplifies planting, saves space, and makes fresh herbs available year-round. Whether you live in a house with limited outdoor space or an apartment with no garden at all, these kits are perfect for anyone who wants to grow fresh, aromatic herbs without the hassle.


Why Indoor Herb Garden Kits Are So Popular

Fresh Herbs at Your Fingertips

Cooking becomes more exciting when you can pinch fresh basil or snip parsley straight into your dish. You don’t need to rush to the store or settle for dried herbs. The garden is right on your countertop.

Year-Round Greenery

Unlike outdoor gardens that rely on warm weather, indoor kits allow you to grow all year long. Rain or shine, summer or winter, your herbs keep thriving.

Space-Saving and Simple

Even if your kitchen is small, herb garden kits fit neatly on windowsills or countertops. They are designed for compact spaces and often include everything you need to start growing right away.

Beginner-Friendly

No experience? No problem. These kits are ideal for beginners. They often come with soil pods, seeds, labels, and clear instructions. Anyone can plant, water, and watch their herbs sprout with ease.


What Comes in a Typical Herb Garden Kit?

Most indoor kitchen herb garden kits are thoughtfully packaged so you can start planting the moment you open the box. While each kit is different, you can usually expect these items:

  • Herb Seeds – Common options include basil, parsley, cilantro, thyme, mint, and oregano. Some kits offer specialty herbs like chives or dill.
  • Growing Containers – Small pots, biodegradable planters, or decorative jars suited for indoor use.
  • Soil or Growing Medium – Pre-measured soil disks or pellets that expand with water for clean, easy planting.
  • Plant Markers – Wooden or plastic labels to help identify each herb as it grows.
  • Instructions – Step-by-step directions that guide even first-time gardeners through setup and care.

Some premium kits may also include:

  • Self-Watering Systems – Built-in reservoirs that reduce how often you need to water.
  • LED Grow Lights – Perfect for kitchens with low sunlight.
  • Decorative Containers – Rustic wood boxes, ceramic pots, or modern metal planters to match your kitchen style.

Best Herbs to Grow Indoors

Indoor conditions favor certain herbs that thrive in pots and grow well year-round. Here are some favorites you’ll find in most kits:

Basil

Fast-growing and fragrant, basil adds a sweet, peppery flavor to salads, pasta, and pizza. It loves bright light and frequent harvesting.

Parsley

A versatile herb that grows easily indoors. Use it to garnish dishes or mix into soups and sauces.

Cilantro

Perfect for salsas, curries, and fresh salads. It prefers cooler indoor temperatures and quick harvesting.

Mint

A hardy herb that grows vigorously. Great for teas, desserts, and cocktails.

Thyme

Compact and low-maintenance, thyme offers earthy flavor perfect for roasting vegetables and meats.

Oregano

A Mediterranean favorite, oregano thrives indoors and adds bold flavor to Italian and Greek dishes.


How to Set Up Your Indoor Herb Garden Kit

Step 1: Choose the Right Location

Place your kit near a sunny window where it can receive at least 4–6 hours of light each day. A south-facing window is ideal. If natural light is limited, consider adding a small grow light.

Step 2: Prepare the Containers

Follow the kit’s instructions to set up your planters. If soil pellets are included, soak them in water until they expand. Fill your containers evenly.

Step 3: Plant the Seeds

Plant the seeds at the depth suggested in the instructions. Most herb seeds need only a shallow covering of soil. Space them evenly so each plant has room to grow.

Step 4: Water Lightly

Keep the soil moist but not soggy. Overwatering can lead to root rot, so check the soil daily and water only when it feels dry to the touch.

Step 5: Provide Light and Warmth

Place your kit where temperatures stay between 65–75°F. Herbs grow best in stable conditions with consistent light.

Step 6: Harvest Regularly

Once your herbs reach a few inches tall, begin harvesting. Snip the top leaves first to encourage fuller growth. Regular trimming keeps plants healthy and productive.


Tips for Success

  • Rotate Plants Weekly – Turning pots helps plants grow evenly toward the light.
  • Pinch Back Often – Frequent harvesting encourages bushier growth and prevents flowering.
  • Fertilize Lightly – A diluted liquid fertilizer every 4–6 weeks can boost growth.
  • Watch for Pests – Indoor herbs rarely have pests, but check leaves for small insects and treat early if needed.
  • Refresh Soil Annually – After several months, herbs may need fresh soil or repotting for continued growth.

Benefits Beyond Cooking

Growing herbs indoors is more than a kitchen convenience. It brings life, fragrance, and even stress relief to your home. Watching seeds sprout and grow can be calming. The greenery brightens your kitchen, and the scent of fresh basil or mint can lift your mood.

Indoor gardening is also a fun family activity. Children love planting seeds, watching them grow, and tasting the results. It’s a simple way to teach kids about where food comes from and encourage healthier eating.


Styles of Herb Garden Kits

Rustic Wooden Planters

These often come in farmhouse-inspired designs, perfect for cozy kitchens.

Modern Ceramic Pots

Sleek and minimalist, these fit well in contemporary spaces and make herbs look elegant on a countertop.

Hanging Herb Kits

Great for saving counter space, these hang from walls or windows and add vertical greenery.

Smart Garden Systems

High-tech kits with automated watering and grow lights. They are more expensive but nearly foolproof for busy households.


Why Choose a Kit Over DIY?

You can create your own indoor herb garden with separate pots and seeds, but kits save time and guesswork. Everything is included and sized to work together. Kits also make excellent gifts for friends, family, or anyone who enjoys cooking and gardening. They are practical, thoughtful, and fun to use.


Perfect for All Seasons and All Homes

Indoor herb garden kits work in apartments, condos, dorm rooms, and full-sized homes. You don’t need a backyard or a balcony. Even in winter, when outdoor gardens are dormant, your kitchen can stay green and fragrant.


Bringing Flavor and Freshness Inside

Fresh herbs transform meals. They add color, aroma, and vibrant flavor. With an indoor herb garden kit, you never have to settle for dried herbs again. Every pinch of basil or sprig of thyme is alive with freshness. And the best part? You grew it yourself, right in your kitchen.


A New Chapter in Your Cooking and Gardening

Bringing an herb garden into your kitchen changes how you cook and live. It turns everyday meals into something special. It connects you to nature, even in the middle of winter. And it reminds you that growing your own food can be simple and joyful.

Now is the perfect time to start. Pick a kit that suits your style, find a sunny spot, and watch your kitchen transform into a tiny indoor garden bursting with flavor.

Posted on

Despite the Heat, Summer Gardening Can Be Rewarding

Sunpatien Compact Pink Candy

Summer is the season of vibrant blooms, juicy vegetables, and buzzing pollinators. It’s also the time when heat can test both plants and gardeners. But instead of dreading the soaring temperatures, we can use this season to grow, experiment, and savor the rewards of hard work in the garden. With the right strategies, summer gardening can be both productive and deeply enjoyable.

This guide explores practical tips, creative ideas, and inspiring approaches to make your summer garden thrive—no matter how hot it gets.


Understanding the Summer Garden Challenge

Why heat matters

High temperatures affect more than our comfort. Plants lose water faster. Soil dries out quickly. Some flowers may wilt by midday, while vegetables can bolt or stop producing. But when we understand these challenges, we can plan smarter.

Nature’s resilience

Many plants adapt beautifully to summer’s intensity. Zinnias, marigolds, peppers, and okra flourish in warm weather. Herbs like basil and oregano actually grow stronger in heat. By choosing the right varieties and caring for them wisely, we create a garden that thrives rather than struggles.


Choosing Heat-Tolerant Plants

Annuals that shine in the sun

Bright flowers bring life to summer gardens. Some of the best include:

  • Zinnias – Long-lasting color and perfect for cut flowers.
  • Marigolds – Natural pest deterrent and easy to grow from seed.
  • SunPatiens – Tolerate full sun and keep blooming through heat waves.
  • Cosmos – Feathery foliage and blooms that attract pollinators.

Vegetables that love warmth

Not every crop falters in high heat. In fact, summer is peak season for:

  • Tomatoes – Thrive in warm soil; just keep them watered.
  • Peppers – Sweet and hot varieties both do well in sun.
  • Okra – Almost thrives on neglect and loves the heat.
  • Eggplant – Needs warmth to produce firm, glossy fruits.

Herbs that never quit

Fresh herbs are the soul of summer cooking. The best choices include:

  • Basil – Loves full sun and steady moisture.
  • Oregano – Hardy and aromatic, even in dry soil.
  • Thyme – Low-growing and drought tolerant.
  • Rosemary – Thrives in containers and dry conditions.

Be Smart About Watering

Deep and less frequent

Instead of daily light watering, give plants a deep soak a few times a week. This encourages roots to grow downward, where soil stays cooler and wetter.

Morning is best

Water early in the day so leaves dry before nightfall. This reduces fungal problems and ensures plants start the day hydrated.

Mulch for moisture

A thick layer of mulch—straw, shredded leaves, or pine bark—keeps soil cool and reduces evaporation. It also suppresses weeds, which compete for water.


Protecting Plants from Extreme Heat

Provide afternoon shade

Use shade cloth, lattice, or even a strategically placed trellis to block harsh afternoon sun. This helps delicate plants like lettuce or young seedlings survive.

Group containers

Place potted plants close together. This creates a microclimate where moisture lingers and roots stay cooler.

Wind and heat barriers

Fencing, hedges, or even temporary burlap screens can reduce drying winds and scorching sun exposure.


Soil Care in Summer

Keep feeding simple

Fast-growing plants need nutrition, but summer heat can stress roots. Use slow-release fertilizers or gentle compost teas instead of heavy feeding.

Refresh mulch midseason

Mulch breaks down over time. Adding a fresh layer mid-summer replenishes moisture retention and keeps the garden tidy.

Watch for compacted soil

Water and foot traffic can harden soil in heat. Lightly aerate around perennials and vegetables to keep roots breathing.


Creative Summer Garden Ideas

Mix edibles and ornamentals

Combine tomatoes with marigolds or peppers with basil. This not only looks beautiful but also helps with pest control and pollination.

Vertical gardening for airflow

Trellises, obelisks, and cages keep vines like cucumbers and beans off the ground, improving airflow and saving space.

Evening garden spaces

Add a bench, string lights, or fragrant plants like night-blooming jasmine. Summer evenings are magical when the heat fades and the garden hums with crickets.

Pollinator havens

Plant nectar-rich flowers like coneflowers, salvia, and lantana. Hummingbirds, bees, and butterflies will reward you with constant activity.


Gardening for the Senses

Colors that pop in bright light

Hot pink zinnias, fiery orange cosmos, and golden sunflowers stay vivid under the blazing sun. Use these to create a cheerful mood.

Fragrance in the heat

Heat releases the oils in herbs and flowers. Plant lavender, basil, and rosemary near paths where brushing against them releases bursts of scent.

Tactile enjoyment

Include plants with interesting textures—lamb’s ear’s soft leaves, ornamental grasses swaying in the breeze, or rough sunflower stalks kids love to touch.


Keep Yourself Comfortable

Hydration and timing

Garden early morning or late evening. Keep water handy and wear a wide-brimmed hat. Simple adjustments protect your energy and health.

Lightweight clothing

Choose breathable fabrics like cotton or linen. Gloves prevent blisters, and sturdy shoes keep feet cool and safe.

Rest in the shade

Take breaks. Sit back and admire your work. Part of gardening’s joy is pausing to soak in what you’ve created.


Embracing Summer’s Unique Joys

Summer gardening is about abundance. Tomatoes ripen faster than you can eat them. Flowers bloom in wild profusion. Pollinators fill the air with life. Yes, the heat can be intense, but with the right choices, this season rewards us with unmatched color, flavor, and vitality.

Instead of avoiding the garden in July or August, lean into it. Choose plants that love the sun, water wisely, and create shady spots for yourself and your plants. The result is a thriving space where beauty and harvest meet in perfect harmony.


A Season Worth Celebrating

Summer asks us to slow down, work with nature, and enjoy the bounty right outside our doors. Every bloom, every ripe tomato, and every buzzing bee is proof of life’s resilience in the heat. When we adapt to the season, rather than fight it, our gardens—and our spirits—flourish.

So, step outside. Feel the warmth on your skin. And let your summer garden remind you that even in the hottest months, growth and beauty never pause.


Posted on

Garden Flowers: Annuals or Perennials?

Perennials vs. Annuals – What Are the Advantages of Each?

Choosing the right flowers for a garden can feel like standing at a crossroads. On one side are annuals, bursting with color and energy, but here for only one season. On the other are perennials, steady and reliable, returning year after year with quiet grace. Both have their own strengths. Both can transform your space in unique ways. Understanding these differences helps you plan a garden that blooms beautifully and works with your lifestyle.


Understanding the Basics

What Are Annuals?

Annuals complete their entire life cycle in a single growing season. They sprout, grow, bloom, produce seeds, and die—all within one year. If you want them again next year, you must replant.

Examples include marigolds, petunias, zinnias, impatiens, and sunflowers. These flowers are often chosen for their bold, nonstop color and quick impact.

What Are Perennials?

Perennials are plants that return year after year. Their top growth may die back in winter, but their root systems stay alive underground, ready to sprout again when spring arrives.

Examples include daylilies, coneflowers, peonies, hostas, and black-eyed Susans. These flowers are known for their long-term beauty and ability to spread and mature over time.


The Advantages of Annuals

Annual flowers offer something irresistible—instant color and flexibility. Here’s why many gardeners love them:

1. Immediate Impact

Annuals grow fast and bloom hard. Within weeks of planting, your garden is overflowing with color. This is perfect if you want instant beauty for a special event or seasonal display.

2. Long Blooming Season

Most annuals bloom from spring to the first frost. That means you get months of nonstop flowers, far longer than many perennials that bloom only for a few weeks.

3. Bold and Diverse Colors

Annuals are famous for their vibrant shades. Electric pinks, sunny yellows, deep purples—annuals make it easy to experiment with striking color combinations.

4. Great for Containers and Borders

Because annuals don’t have to survive winter, they work well in containers, hanging baskets, and edging borders. You can swap them out easily for a fresh look each year.

5. Flexibility in Design

Annuals let you reinvent your garden every season. If you love trying new themes or color palettes, annuals are the ultimate design tool.


The Advantages of Perennials

Perennials reward patience with lasting beauty and lower long-term costs. Here’s why they are a favorite for many gardeners:

1. They Come Back Every Year

Plant once, enjoy for years. Perennials return season after season, saving you the effort and expense of replanting annually.

2. Cost-Effective Over Time

While perennials often cost more upfront, they pay off in the long run. A single investment can provide beauty for decades with proper care.

3. Low Maintenance

Many perennials are hardy and resilient. Once established, they need less water, fertilizer, and care compared to annuals.

4. Naturalizing and Spreading

Perennials often grow larger and multiply over time. They can fill in empty spaces naturally, creating lush garden beds without constant replanting.

5. Seasonal Interest and Structure

Perennials add rhythm to the garden. Some bloom in spring, others in summer or fall. Their foliage, seed heads, and winter silhouettes add texture year-round.


When to Choose Annuals

Annuals are ideal when:

  • You want fast results for new beds or containers.
  • You enjoy changing your garden’s look every year.
  • You love intense, bold colors that pop in summer.
  • You need seasonal displays for holidays, weddings, or parties.
  • Your garden beds need filling between young perennials.

When to Choose Perennials

Perennials are perfect when:

  • You want long-term beauty without replanting every spring.
  • You prefer a low-maintenance garden that evolves naturally.
  • You aim to build a garden’s structure and character over time.
  • You enjoy watching plants mature and return bigger each year.
  • You want wildlife-friendly gardens—many perennials provide nectar and shelter for pollinators.

Why Not Both?

The best gardens often combine annuals and perennials. Here’s how they work together:

  • Perennials provide the backbone. Their steady presence creates structure and continuity.
  • Annuals add seasonal flair. Their bursts of color fill gaps and keep things lively.
  • Mixed beds stay dynamic. As perennials fade, annuals can carry the show until frost.

For example, a bed of daylilies (perennials) can be brightened with marigolds (annuals) in summer. When the lilies finish blooming, the marigolds keep shining until fall.


Planning Tips for a Balanced Garden

1. Start with Perennials for Structure

Plant perennials as your garden’s foundation. Choose different bloom times to ensure something is always flowering.

2. Use Annuals for Gaps and Pops of Color

Fill empty spots with annuals to create fullness and extend bloom seasons.

3. Think About Maintenance

If you prefer low effort, lean toward more perennials. If you enjoy seasonal replanting and experimenting, add more annuals.

4. Match to Your Climate

Some plants act as perennials in warm regions but as annuals in cold ones. Know your USDA hardiness zone and choose accordingly.

5. Consider Pollinators and Wildlife

Both annuals and perennials can attract bees, butterflies, and birds. Mix them for a pollinator-friendly haven.


Examples of Stunning Combinations

  • Black-Eyed Susans (Perennial) + Zinnias (Annual)
    Golden daisies paired with bright, rainbow blooms for cheerful summer beds.
  • Hostas (Perennial) + Impatiens (Annual)
    Shade-loving hostas with lush foliage paired with impatiens’ vibrant flowers.
  • Coneflowers (Perennial) + Petunias (Annual)
    Coneflowers provide height and structure, while petunias trail with soft fragrance.
  • Daylilies (Perennial) + Marigolds (Annual)
    Hardy daylilies bloom in waves, complemented by marigolds’ continuous color.

Common Mistakes to Avoid

  1. Planting Only One Type
    A garden of only annuals can be costly to replant each year. A garden of only perennials may lack color at certain times. Balance is key.
  2. Ignoring Bloom Times
    Mix early, mid, and late bloomers to ensure flowers from spring through fall.
  3. Not Considering Growth Habits
    Perennials spread and grow larger over time. Plan for their mature size to avoid crowding.
  4. Forgetting Soil and Sun Needs
    Match plants to your conditions. Full-sun annuals will struggle in shade, and vice versa.

Creating a Garden That Feels Alive

Gardening is more than planting flowers. It’s about creating a living space that grows with you. Annuals bring excitement and change. Perennials bring stability and a sense of homecoming each spring. Together, they create a garden that feels full, balanced, and alive.


A Blooming Blend for Every Gardener

Whether you lean toward the vibrant energy of annuals or the lasting charm of perennials, there’s no wrong choice. Both bring beauty and joy in their own way. The real magic happens when we mix them, letting each shine in its season. A garden that blends both is not only practical but endlessly rewarding—a space that surprises us each year and invites us back to see what blooms next.


Growing Beauty, Year After Year

Choosing between annuals and perennials doesn’t have to be a strict decision. The garden you create today can change with the seasons, just like life itself. Plant boldly. Experiment freely. And let your garden tell a story that unfolds, year after year, in living color.

Posted on

Herb Garden Ideas

herb garden ideas

As a gardener, you know how important it is to have fresh herbs on hand. You can’t just run down to your local grocery store for them when the need arises! This blog post will give you some ideas on what types of herb gardens work best in different situations. If you’re looking for an easy garden that doesn’t require much maintenance, try planting your herbs in pots with shallow soil and lots of sun exposure. Herbs like basil and thyme do well in this type of environment and they’ll grow fast too!

Herbs are a delicious and versatile ingredient that can be used in cooking or to make tea. They also have amazing health benefits, which is just one of the reasons why more people are starting their own herb gardens! With this blog post you’ll get some ideas on how to start your own herb garden. Whether it’s indoors or outside, there’s an idea for everyone! We hope you enjoy reading about these new gardening trends.

There are a plethora of herb garden ideas you can choose from that will literally spice up your life! Fresh herbs are the ultimate when it comes to cooking and many people now a days want them. What better way to enjoy fresh herbs in your kitchen than ones that are just minutes old. Herb gardens, whether yours is indoors or outdoors, are a great way to begin gardening.

Herb Potting

Potted herbs are easy to grow from cuttings or seeds, indoors or outdoors. Start with a well draining soil. Another option is starting out with self-sustainable potting mix that has been sterilized with heat. The majority of these mixes will contain peat moss. Water often until the plants become established, then reduce water to intensify the flavors. Perennial potted herbs may need an occasional root pruning to keep the plant from getting too root bound.

Fertilize once a week with a balanced liquid fertilizer. Incorporating a granular fertilizer at planting will help. Too much fertilizer can lessen the flavor by increasing the shoot mass faster than oils develop in the plant.

Raised Herb Garden Ideas

Building a raised bed for your herb garden can be as simple or as extravagant as you want it to be. Raised herb garden ideas are many and varied. This blog post will explore some of the different ways you can create a raised herb garden, as well as how to care for them. It’s time to get your gardening gloves on!

More Herb Garden Ideas

There is no deep dark secrets when it comes to growing herbs. In fact herbs are really very easy to grow and you don’t need a large space to grow them in either. Most herbs can be grown in an area no bigger than a window box. Actually a window box would be an ideal place to grow a kitchen herb garden. There is enough room to grow parsley, basil, sage, or cilantro and it can all be in a compact container just outside the kitchen door. Combine herbs with a grape vine.

Many herbs can even be grown on the window sill of a sunny window in the house. The trick is to keep the herbs picked and to start new ones before the plants start to get too woody. Basil is an excellent window plant. When growing herbs inside or out remember two things the first is herbs do not like a lot of fertilizer and most herbs like moist soil but it needs to dry quickly wet soil will do most herbs in.

How about a strawberry jar herb garden Plant the top with a tall herb such as dill and then fill in the side with creeping plants like oregano, creeping thyme, or creeping rosemary. They will grow out the sides and hang down. just remember to keep the creeping plants trimmed to keep producing new leaves. You may substitute the plant in the top with something else such as sage if you like.

When planting herbs such as cilantro and basil it is good to do succession plantings maybe about 3 weeks apart so that you will have fresh leaves throughout the growing season. Cilantro and basil will go to seed quickly if not picked often and the flowers removed.

The main thing most herbs have in common is that they do not like wet feet and really do not need fertilizer as I mentioned earlier. Fertilizer will change the growth habits of the herbs and effect it’s strength and flavor. Good soil will provide all the nutrients necessary to grow a productive herb garden. Also be careful what you plant as some herbs can become rather aggressive and take over the whole area chocking out everything else. Mint is a perfect example. Mint is very invasive so if you want to grow it I suggest that you grow mint in a container and never in the ground.

A good herb garden will pay big dividends in as your family and friends will enjoy the great taste coming out of your kitchen. You will have the satisfaction of knowing you are using fresh homegrown herbs to feed them.

Herb Garden Design Ideas

Your herb garden should be functional and attractive. If you visit other people’s gardens, it should help you with your own herb garden designs. There are several important things to decide before you plant your first herb.

Research the plants you are thinking of planting. This will help you understand what types of pests you may be attracting to your garden. Each plant’s susceptibility to stagnation and decay when it is transplanted should be another concern.

You must determine what you hope to accomplish with your design. Do you want herbs primarily for medicinal reasons, or are you planting them for seasonings in your food? You can grow herbs of both types, but you will need to plan your garden design accordingly.

How much produce do you need to harvest from the garden? Is the beauty of the garden more important than the actual produce it yields? The answers to these questions are determined by your interests, and you should design your garden with these answers in mind rather than simply duplicating another garden design you have seen.

The herb gardens of centuries past were designed for the necessary functions of life. The garden yielded plants for medicines, seasonings, and dyes. These gardens were sometimes community gardens, and had to cater to several families. Those designs might be different than yours, especially if you just want the garden for the blooms and fragrances.

The amount of space you have to dedicate to the garden will have an effect on the design. If you have plenty of space, you may choose to have every conceivable type herb you can find. However, if space is limited, the garden may be limited to a handful of varieties. The wonderful thing about herbs is the limited number of plants you will typically need for any one item.

How will your garden relate to other landscape features in your yard? Can you plant your herbs in partial shade due to existing trees and plants? What existing landscape features, if any, are you willing to change to accommodate your new garden? Will some of the plants you want to use be a stark contrast to plants that are already there? Are some herbs incompatible with your existing plants?

Where you plant may be dictated in part by the herbs you have chosen. Although some herbs can be grown in shady areas, some require full sun. Some herbs bush into plants and pretty much stay where you put them, while others shoot out runners and want to go everywhere. Keep in mind how the garden will change after you’ve planted it. Decide what changes you are willing to allow.

Don’t be afraid to alter the garden after you plant it. After your original plan is implemented, things may transpire later that make that plan obsolete, or at least not in your best interests. You can relocate plants or have them removed if your interests change.

Freely use your imagination when designing your herb garden. There is no right or wrong place to put your herbs, as long as they get enough water, required sunlight, and proper drainage. Your herb garden designs should be your own and not mandated by the wants and needs of someone else.

Posted on

Raised Garden Beds: A Complete Guide to Better Gardening

raised garden bed

Raised garden beds, also known as garden boxes, are a type of gardening structure that elevates the planting area Raised garden beds, often called garden boxes, have transformed the way many of us grow food, flowers, and herbs. Instead of planting directly in the ground, raised beds lift the soil above ground level, creating a contained and elevated growing space. This simple shift offers an incredible range of benefits, from healthier soil to easier maintenance. Let’s explore why these structures have become a favorite for home gardeners everywhere—and how you can use them to create a thriving garden.


What Are Raised Garden Beds?

A raised garden bed is essentially a framed box filled with soil. It sits above the surrounding ground and can be made from wood, stone, metal, or even recycled materials. While some are shallow, others are built tall enough to double as waist-high planters. Their design gives you more control over soil conditions, drainage, and accessibility.

Raised garden beds can be simple and rustic or beautifully crafted to enhance the look of your outdoor space. Their flexibility means they work in both small backyards and large homesteads.

Why Raised Garden Beds Are So Popular

There are many reasons gardeners love raised beds. They solve common problems and open new possibilities for planting. Here are the major advantages you’ll notice when you switch to this style of gardening.


1. Better Soil Drainage

One of the most frustrating challenges for gardeners is waterlogged soil. When water sits too long around plant roots, it can lead to root rot and stunted growth. Raised beds naturally solve this. Because the soil is elevated and contained, water drains more effectively. Even during heavy rains, plants remain healthier, and roots stay oxygenated.


2. Total Control Over Soil Quality

When you garden directly in the ground, you’re stuck with whatever soil you have—whether it’s clay, sand, or rocky terrain. Raised beds let you create the perfect soil mix for your plants. You can combine compost, topsoil, and organic matter to create rich, fluffy soil that supports strong growth. This is especially valuable if you live in an area with poor native soil.


3. Reduced Soil Compaction

Healthy soil is loose enough for roots to spread easily. In traditional garden rows, walking between plants can compact the soil, making it harder for roots to grow deep. Raised beds eliminate this problem because you never step inside the bed itself. The soil stays light, airy, and easy to work with year after year.


4. Easier to Access

Raised garden beds can be built at different heights. This makes them ideal for people who prefer not to bend or kneel while gardening. A higher bed brings the plants closer to you, making planting, weeding, and harvesting much easier. For people with mobility challenges, this accessibility can make gardening enjoyable again.


5. Natural Pest Control

While no garden is completely pest-free, raised beds make it harder for certain pests—like slugs and snails—to reach your plants. The defined edges of the bed also make it easier to install barriers, netting, or fencing to keep out larger animals like rabbits or deer.


6. Longer Growing Season

Soil in raised beds warms up faster in the spring because it’s elevated above the ground. This means you can start planting earlier than you would in a traditional garden. It also tends to stay productive later into the fall, giving you a longer harvest window.


7. Cleaner and More Organized Appearance

A raised garden bed adds structure and visual appeal to a garden. Beds can be arranged in neat rows, geometric patterns, or even decorative shapes. Their clean edges help define planting areas, making the entire space look tidy and intentional. For gardeners who value beauty as much as function, raised beds deliver both.


8. Better Weed Management

Raised beds act as a barrier between your garden soil and the weeds in the ground below. If you line the bottom with landscape fabric or cardboard, you can block most weeds from coming through. This means far less weeding and more time enjoying your garden.d beds can’t fix everything, however, they are still a great option when soil limits the way you garden.

Choosing the Right Material

Raised garden beds can be built from many different materials, and each has its own advantages.


Wood

Wood is the most popular material because it’s easy to work with and affordable. Cedar and redwood are naturally rot-resistant and last for years. Pine is cheaper but may break down faster. Untreated wood is best if you’re growing food, since it avoids chemicals that could leach into the soil.


Metal

Metal beds, often made from galvanized steel, are modern and durable. They resist rot and can last decades. They also create a sleek look that works well in contemporary gardens. One thing to keep in mind is that metal can heat up in direct sun, so they’re best used with soil depth that insulates plant roots.


Stone or Brick

Stone and brick raised beds are attractive and permanent. They blend beautifully with natural landscapes and offer incredible durability. The downside is cost and labor—building them takes more time and materials.


Recycled Materials

Some gardeners get creative by reusing old containers, barrels, or even stacked pallets. This option can be budget-friendly and eco-conscious, but always make sure recycled materials are safe for growing food.


How to Build a Raised Garden Bed

You don’t need advanced carpentry skills to build a raised garden bed. A simple design can be assembled in a single afternoon.


Step 1: Choose a Location

Pick a sunny spot that gets at least six to eight hours of sunlight per day. Make sure it’s level and close to a water source.


Step 2: Decide on the Size

Beds that are 3 to 4 feet wide are easiest to manage, since you can reach the center without stepping inside. Length can vary based on your space. A height of 12 to 18 inches is common, but taller beds (up to 30 inches) are great for accessibility.


Step 3: Prepare the Ground

Clear any grass or weeds from the area. You can place cardboard or landscape fabric on the bottom to block weeds and improve drainage.


Step 4: Assemble the Frame

Build your frame using your chosen material. Secure corners with screws, brackets, or stones to ensure stability.


Step 5: Fill with Soil

Use a rich blend of topsoil, compost, and organic matter. A good mix is one-third compost, one-third topsoil, and one-third coarse material like sand or peat for drainage.


Step 6: Start Planting

Once filled, your bed is ready for seeds or seedlings. Water thoroughly after planting and watch your garden thrive.


Maintenance Tips for Healthy Raised Beds

Maintaining a raised garden bed is simple but does require regular care.

  • Water consistently. Raised beds dry out faster than in-ground gardens, so check soil moisture often.
  • Replenish soil each year. Add compost at the start of each season to keep nutrients high.
  • Rotate crops. Plant different vegetables in new spots each season to avoid soil depletion and pests.
  • Watch for pests and weeds. Even with fewer weeds, some may appear. Remove them early to keep the bed tidy.
  • Inspect for wear. If using wood, check for rot or loose boards and repair as needed.

What to Grow in Raised Beds

Raised garden beds are versatile. You can grow almost anything in them, from vegetables to herbs to flowers. Popular crops include:

  • Tomatoes, peppers, and cucumbers
  • Leafy greens like lettuce, spinach, and kale
  • Root vegetables such as carrots, radishes, and beets
  • Herbs like basil, oregano, and thyme
  • Pollinator-friendly flowers like marigolds and zinnias

Because you control the soil, even challenging crops—like blueberries that need acidic soil—can thrive in a raised bed.


Making the Most of Your Space

If you have limited space, raised beds pair well with vertical gardening techniques. Add trellises or archways for climbing plants like beans and peas. Use companion planting to maximize harvests—like pairing tomatoes with basil or carrots with onions.


Why Raised Beds Are Worth It

Raised garden beds make gardening easier, more efficient, and more rewarding. They help solve soil problems, reduce weeds, extend your growing season, and create a beautiful, organized space. Best of all, they invite us to connect more deeply with the process of growing food and flowers.


Bringing It All Together in Your Garden

By adding raised beds, you transform your gardening experience. You gain control over soil quality, reduce strain on your body, and enjoy a cleaner, more organized layout. Whether you’re growing vegetables for your family, herbs for cooking, or flowers for pollinators, raised beds offer a practical and beautiful solution.

When you step outside and see those neat rows brimming with life, you’ll know the effort was worth it. Every harvest, every bloom, and every moment spent tending the soil becomes part of something lasting—a garden that grows with you year after year.