Posted on

Muscovy Ducks to Help Manage Pest for Your Property, Garden and Blueberry Patch

The Muscovy duck has been selectively bred for hundreds of years. It is often a good option for little farms and Gardens to help manage pest. Muscovies are distinctive, the only ducks that did not descend from mallards. They are South American natives. The initial name was “Musco” duck because they were voracious eaters of mosquitoes. Muscovies come in a number of colors. The most numerous commercial variety is probably the white. Muscovies. They are relatively good fliers.

They will roost in trees and they will also roost on “perches” or “roosts,” at night if available.Muscovy duck can live as free range and while they can fly, they just fly around will not fly away and leave the property. In fact our Muscovy ducks hardly ever fly. Muscovy ducks do not make as much noise as other ducks.

Use Muscovy Ducks as pest controllers

Muscovy Ducks do an awesome job at controlling mosquitoes and flies. They will eat all sorts of bugs, the black widow and the deadly brown spider, Japanese beetles, maggots, grasshoppers, mosquitoes, mosquito maggot, slugs, snails and everything else that crawls, creeps, or flies. They also make a quick food out of mice, snakes, wasps, and hornets. They love to eat roaches and will eat them voraciously. They consume every bug they observe including ants. One of the things that make them very valuable is that they love spiders. They will even eat poisonous ones including the deadly brown and the Black Widow spider. They will go under things such as picnic tables and get up in the corners and crevices and eat the bugs, spiders, and other insects.

Their bug eating activities help reduce problems with bugs when working in the blueberry field or garden. Using Muscovy also helps eliminate the need to purchase chemicals for pest control to keep pests down. This can help in raising a pesticide free blueberries and vegetables.

Muscovy Ducks are Easy to raise

They’re inexpensive and trouble-free: Muscovies reproduce well. They are very good foragers, they grow quick and they rarely get sick. They will eat what the other animals leave or spill. They are good mothers. Muscovy Ducks also are very useful on farms where you have other animals because they eat any the excess food left by other animals. This helps reduce rats because there is no excess food lying around that can attract rats. They will also eat the spare food from the chickens or other animals.

Meat and eggs of Muscovies

They are really efficient for meat production. Muscovy breast is the size of a steak; you wouldn’t deduce it was duck without knowing. The meat is lean when compared to the fatty meat of ducks of mallard decent. Its leanness and tenderness is often compared to veal. The meat of Muscovy ducks is one of the healthiest meats you can purchase or grow. It is 98% or greater fat-free. Some people declare that the breast of a Muscovy duck taste like a Sirloin steak. It is sometimes made into “hamburger”. Persons requiring a low-fat diet use it. The meat is great tasting and very nutritious. Being a very lean meat it is not greasy like that of other ducks.

Muscovy eggs are tasty and are used in many dishes. They are considered a delicacy. Muscovy ducks can lay as many as almost 200 eggs a year. This can provide plenty of eggs for you to eat. They will nest three or four times a year and hatch up to 20 ducklings a time.

Posted on

Don’t Bug Me – Telling The Difference Between Harmful and Helpful Insects

There is a certain order in nature that should be maintained to make the lifecycle in the ecosystem continuous. This sense of order also applies in your garden, and the crucial factors would be your plants and insects surrounding them. That’s why telling the difference between harmful and helpful insects is important.

Garden Wars: Knowing Your Allies And Enemies

A lot of people think that having insects in their garden is a bad thing. This is true because some insects, like aphids, can be annoying and harmful. But not all of them should be considered pests. Other insects, like ladybugs, are very helpful. The trick here is to get a balance between the helpful insects and the harmful ones.

A Fine Lady Garden Helper

As said, ladybugs are very helpful insects, especially in your garden. This is because they feed on small caterpillars and Aphids mites, which are damaging to your garden. Both the larvae and adult ladybugs eat the pests in your garden.

Ladybug larvae are mainly active between the months of May and July, while the adults come after. You can even buy Ladybugs at many nurseries and greenhouses, or order them through mail.

Delicate Laces For Predating

One of the most excellent insect predators that you would want to have in your garden are Green Lacewings. Its larvae eat Mealybugs, Aphids, Spider mites, white flies, Thrips, and scales, just to name a few.

Hover Helpers

Another good insect for your garden are Hover Flies. They are very helpful insects and look like wasps or dark bees. Hover flies eat caterpillars, green flies, and fruit tree Spider Mites. Hover Flies are easily attracted to plants like phacelia plants and marigolds. Putting plants like these throughout your garden will encourage Hover Flies to thrive.

Dragon Friends

Dragonflies are also one of the best beneficial insects. They eat mosquitoes, which are not only harmful for your plants, but for humans as well. You should plant reedy plants to encourage dragonflies to thrive in your garden.

Busy Bees

Although bees may seem dangerous to some people, they are actually quite helpful to gardens and harmless to other insects. They do not eat or predate upon other insects. They help out in your garden by pollinating flowers and trees. A lot of vegetables need flower pollination too. Having bees close by will aid this process. You should plant flowers throughout your garden to encourage busy bee workers to visit.

Know Your Foes

Insects that you should watch out for are Scales, Leaf Miners, Japanese beetle and Spittlebugs. All of these are very harmful insects for your plants. So if you spot them thriving around your garden, appropriate action must be done.

Most people choose to use insecticides or pesticides. Yes, this may be the easiest way to kill insects, but too much of this can also be harmful, especially to your plants. That’s why making use of good insects is, generally, a much better way to deal with pests than the use of pesticides.

When you use good insects, the method is natural and you don’t contribute to polluting nature. With just a little effort in learning which bugs are good and bad, you can improve the way you and your garden handles insect problems. So the next time you see an insect thriving in your garden, always think twice before you even try to squish or shoo them away. They may just be the friends you need.

Garden Pests – How to Identify and Eradicate Them

Garden pests are not the thing most gardeners relish talking about. But whether you’re container gardening or working in flower beds, for beautiful clay flower pots or blooming perennial flowers, herbs, and vegetables beds, knowing your stuff about pesky critters is essential.

Your first (and best) line of defense is good plant culture. This means paying attention to these 4 essentials:

  • Proper soil for your flowers, herbs, or vegetables you’re growing. Why? Because planting in the wrong soil (such as peonies in cactus mix) won’t promote a healthy plant. And poor plant health means less defenses to ward off garden pests and diseases. Characteristics of the right planting soil include that it’s rich enough for the plant, but well-draining, and light enough for good root development.
  • Water properly. Too much leads to water-logged roots and fungal root inflections plus all sorts of other debilitating problems. If the soil is moist, don’t water (unless you have a plant, such as mint or hydrangea that relish evenly moist soil). And make sure your pots have drainage holes. If the water stands in the soil, even out of sight, this spells trouble.
  • Fertilize well through the whole growing season (don’t start strong and then quit!). And know your plants in terms of soil ph requirements. For example, azaleas or the herb chamomile loves an acid soil, while basil prefers a neutral ph, and oregano a slightly alkaline one. Know your plant and provide the soil additives they need to stay healthy.
  • Clean environment. Remove spent blooms, dead leaves, and other potentially decaying matter. Garden pests and diseases thrive in an unclean environment. Add good air circulation here, too. Don’t crowd the plants together or you’ll be removing a lot more than spent blooms. In short, strong plants, like strong bodies of any sort, are better equipped to stay healthy.

But as we know, stuff happens.

We’ll deal with seven of the most common garden pests below, both in terms of how to spot the problem and what to do about it.

But before we get to the pests, one word about beneficial insects-yes, there are some! Lacewings, lady bugs, and praying mantis are three of the best.

They love to eat the destructive insects that harm your garden. And, you can find reputable suppliers online.

Ok, on to our subject: Garden Pests.

The Pesky Little Critters

Aphids
The Problem: These are pretty common, but very hard to see. 3 millimeters and green, they love the undersides of leaves where they suck until the leaf becomes rolled and sticky.
The Solution: You can spray the plant leaves to knock off the offenders and use a spray of water and soap (best to use insecticidal soap from the nursery). Repeat every few days until they’re gone.

Spider Mites
The Problem: Too little to see with the human eye, these guys also hang out on the underside of leaves. You’ll know they’re there if your leaves turn yellow and wither. At the worst, there’s a white web on the leaves.
The Solution: Rinse the leaves as with aphids and spray. You can also move the plants to a cool spot as you do this. Spider mites like it hot.

Whiteflies
The Problem: Little white flies. Usually a whole lot of them, and they fly up disgustingly when you touch a leaf (they like the underside) or water. The leaves wither.
The Solution: Use an insecticidal soap on them, and they’ll bite the dust pretty quickly.

Mealybugs
The Problem: 3 millimeter yellow-brown nasties that hold onto the stems and leaves. They leave behind little white fluffs and the leaves get sticky.
The Solution: You can squish the bugs between your fingers if you’re not like me and have a bug phobia. Otherwise, clean off the critters with a hose or hard spray with insecticidal soap and treat with horticultural oil you can buy online or at the nursery.

The Bigger Critters

Caterpillars
The Problem: You’ll see hanging larvae and caterpillars-not too hard to spot. The thing about these garden pests is you need to decide if the harm is less than the pleasure of the butterfly that might come out. Sometimes letting them hang around, literally, can bring quite a lot of pleasure.
The Solution: Just pick off and discard. Enough said.

Japanese Beetles
The Problem: Big beetles with a shiny brown carapace and black head that reduce ornamental leaves to skeletons.
The Solution: Pick off and discard. You can drop them in a soapy solution if you get no pleasure from the squish option.

Snails and Slugs
The Problem: Little slow-moving, shelled creatures that love, love, love hostas.
The Solution: I’ve heard of lots of solutions, none of which have worked very well for me-these include setting out jar tops filled with beer (Really). Putting sticky boards at the base of plants-you have to get rid of them in the morning. Pick them up and dispose of them. In a manner of your choosing.

Posted on

Black Flowers For Your Garden – 10 Almost Black Flowers

Black rose and black tulip has always been the dream of gardeners. We haven’t reached that dream yet, but we are getting closer. Flowers we call black, are actually very, very dark red or purple flowers, so dark they appear black to us.

If you are like me, and want some black flowers in your garden, here are some suggestions:

1) Black violas and pansies (Viola)

Black violas are among the few truly black flowers. They flourish richly and are easy to grow and keep. They are edible.

2) Black Columbine (Aquilegia)

They are not really black, nevertheless they are very ornamental and will enhance the basic beauty of any garden. They are hardy and prolific. However, they prefer shady and moist places.

3) Black daylilies (Hemerocallis)

The darkest is ‘Black Emanuelle’, though daylilies are never actually black, only dark, dark maroon. Daylilies are also very easy flowers, all they require is plenty of sun, but do provide shade to black daylilies at the midday sun, to avoid that sunlight bleaches the color.

4) Black Hollyhock (Alcea Rosea var. Nigra)

This is a magnificent and useful plant. It can be eaten, and used to dye food and yarn.

5) Black Scabiosa, Mourning Bride (Scabiosa atropurpurea)

The flowers have a lovely scent and they attract butterflies, bees and hummingbirds to the garden. Cut, these flowers will last long in a vase.

6) Black Tulips (Tulipa)

‘Queen of Night’ is my favorite. It’s a spectacular, dark maroon, almost black tulip. Tulips are a little complicated to grow, but not difficult.

7) Chocolate Cosmos (Cosmos atrosanguineus)

Chocolate Cosmos is aptly named, as it sports the color of dark chocolate and gives off a sweet chocolate scent. This flower, as the Black Scabiosa will attract bees and butterflies to your garden.

8) Black Ball Cornflower (Centaurea cyanus)

This flower is not truly black either, but I am very fond of cornflowers. They like poor soil (they create fewer flowers in rich soil) and the flowers are edible, last long in a vase and can be dried so their beauty is preserved for in-door decoration in the winter.

9) Black Iris (Iris)

Black Iris is another really beautiful flower. It needs its soil to be constantly moist, so it’s good to plant irises in a water garden or by a pond.

10) Black Peony Poppy (Papaver somniferum var. paeoniflorum)

Planting this luxurious flower is a very easy way of providing an intense and eye-grabbing splash of very dark purple color for your garden.

11) Black Roses (Rosa)

There are no black roses, only very deep purple and red ones. If you like roses, like I do, you could consider ‘Deep Secret’, ‘Black Baccara’ or ‘Midnight Blue’, depending on if you want a purple or red rose.

Most often people recommend using yellow green foliage to bring forth the magnificent darkness of these beauties, but I personally prefer yellow, orange and pink flowers, small areas of bright light as the backdrop. In my mind dark flowers alone with different shades of green is slightly boring.

Just remember that most black colored flowers are actually purple!

Posted on

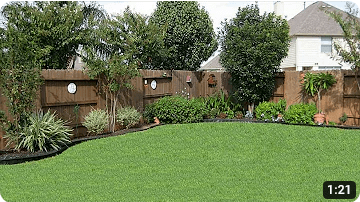
Useful Tips And Ideas For Landscaping Along The Fence Line

Useful Tips And Ideas For Landscaping Along The Fence Line

4 Tips for Landscaping Along Your Fence Line

A well-landscaped yard can make all the difference in terms of curb appeal. But if you’re like most homeowners, you probably don’t have a lot of extra time or money to spend on landscaping your entire property. That’s why focusing on one specific area, like the fence line, can be a great way to make a big impact without breaking the bank.

Here are four tips for landscaping along your fence line:

Useful Tips And Ideas For Landscaping Along The Fence Line
  1. Decide on a style and stick to it.
    You might be tempted to try out a bunch of different styles for your landscaping, but that will only end up making your yard look cluttered and messy. Instead, pick one style that you like and stick to it throughout your landscaping. This will create a cohesive look that is much more visually appealing.
  2. Use low-maintenance plants.
    There’s no need to choose high-maintenance plants that require a lot of watering and upkeep. Stick with low-maintenance plants that are drought-resistant and able to thrive in your climate. This will save you time and money in the long run.
  3. Mulch around your plants.
    Mulching is not only good for your plants, but it also helps to prevent weeds from growing. You can find mulch at most home improvement stores or online retailers. Be sure to spread it around your plants evenly and give them a good amount of coverage.
  4. Consider using decorative stones or other accents.
    In addition to plants, there are other ways to spruce up your fence line landscaping. Decorative stones or other accents can add visual interest and texture to your yard. Be sure to choose accents that complement the overall style of your landscaping for the best results.

By following these tips, you can easily create an attractive and eye-catching fence line landscape that will boost your curb appeal and make your neighbors green with envy!

Grouping Plants Together to Achieve a More Natural Look

Have you ever looked at a landscape and thought it looked too perfect? Maybe the plants were all the same height, or they were spaced too evenly apart. If you’re going for a more natural look, one of the best things you can do is group plants together in clusters.

Why Group Plants Together?
When you group plants together, it gives the landscape a more organic feel. It also helps to camouflage any bare spots in your yard, since the plants will conceal them. Another benefit of grouping plants together is that it can save you money. Buying several small plants is usually cheaper than buying one large plant, so if you group them together, you’ll get more bang for your buck.

How to Group Plants Together
The first step is to plan out your landscaping before you start planting. This will help you figure out how many plants you need, and where they should go. Once you have a plan, make sure all your plants are healthy before putting them in the ground. Once they’re in, water them well and give them some time to adjust to their new home. After a few weeks, you should start to see some new growth.

Grouping plants together is a great way to achieve a more natural look in your landscaping. It’s also economical and can help to camouflage any bare spots in your yard. With a little planning and patience, you can have a beautiful, organic-looking landscape that will be the envy of your neighborhood.

Below are some landscaping tips and ideas you can consider for improving your fence line:

• Before starting to plant along fence the line, make sure you remove any brush and debris on the area. This means removing weeds growing along the privacy fence. You can use a weed trimmer to cut down weeds and grass next to the fence.

• Aside from planting ornamental plants, the area along the fence is the ideal location to grow long, narrow vegetable garden beds. The edible garden will decorate and improve the look of the area while making the space functional to produce your own food.

• If you want to cover some of the wooden fence’s parts (especially the old, rotten ones) plant vines, like bougainvillea or trumpet vine along the base of the fence. These vines will naturally grow up the fence to add color to your fence and at the same time, soften the look of the wood.

• If you want to grow plants along the fence line, grow tall ornamental grasses, such as cape thatching reed or muhly grass, along the area. When they grow, they will fill out to cover a large area of the fence while adding movement and texture to your outdoor space.

• To have blooming flowers near your fence, plant ornamental grasses with flowering perennials such as poppies or hydrangeas. You can also consider growing flowering herbs like chives and lavender since they work great for different types of border gardens.

• You can also consider planting pots. Place large, decorative pots along the fence line. Make sure you pace the pots evenly along the privacy structure. To add color and boost visual interest to the area, grow a variety of plants in one pot.

• Lastly, to improve the look of your fence and outdoor space, you can also hang decorative garden fixtures such as metal lanterns as accent pieces. However, make sure you choose only lightweight garden decorations that won’t cause the fence to sag or lean and screw the pieces into the wood securely.

Posted on

How to Grow Grapes – Backyard Grape Growing Secrets Revealed

Contrary to popular speculation or belief, growing grapes in your backyard is not as difficult as one may presume. When someone mentions the idea of starting a grape garden, one may immediately assume that without acres of free land at their disposal, it will be almost impossible to be successful. This is absolutely NOT true!

As a matter of fact, there are many amateur grape growers today who are content with their small vine garden in their backyard. The grapes they produce are excellent for eating and making wine and the little effort put into it has a high return.

As a full time grape farmer, I have learned the secrets of what it takes to grow the best tasting grapes for decades. As a child I would work with my father on his farm planting and pruning grapevines all day long and continued working with him as a teenager and even now as an adult and family man. I want to teach you how to grow grapes and share with you the secrets of keeping a successful grapevine garden so that you too can enjoy what these delicious fruits have to offer.

First of all backyard grape growing does not require expensive fertilizers or manures. You can get some really good vines from ordinary soil. Another goodie is that you won’t have to invest a lot of time in your garden because the roots themselves will seek out what they need. The only thing you need to concern yourself with is where to put the vine itself.

It really is quite amazing how no matter where you plant your vines, all you have to do is train the vines around your house towards the well sun lit areas. If you have an open garden where the sun hits all day long, then that will work even better.

The best time to plant your grapevines is during the fall. Do not let the vines fruit during the first season of planting. Instead, always remember to cut down your vines to about four buds. The reason for this is that those four buds will become the strongest points and will lead the rest of the vine up the wall where you planted them in. You want your grapevine to use all of its energy producing a strong wood for the next season because it is during the second season of growth that you get the best grapes.

Remember that the wood that is born this year will lead to next year’s fruits. So during the first year, clip away any flower buds that may form, thus making sure that the vine’s energy is focused on producing wood.

When pruning during the summer, you want to cut off all new growth while leaving the old wood to provide for future fruit. Only remove old growth when they become a straggling nuisance hanging all over your garden. When pruning in the fall or early winter, you should cut back the vines this time to about five to six buds only so that once again, the vines will use all their energy for producing strong wood during the winter.

Most grape vines ripen during the late summer, early September. At this time you can enjoy the best tasting home grown grapes and continue preparing your vines for future growths.

Wait! Don’t go planting some grapevines you purchased at your local nursery and then wonder why you are getting poor results. Many of these vines come from other states and were cut from a healthy patch which will never have the strength to ripen once taken home. Learn the fundamental procedures of backyard grape growing first before making a mistake!

Tips For Successful Backyard Grape Growing

done properly. Grapevines are perennial plants and will grow for years to come. There are a few things to consider before you just jump in and start planting your grapevines. Otherwise, mistakes made at planting will haunt you in the future.

Grapes need lots of sunshine. One of the biggest mistakes that the home gardener makes when growing grapes is to plant them in the shade under a tree or where they get shaded by houses most of the day. If you watch wild grapevines grow, you will notice they make all efforts to climb trees and shrubs to get into the daylight. Without proper sunlight, proper ripeness cannot be obtained. Be sure the spot you choose has good sun most of the day.

A second mistake that many home gardeners make is to not take into account the grape variety’s growth habit and vigor. These two factors come into play when planting the grapevine and deciding on how to trellis the vine.

Vigorous varieties need lots of space. You can find out how vigorous a variety is by consulting your local nursery where you bought your vines. Vigorous varieties need eight feet between vines when planting. Less vigorous varieties can be planted closer at six feet between vines. Very low vigor vines can be planted as close as four feet.

Growth habit determines the trellis type and how the grapevine will be trained and pruned. Grape varieties with a large portion of their ancestry coming from wild American species tend to droop. These are like the wild vines that grow to the top of small trees and shrubs then cascade downward during the summer. The gardener will find that it is best to mimic this natural growth.

Vines of this type will be trained to a high wire about six feet off the ground. The grapevines are pruned to two to four long canes each year. As the shoots grow each year from the canes left at pruning time, they will grow outward from each side and soon start drooping towards the ground, forming a curtain of leaves by the end of the growing season.

Many varieties have the European grape, V.vinifera, in their ancestry. The European grape varieties tend to have a more upright growth. These grape varieties need a more extensive trellis system. At least four wires are needed to contain them. The first wire is approximately three feet off the ground with the two additional wires at eight inch intervals above the bottom wire. The vines are trained to a trunk that extends to the bottom wire.

Two to four canes are pruned and tied to the bottom wire on each side of the trunk. As the shoots grow during the spring and summer they are tied straight up to the wires above. Once the shoots have reached approximately 16 inches above the top wire, they are cut off at the tips. This “hedging” prevents further growth and shading of the vine below.

Grapes need a good water supply when they are actively growing in the spring and summer. They should be watered at least once a week in areas of little rain. More often under drought conditions. This watering should be continued until the berries begin to turn color. After coloring, watering is not needed and will in fact slow the ripening process. Once the leaves have fallen in the fall, one last large watering should be undertaken before the ground freezes to get the vines through the winter.

Perhaps the biggest mistake I see with home gardeners growing grapes is neglecting pruning the vines each year. This is a must! Without pruning the grapevine becomes an overgrown tangled mess. The grapevines overbear and the berries don’t ripen properly. Disease sets in as the vine is over shaded and doesn’t receive drying winds. The vines will weaken over time and eventually die before their time.

Pruning removes 90-95% of the previous year’s growth. It keeps the vines in balance and aids in controlling the crop and ripening the fruit. Pruning the grapevine is an art, not a science. Information on grapevine pruning can be obtained through your local Ag Extension agent. They have agricultural bulletins that detail the pruning process.

Growing grapevines can be a nice hobby that will provide you and your family with fresh fruit or grapes to make wine with. Table grape varieties and wine varieties are distinct. Make sure you are planting the proper varieties for the wanted purpose. Home gardeners should also make sure that the varieties they are planting are adapted to their local climate. Some varieties cannot take cold winters, while others can tolerate freezing temperatures down to -25-30F.

Varieties that have American grape species in their ancestry can tolerate colder winters. Make sure you consult with your nurseryman to fit the variety you are planting to your conditions. The variety you choose must also be able to ripen in your climate. I see too many home gardeners planting varieties that take up to 170 days or more to ripen in areas that have only 150 days or less in their growing seasons.

If you are thinking of growing grapevines in your backyard or garden, be sure to consider the above factors before you start planting. Choose your grape varieties based upon what you plan to use them for, how they are adapted to the local growing conditions, and plan the trellis according to the variety’s growth habit. I wish you all the luck in your endeavor.

Posted on

Asian Vegetables You Can Grow in Your Organic Garden

As oriental dishes are becoming more popular in America, so are the vegetables used in those dishes. You can grow these unusual Asian vegetables in your own organic garden.

Mizuna: Also know as Japanese Greens, Japanese Mustard, Spider Mustard and many more.

Mizuna is a compact green plant with fringed, dark green leaves that can be used cooked or fresh. This plant has been described to be slightly spicy and have mild peppery flavor. One can use the leaves in a fresh salad, cooked in a stir fry, steamed, or even boiled. Add them to a clear soup to add color and texture.

The best time to sow seeds is in early spring. You will want to grow this plant like spinach. Space the plants about 6 inches apart. This plant is good for successive plantings. You can harvest the entire plant, or just some of the leaves.

Shungiku: Also known as Chrysanthemum, Tong Hao in Chinese, Ssukgat in Korean, and Kikuna in Japanese.

Shungiku is a beautiful plant that has single yellow flower which are edible, but it is mostly known for the leafy green leaves. Both the leaves and the flowers can be enjoyed in a fresh salad either alone or with other Asian vegetables. You may use the leaves in stir fry, casseroles, soups or many other hot dishes although it is recommended that you wait to the last minute to add the Shungiku leaves. These leaves cook quickly and are known to loose their structure.

Sow seeds in early to mid spring and early fall. This vegetable will not do well during summer conditions causing it to go into premature flowering. You may harvest individual leaves or the entire plant. Thin the plants as needed while enjoying the thinned plants in your favorite dishes.

Daikon: Also known as Chinese Radish, Aukobi-Daikon, or Asian Radish.

Daikon is a torpedo shaped radish that comes in many colors but most commonly white. Larger breeds can get up to 2 ft long and 3 in wide. The root (radish part) is mildly spicy and adds flavor to salads, sauces, and stir fries. In Korea, the daikon is traditionally made into a diced sweet pickle. You can steam the peppery leaves or add them to a soup.

Sows seeds during the spring for a summer harvest, and fall for a winter harvest. When purchasing your seeds, select the variety for the season you are planning on planting. Plants should be spread 6 inches apart. They take about 60 days until harvest. Carefully dig up the entire plant.

Growing unusual Asian vegetables in your own organic garden is fun and exciting. If you decide to grow these or any other Asian vegetables, you better get your Asian cookbook out and get ready to make some delicious meals!

Vegetable Gardening in Small Spaces

Do not let the lack of space be a reason or an excuse to not have a vegetable garden at your home. Thousands of people are in the same situation as you and that is the space they have available to grow fresh fruits, vegetables and herbs from seeds is very limited.

Related Links:

Maybe you live in a big city and land available is scarce, or you reside in a condominium or apartment and the only thing available to you is a patio. Either way, there are some great solutions to help you through this. You can be growing your own fresh veggies in no time.

I recently spoke with Tracy Godsey who runs the small container blog Eden’s Container. Tracy started her small space vegetable gardening adventures when growing fruits, vegetables and herbs in containers is all she could do with her limited apartment space, which consisted mainly of a balcony.

“I currently grow herbs on my patio including basil, parsley oregano, thyme, mint and chives. The basil and parsley are the only plants that won’t overwinter in my containers outdoors.”, says Tracy. “In a vegetable garden, full-sized plants can grow in any pot that holds 3-5 gallons of soil. Large plants like tomatoes need 5 gallons, while plants with shallow roots like lettuce can get by in a 3 gallon pot. Even smaller plants like radishes can grow well in trays and produce a harvest very quickly. If you don’t have a container handy, you can make one by filling a plastic tube (such as a garbage bag or bread wrapper) with potting soil. These types of tubes are known as grow bags.”

Tracy reminded me of a very important factor that I had not thought about and that was the weight of what you are growing. If you are on a second floor balcony where weight will be an issue, Tracy recommends, selecting smaller heirloom varieties and grow them in hanging baskets.

Just because you are limited on space does not mean you are limited on what you can grow. Remember to select fruits, vegetables and herbs that you and your family will consume. Since space is a premium you do not want to waste any with items that will get discarded. Be careful not to over water your items in containers and make sure your containers have adequate drainage holes. To protect from the loss of dirt through those drainage holes use coffee filters at the bottom or paper towels. Both options allow water to pass through but not dirt.

On a final note, “never put ordinary dirt in containers, only potting soil,” says Tracy. “You will have much better success since the soil is already formulated for growing plants in pots.”

Now it’s your turn to roll your sleeves up, get some containers, fill them with potting soil and plant the seeds of your favorite fruits, veggies and herbs. Don’t let space, or in this case, the lack thereof, prohibit you from eating fresh from the garden.

Posted on

How to Compost in the Garden

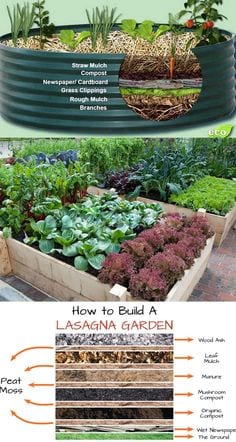
Raised bed garden

Starting Guide to Composting

When organic matter has finished decomposing the end result is compost. Although there are many types of organic matter such as manure, leaves, garden waste and kitchen scraps etc. although there are many types of composting organic matter will eventually do its job with or without you.

Composting does not have be a difficult task, most people can achieve quick results it’s just a matter of managing your time properly. If you want your compost to be ready faster then let’s get started.

To start we will use kitchen and garden waste. The only materials required at this time are a shovel or pitchfork. If you do not know where to build your compost pile there are compost bins or tumblers that you can use. In this case we will just use the ground but in the future a bin is more effective and keeps unwanted animals from your site.

Make sure that the compost is a safe distance from the house. All you need now are the ingredients. In the house you can start to collect kitchen scraps in a large coffee can or you may even use a large pail with a lid. You know when to take the scraps to your compost when you start to smell an odor. Make sure not to mix the compost too much, start out by mixing the compost once a week or less. This will speed up the process your compost needs to complete itself.

Try to obtain grass clippings and leaves for your compost. Leaves will provide carbon and your kitchen scraps will provide nitrogen. Try to stay away from scraps that are oily or greasy this will only attract unwanted pests. The best things for your compost are egg shells, coffee grinds, tea bags, bones and even hair. Many baseball diamonds have used hair to get their grass started. Undertake if possible a search for green manure if you can, if not regular steer manure will do.

When is the compost complete?

Once the organic matter has finished decomposing your will know by the texture and smell. When your compost has a strong odor your will know that it is not getting enough oxygen. If the end result smells woodsy or earthy then your compost is complete.

If you are concerned that you are using too much compost then stop worrying as your soil will never reject the amount that you use. The end result should be a proud yard, garden or plant you can enjoy.

Improving Soil with Compost

Soil modification is a key ingredient for how to start a garden. The content and texture of your soil is critical. To have a successful garden, you will need to have good soil. The best soil is not sandy, and it’s not too much like clay. It needs to be able to drain adequately, but hang on to enough moisture so that your plants don’t go thirsty. Too much sand and the water runs off, too much clay and you drown your plants. You may need to modify your soil before you start your garden.

If your soil sticks together, it’s too much like clay and you will need to amend it. If your soil is too sandy, meaning it won’t hardly stick together at all, you will also need to amend it. The way that you amend both kinds of soil is to add organic matter, or compost.

Luckily, organic matter is nothing more than plant or animal matter that is decomposing. The easiest way that you can add organic matter to your soil is to add compost or apply mulch. If you have a heavy clay like soil, it’s best to add manure, or green plant material since they break down more rapidly, instead of peat moss, straw or shredded bark, because they don’t break down as quickly. Even if you have good soil adding compost is always a good idea.

Adding compost to clay like soil makes it more pliable and improves its ability allow water to flow through. Sandy soil doesn’t have enough organic matter, so adding large amounts helps to give sandy soil a better ability to hold water. Large amounts of organic matter are likely to be needed to make your soil suitable. You will usually want to use a ratio of 2 to 1 compost to soil for it to be effective.

Air, water, minerals, and organic matter are all components of healthy soil. There are benefits of adding decomposed matter to good soil, in addition to compensating for poor soil like sand or clay, and that is it adds carbon, which promotes good bacteria growth, and it is more likely that you will have hearty plants.

You can’t have too much compost. In fact, you shouldn’t till your soil more than once or twice a year after you have worked in appropriate amounts of organic matter. This is because as the soil is turned, oxygen is added and it feeds the microbial activity that breaks down the organic matter. So if you don’t till it, it slows down the destruction of your organic matter.

If you invest the time to make sure you soil is healthy it will pay dividends when it comes to growing your garden.

Compost Bins

You can compost for nothing ( zero pounds / dollars) by piling your garden and food waste up in a corner. How do you decide whether to pay 20, 60, 140 or even 900 pounds (yes really!) for a compost bin? You ‘justify’ the cash by convincing yourself of the ‘value’. We show you how to do this by checking the composting features meet your needs at a price you can afford.

Sounds like hard work – why not just go online, look for a 5 star ratings and best price – job done. Almost all the online reviews look like this “arrived/did not arrive on time (score 1-5), it was easy/hard to set up (score 1-5). I’d let you know how it works! The all important bit is missing – few return 12 months to let you know if it worked and how well.

We can summarize the process of how do choose the ‘right compost bin’ or the ‘best compost bin’ for you into seven steps:

Step 1 – WHY – define your goals

Step 2- WHERE – review your available space and site for the bin

Step 3 – WHAT & WHEN – how much garden and food waste you produce

Step 4 – EFFORT – how much time and effort you are willing to invest

Step 5 – HOW – which method (ex. hot, cold, digesters, vermicompost) and which bin features are essential and which are nice to have (ex. low odor, no rats, no flies, handle all food waste, kills pathogens, kills weed seeds)?

Step 6 – CHECK – build a feature list

Step 7 – MATCH – which compost bin will deliver the best price / performance

Before we go any further, let’s consider your time and effort to read this article. You might have the time and interest in composting to fully research the topic – if so read the detail below), but many will just want a ‘fast track’ to help them make a quick decision with a degree of confidence that they are choosing a one that will work.

The fast track

Read between the lines of the vendor marketing hype (that’s the polite term!).

Seek user recommendations. Ignore the ‘arrived/did not arrive’ on time, ‘easy/hard’ to assemble. Look for reviews that state “It works, it does what it says, I have great compost out fast, worth every penny, best compost bin used in 20 years.

Validate vendor promises (ex. compost in 7-days). Look for detailed scientific study from reputable independent organization that supports the claim. Walk away if nothing.

Check vendor ability do they offer in-depth hands-on composting advice or just regurgitate the ‘list of things to compost’ that only applies to ‘cold’ composting? Look for advice that explains hot versus cold composting, how long it takes in each situation an why it differs when hot composting.

Look for vendors with ability in composting science & engineering. Composting obeys the laws of nature such as heat loss & cooling, rates/speed of biochemical reactions. You do not need to know about the science and engineering of composting – but I believe your compost bin vendor should.

For those who want to look into the detail, here is a little more depth around the seven steps to help you choose a compost bin

Step 1 – Consider your composting goals

Do you want to make lots of rich/great compost for your garden that will improve its fertility and cut down how much fertilizer and maybe even peat you use?

Do you just want to keep the garden tidy?

Do you want to make a more positive contribution to the environment by recycling all your food waste so your local council no longer has to collect and transport it to landfill?

Are you just fed up with allocating more and more of your flower or vegetable patch to overflowing compost bins that never seem to do anything?

What are your goals on sustainability, organic gardening, good use of limited resources.

Step 2 – Review your available space and site for the compost bin

Some compost bins need a certain site (ex. a sunny spot, or the opposite keep in the shade’, ‘only use on soil’, ‘do not use on clay soil’. You may have very little choice (ex. it needs to go on the concrete by the garage). Your site may limit your compost bin choice.

You might have a small garden and no space for a large compost bin, conversely you might have very large garden and taking 9 square feet for a traditional 3-bay compost bin system might pose no issues.

Do you want to the compost bin close to the kitchen so you can pop out easily in the rain to empty your food caddy?

Step 3 – Review the volume of garden and food waste you produce

Are you just going to compost seasonal garden waste (summer/autumn)

Do you want to compost grass cuttings (spring, summer, autumn)

Do you want to compost food waste – produced all year-round – ie compost through winter

How much of each type of waste do you have? In my experience, very few garden composters or food waste recyclers accurately know how many pounds of waste they produce. Very few want to record and measure it either. Choosing the right compost bin size is also further complicated as compost bins can (given the right conditions ‘hot compost’). Hot compost 32 times faster than a competitor bin that only facilitates ‘cold composting. So 5 gallons of waste a week in one bin would rapidly break down within a week, but in another bin build up over time and need a 100 gallon bin.

Step 4 – Consider if you want to ‘hot’ or ‘cold’ compost?

The headline benefits of ‘hot’ composting over ‘cold’ composting are:

  • Hot composting will destroy weed seeds – saving you time and effort in future
  • Hot composting will destroy dangerous bacteria – you can compost all food waste
  • Hot composting requires far less space to compost the same amount of waste
  • Hot composting requires dramatically less time (ex. 30 days Vs 360 days)
  • Hot composting works all year-round (cold heaps stop in winter below 5C)

Step 5 – How much time and effort you are willing to spend on composting

This is hard – everyone tends to answer – ‘none / minimal’. The more a vendor knows this is critical to your choice, the more pressure to use the term ‘easy’ and the bigger the potential expectation gap and likely hood of user disappointment. There is always some effort (ex. collecting food, turning, mixing, shredding). In our experience, it is easier when you follow simple steps. Investing the time to form habits is challenging – especially at the start when people perceive the habits are taking more time not saving time.

So, now you have a clear picture of what you want. Next, how do you check and match the compost bin against your composting goals?

Step 6 – Build a compost bin feature list

Build a feature list, find the top 10 commercial bins, score each feature, ignore those compost bins that do not fit your needs to produce a short list; then weight/score the remaining compost bins to find the best match.

Step 7 – Assess which compost bin will deliver the best price/performance

Score each compost bin against each feature to find the overall value for money score – the million dollar question!

Commercial Product managers do this kind of work as their day job – but it is likely very few composters, gardeners or food waste recyclers have the time or inclination to do this. Follow our link to the ‘compost bin competitive evaluation sheet’. You will find 12 widely available compost bins types and brands analyzed. You can play around with the scores and weighting to see which you think is best.

How To Improve Garden Soil Naturally

Healthy garden soil is teeming with life: there are earthworms and micro-organisms by the millions, each with a particular function in making soil fertile. Like any living thing, the soil must have food. Without food, the life in soil either leaves or dies. Eventually, the garden itself weakens and dies.

Soil life eats organic matter, decomposing it and creating a crucial soil element called humus. Humus is decayed organic material. The process of decomposition releases nutrients in forms that plants can absorb. In other words, decomposition of organic material has a fertilizing effect.

But fertility is only part of the value of regularly feeding the soil with organic material. Humus also contributes to the sponge-like soil texture that allows air circulation and moisture retention. Loam — the ideal soil for growing plants – is a balanced mixture of sand, clay, silt, and organic matter. Humus will bind sandy soil or loosen hard-packed clay.

For these beneficial results (for fertility and texture), the life in soil needs fresh food. Regular doses of organic material will ensure that garden dirt is enhanced rather than depleted over the lifetime of the garden. Every year, a 30 by 40 foot garden needs around 400 pounds (equivalent to 10 bales of hay) of organic material, but it doesn’t need to be added all at once.

Additions of organic material take a variety of forms. For starters, chop garden residues into the soil: weeds, mulch, and plants left after harvest. Hauling in compost by the yard from nurseries or hauling animal manures from nearby farms is also an option. But the easiest and most cost effective method of continuous additions of organic material is to grow cover crops, also known as green manures.

Cover crops are grown and tilled into the soil, replenishing rather than removing nutrients. Even in a small garden, this is an effective method when a harvest crop and a green manure are grown in rotation. For instance, plant a late summer green manure after an early crop such as peas or broccoli.

Some suggestions for cover crops include legumes, buckwheat, and rye grass.

Legumes such as peas and soybeans fix atmospheric nitrogen into the soil when inoculated seeds that attract certain micro-organisms are used. In addition, these legumes are vegetables, making a single planting both a harvest crop and a green manure.

For bulk and quick growth, rye grass or other annual grains are good choices. In colder climates these are especially good cover crops for the end of summer because they die over the winter and are easy to till in the spring. For the poorest soils, buckwheat is most useful.

Green manures can work with or without using powered equipment, but in larger gardens a rotor-tiller certainly makes the process easier. In smaller gardens, the question of whether it makes financial sense to invest in renting or buying a rotor-tiller has to be weighed against the cost of hauling in compost and animal manures.

Either way – hauling or tilling – some form of additional organic material beyond chopping in garden residues must happen in order for the soil to function and for the plants it supports to thrive.

Posted on

Growing Tomato Plants

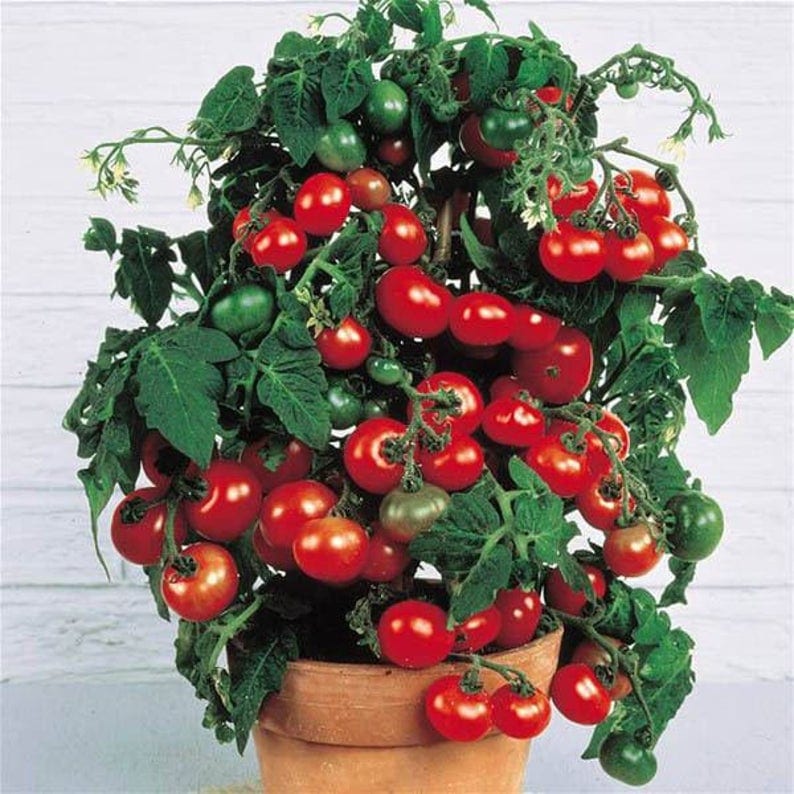
tomato-tiny-tim

Tomatoes from the grocery store shelves taste like-NOTHING! Why? Most of the tomatoes purchased from grocery stores have been harvested days before they reach the grocery, treated to turn red, and bred to stay firm and not bruise on the shelves. Plant breeding for the last fifty years has concentrated on producing a tomato that can survive anything-except for a taste test.

Growing Tomatoes – Heirloom Vs Hybrid Varieties

Gardeners and tomato aficionados alike have given up on the produce aisle for anything other than garnish. Instead, they turn to seed and plant catalogues to find tasty varieties to grow. When viewing a plant catalogue of tomato seed sources, you will be confronted with hundreds of varieties. Huge and tiny, purple, red, yellow and orange tomatoes. Perfectly round, almost flat, and lemon-shaped tomatoes. Seed catalogues highlight another variable to understand regarding tomato growing: heirloom versus hybrid tomatoes.

Heirloom Tomatoes

Tasty and unique, heirloom varieties are endless. This category of plant is where you will find purple, orange and yellow tomatoes sharing catalogue space with red ones. Heirloom varieties are “open pollinated” plants, which means that if you harvest seeds from a plant, prepare them, save them, and plant them next year, you will grow the same plant. Heirloom varieties were developed over time, in isolated gardens and communities, thus developing unique characteristics.

Heirlooms require particular growing conditions, and each variety is different. The key to success with heirlooms is choosing a variety that is well suited to your growing conditions. Because heirloom tomatoes have not been bred for generations to promote vigor and disease resistance, these varieties need a little bit of extra care. They are, however, worth the extra work. Heirlooms will produce lush, flavorful tomatoes of every shape, size and hue, for every culinary taste or need.

Hybrid Tomatoes

These tomatoes are the result of two different tomato varieties being “crossed” or joined, and the seeds harvested from the resulting plants. Hybrid tomato seeds will produce the tomato with hybrid characteristics for only one plant generation. If you harvest your tomatoes from the hybrid plant and plant those seeds next year, you will not have the same plant.

Hybrid tomatoes have been bred for disease resistance, uniformity, and ability to withstand mechanical harvesting, packing and shipping. Little time has been spent in enhancing flavor in hybrid tomatoes. Much like hybrid tea roses, hybrid tomatoes may be nice to look at, but they have few other desirable attributes.

For large-scale commercial tomato growers, hybrid tomatoes are a great help. For consumers expecting bright red tomatoes in the middle of winter, hybrids are a way to consume. For home gardeners, Heirloom varieties produce yields as large, and much more flavorful. Home gardeners have enough time an attention to successfully grow heirloom tomatoes and bring out their best qualities.

Choosing the Right Variety

Whether Heirlooms or Hybrids are your tomato of choice, you much choose tomato varieties that are well suited to your growing environment. Climates with high heat and humidity will help certain varieties flourish, while colder climates with shorter growing seasons require cultivation of plants that set fruit and mature faster.

What is the difference between determinate and indeterminate tomatoes?

When it comes to determinate and indeterminate tomatoes, the main difference is in how they grow. Determinate tomatoes are bred to grow a certain way and ripen all at once. They are mostly used for canning or sauces. Indeterminate tomatoes are bred to vine and grow continuously, so they are better for fresh eating.

Determinate tomatoes generally grow to be about two to four feet tall and have a compact, bushy growth habit. The fruit ripens all at once on these plants, making them ideal for canning or other recipes where you need a lot of ripe tomatoes all at once. Indeterminate tomatoes, on the other hand, can grow much larger, up to six feet or more. They have a vine-type growth habit and produce fruit throughout the season. Because of this, they are better suited for fresh eating.

When it comes to taste, there is no difference between determinate and indeterminate tomatoes. Both types can produce delicious fruits that are perfect for eating fresh or using in recipes. The only real difference is in how they are grown and how the fruit ripens. So, if you’re looking for a tomato plant that will produce a lot of fruit all at once, go with a determinate variety. If you want a plant that will keep producing fruit throughout the season, choose an indeterminate variety.

Container Gardening Ideas For Your Home

Many gardeners have given up on the idea of a garden because they lack space, time or lots of experience. But if growing plants is an interest of yours container gardening could be your answer. Container gardens will allow you to enjoy “playing in the dirt” without investing a lot of time or money. You can get very creative in container gardening using vegetables, decorative grasses or flowers and herbs. You can plant a container garden with any plant that would grow outside. The trick is to come up with some creative ideas for your container garden.

You should do some research at your local nursery or on the internet to choose the plants you wish to grow to help you come up with some ideas. Try to use plants that complement each other and have the same basic needs for water, air and light.

A container garden idea that has taken off recently is the landscape container. Some people plant a simple evergreen tree in a container with good drainage to place at their front door. Or you could plant an assortment of flowers for a bright and beautiful vista. If you do plant flowers, add plants that spill over the sides of the container to add more visuals and interest. What ever container gardening idea you can come up with can be placed on a deck, patio, and balcony or by the front doors. Put them somewhere that your family and friends can enjoy.

You can grow vegetables in containers but choose wisely. Vegetables like squash and pole beans need lots of space, while tomatoes need a deep pot. When you grow your own vegetables you will have tasty produce not the bland stuff that is in the grocery store. Nothing tastes better than a tomato right off the vine. There are many chefs and good home cooks that grow their own for just this reason. Don’t forget to pot some herbs, they are pretty plants and add zest to your meals.

But don’t just stick to vegetables and herbs; why not add fruit trees too? Instead of using an evergreen tree, pot a fruit tree instead. There are many dwarf varieties available that work best in pots since with pots there is less soil therefore less nutrients to draw from. If you live in a year round warm climate citrus trees are perfect. In other regions, stick to pear, apple and cherry trees. Another good container gardening idea is to grow strawberries. With strawberries climate does not matter since you can bring the container inside. Fresh strawberries are amazingly sweet and delicious. Imagine how good a bowl of fresh strawberries will be, strawberries that you have just picked.

Remember that container gardens dry out more quickly than traditional gardens. Be diligent about watering your plants if you don’t want your container gardening ideas to wither and die. Container gardens must be fertilized too. Keep a small notebook handy so you can write down the needs of your plant so you will always know when to water or feed. Keep an eye out for pests. If you find a container that has an infestation, isolate it immediately and treat it with a natural pesticide. You don’t want harsh chemicals on fruits, vegetables or herbs. A good natural pesticide recipe is:

In a jar, combine 1 teaspoon dishwashing liquid and 1 cup vegetable oil. Shake vigorously. In an empty spray bottle, combine 2 teaspoons of this mixture and 1 cup water. Use at ten-day intervals (or more often if needed) to rid plants of whiteflies, mites, aphids, scales, and other pests.
 
So, do some research, come up with your own unique container gardening ideas, gather your materials and get to work. The fruits of your labor will be amazing.

Happy Container Gardening!

Greenhouse Growing For Tomato Plants

There are a couple of ways for approaching tomato growing in a greenhouse, you can either dig and prepare the soil of the greenhouse ready to accept the tomato plants or you can grow the plants in a container such as a plant pot (12″ diameter) or growbag.

Realistically most growbags that are available which can be 3 to 7 gallons in size are only enough to support two plants. There are ways in which you can push this out to 3 plants but for the cost of a growbag its probably as well just to stick to 2 plants, particularly if you take good care of them and produce lots of fruit.

If you go for pots then you should sterilize them before use, to do this you can use a dilute solution of a suitable disinfectant, something like clorox fluid is perfect for this task.

While we are on this subject, you really should wipe down the inside of your greenhouse with disinfectant as well to ensure any residual contaminants that could also cause disease are removed from the glass.

One of the reasons I am suggesting using large pots or growbags for growing tomato plants is because the soil in the greenhouse is going to need to be dug out and replaced every 2 or 3 years anyway to ensure that you get rid of any build up of disease and also because the soil will be pretty much spent in terms of nutrients.

Space is limited in a greenhouse so the best option for plant varieties is to use the indeterminate variety of tomato plant i.e. a vine plant. You can prune the plant to the required size, leaving about 4 to 6 trusses on the main stem, which is about 6′ to 7′ in height, greenhouse size allowing. This will give you lots of fruit over an extended period. You will have to pinch out the main stem when you have enough trusses to stop further growth.

As an aside, using the bush variety is less convenient for greenhouses because they, as the name suggests, form a determinant size of bush without pruning which is probably a little too large in diameter for the average greenhouse. The fruit also has a tendency to all come at once.

Irrespective of the growing method you choose, you should start to feed the tomatoes at the first sign of fruit and for the duration of the growing period, twice a week should be sufficient. Also as you are in a greenhouse regular and consistent watering is also very important and I recommend 2 to 3 times a day with water that has been allowed to warm in the greenhouse.

As the end of the season nears a way of helping the last remaining fruit ripen is to hang a couple of bananas in the apex of the greenhouse. If that fails to ripen the last bit of fruit you can always use the green tomatoes for making a delicious chutney.