Posted on

The Fascinating World of Succulent Plants: Ultimate Guide

Growing Succulent Plants

If you’re like most people, you probably think of cacti when you hear the word “succulent.” However, succulent plants come in all shapes and sizes, and there is much more to them than just prickly plants that thrive in the desert. In this blog post, we will discuss everything you need to know about succulent plants. We’ll cover what they are, how to care for them, and some interesting facts about these fascinating plants!

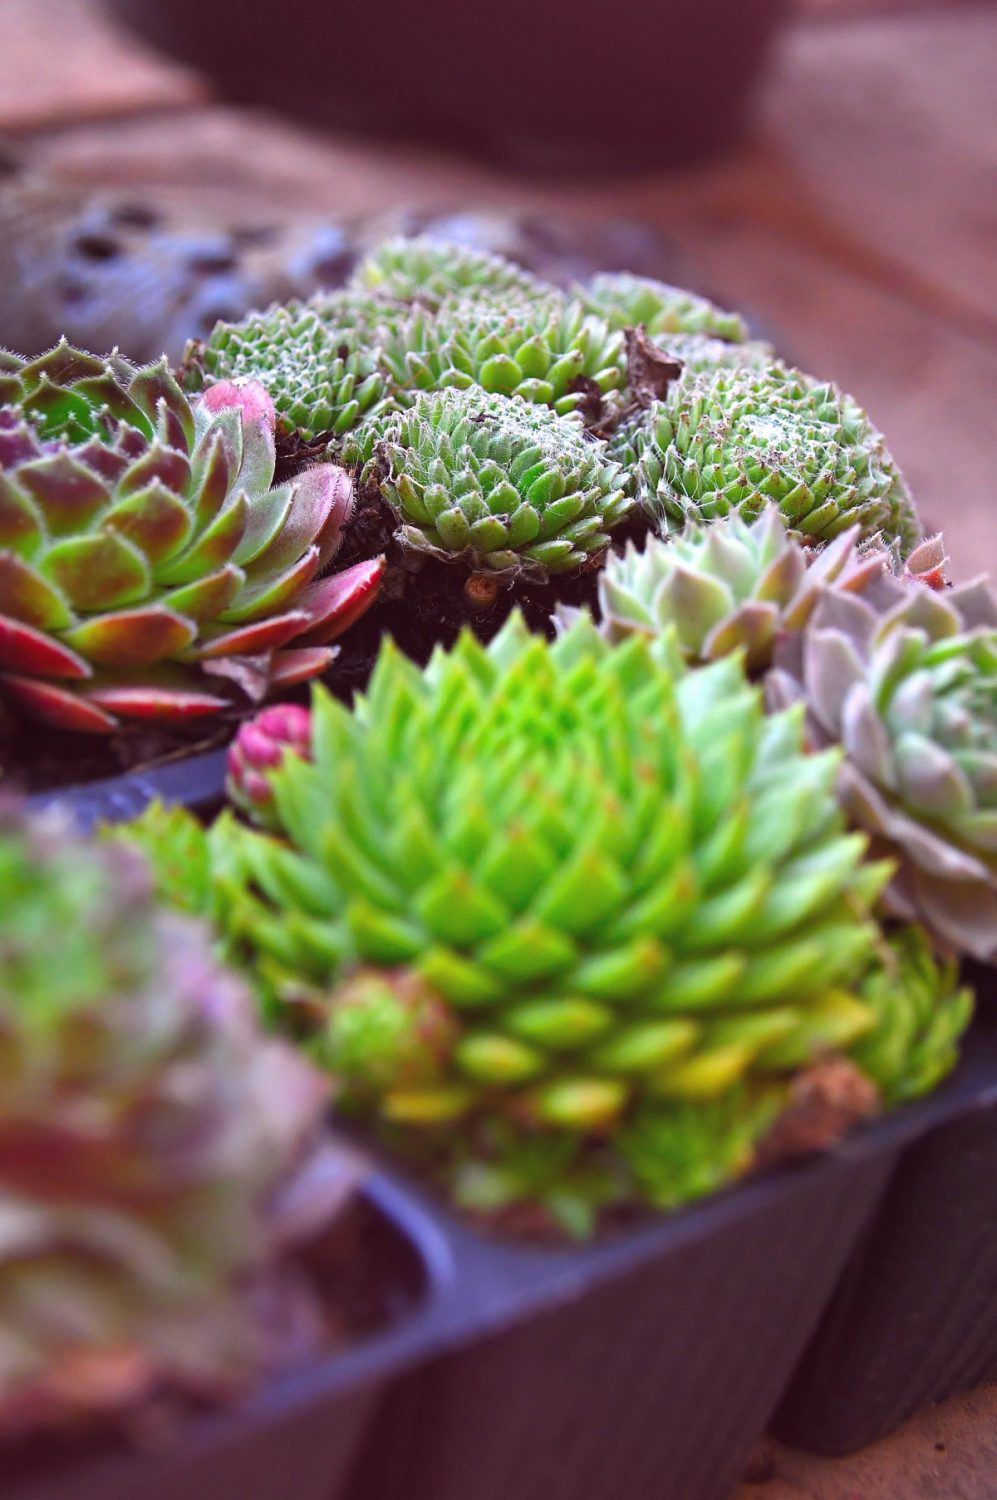
Succulent plants are a type of plant that has thick, fleshy leaves or stems. This type of plant is adapted to living in dry environments, as the thick leaves and stems help to store water. Succulent plants come in all sorts of shapes and sizes, from small, delicate-looking plants to large, tree-like succulents.

Now that you know a bit more about succulent plants, let’s take a look at some interesting facts about these fascinating plants!

Light

Growing Succulent Plants

Growing succulent plants benefit from getting a few hours of sun. Put succulents outdoors during morning hours, gradually increasing their exposure to direct sunlight over several days or weeks until they’re used to full sun exposure. You can also place succulents into an area that receives indirect light all day long. This will allow them to adjust more slowly by giving succulent leaves time to react and close up during periods of intense heat or bright light while still receiving adequate water and nutrients.

Treat succulents as houseplants and keep them near a sunny window, at least 6 to 8 hours of sun exposure per day. If your succulents aren’t getting enough sunlight, the leaves will be thin and succulent rosettes will be small.

Water

Keep growing succulent plants evenly moist and fertilize them with a dilute (half-strength) plant food solution, but don’t fertilize succulents that go outdoors until the weather warms up enough for succulent leaves to begin opening again – then stop fertilizing altogether once succulents start storing energy for next year’s succulent growth.

If your succulents are inside, water succulents when they look shriveled or let them dry out. Water succulents until the water trickles through the drainage hole – succulents also absorb moisture through their succulent leaves. Finally, water your succulents sparingly; too much water can lead to root rot.

Soil

Soil is the primary growing medium, choose a well-draining soil and be sure to adjust your soil mixture based on where you plan on growing succulent plants. Succulent soil should drain well and not hold too much moisture. Most soil mixtures for cacti include coarse sand or perlite (or both) as primary ingredients, with composted bark or other organic matter incorporated. If you want to use soil that doesn’t include sand, perlite or bark as an ingredient, make sure you purchase a bagged potting soil designed for cactus and succulents ¢â‚¬â€œ do not use topsoil from your garden! You can also make your own custom soil mix using materials like: 1/3 soil, 1/3 compost, 1/3 perlite. Succulents require soil that is free of plant food or fertilizers since these will burn your succulent’s roots and ultimately kill the plant.

Succulent Plants

Huernia zebrina, Lifesaver Plant

Most succulents require a lot in order to thrive and that¢â‚¬â„¢s where Huernias like this one (Huernia zebrina Lifesaver Plant) come into play. This plant is easy-to-grow and has an unusual beauty when in bloom. The lifesaver plant (Huernia zebrina) is perfect for beginners or experts alike!

Aloe, White Fox

Aloe ¢â‚¬ËœWhite Fox¢â‚¬â„¢ is a dwarf succulent that displays rosettes of thick green leaves with distinctive white markings that become more prominent in bright light.

Posted on

Trends in Garden Design

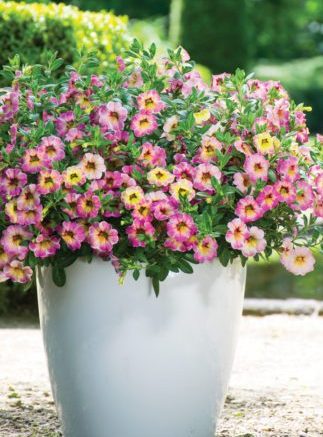
Calibrachoa, Chameleon Cherry Banana

Gardening is all about making you happy. We get it! And the best thing about gardening is that no one can tell you what to do in your own backyard, but we still want to share some trends with you for inspiration.

Here are our top three trends in garden design: Intentionality – Considering how everything¢â‚¬â€each plant, piece of garden art or furniture, structure, material, pot and more-contributes to your space as a whole; Living Whole Gardens – Creating spaces where people live and work together on an integrated site; Garden Housekeeping – Making sure every part of the garden has its place.

Trends in Garden Design

Intentionality

Creating a beautiful garden is an art form, and like any other form of art, it takes intentionality. When you’re planning your garden, be sure to consider how every element will contribute to the whole. From the plants you choose to the color of the pots, everything should be intentional.

Living Whole Gardens

Gardens have long been used as spaces for relaxation and escape, but in 2022, they’ll also become places for people to live and work together. With advances in technology, we’ll see more gardens that integrate living and working spaces into one cohesive whole. This will create a more sustainable and efficient use of space.

Garden Housekeeping

In order to maintain a beautiful garden, you’ll have to keep up with the “cleanup crew” ¢â‚¬â€œ the gardeners and landscapers who manage plant health, turf care and debris removal. This means having a regular maintenance schedule that works for you. It will be important to maintain cleanliness in your garden so you can enjoy it as much as possible.

At the end of each season: 1) As soon as it’s done blooming, get rid of faded annuals; 2) Turn pots right side up and stash away any that won’t be used again until the following year; 3) Store long-handled tools in a shed or garage; 4) Clean and oil all tools, then hang them up or put them in a tool box.

In the Spring Garden: 1) Order seeds and plants; 2) Start seeds indoors; 3) Sharpen blades on tools.

In the Summer Garden: 1) Weed; 2) Water; 3) Harvest vegetables and fruits.

In the Fall Garden: 1) Remove dead plants; 2) Mulch flower beds and trees; 3) Store pots and furniture.

We hope these trends inspire you to get creative with your garden this season! Happy gardening!

Posted on

How Birds and Other Flying Creatures Can Benefit a Garden

Seeds are planted, watered, washed with sunlight, charged with electrons during a thunder and lightning storm and nurtured to maturity. We as humans absolutely depend on this process. But so do the pollinators. Those hard-working players in this ecological balancing act are active in our gardens 24/7.

Birds, bees, butterflies, moths, bats, beetles, ants and yes, even the lowly flies have important beneficial duties to perform in the garden. Flowers, fruits and vegetables have adopted elegant systems to attract carriers, and attach and distribute their pollen for optimum survival of the species.

To a bird, insect or bat, your garden is a metropolis filled with neon signs and billboards advertising its goods. The neon signs and billboards are the flower petals. They attract attention using color, including ultraviolet markers, fragrance, shape and size. The ultimate reward for the transporter is the sweet and nutritious nectar of the flower. The base of the sign is the flower stalk, which is designed to hold the flower high enough to be easily seen. This insures it won’t be trampled by insect and critter traffic on the ground before it has a chance to be fertilized.

A bee has seen the ultraviolet nectar sign and beats a path to its target. Hairs on the bees abdomen are statically charged to help hold the pollen as it brushes the anther, which is the male part of the plant that produces the fertilizing powder. Bees also have built-in ‘saddle bags’ and ‘baskets’ on their legs and body parts to transport the pollen to the next flower. Once the pollen is brushed off onto the sticky stigma (female part of the plant), it travels down the stigma’s tube to the ovary and ovules at the base of the flower. There each ovule becomes a new fertilized flower seed. And that is the ultimate reward for the flower!

Evolution has further modified plants to provide just the right size nectar tube to accommodate the exact size critter tongue. For example, moths hover to feed, so they need a flat flower with a deep tube to match the length of the moth’s tongue. The flower will be white or very light in order to be seen in the moonlight, and it will be heavily scented to be found in the dark of night.

Bats work the nightshift as well. Those flowers that open after sundown and are extremely fragrant, large, showy and white with larger pollen grains will attract our echo-locators’ attention. They have bristles on their tongues to which some pollen sticks as they lap up the nectar. It is then transferred to the next flower from the bat’s head, feet and tongue. Larger, tougher flowers will accommodate the bat’s head without damage. Additionally, bats can consume thousands of harmful insects each night. I’d hate to think where we’d be without their vigilance!

Bees are particularly attracted to yellow and blue colors as well as sweet smelling plants. The flower tubes of these plants just happen to be the right size for the bee’s tongue to reach. Interestingly, snapdragons can only be ‘unlocked’ by a bee of the right size and weight to ‘provide the right key’ to open the ‘magic door’ to the ‘treasure room’.

Conversely, butterflies do not have a good sense of smell, but they can see the color red. Did you know that they ‘taste’ with their feet? They have highly sensitive receptors that tell them if they are on the right nectar-rich plant, or on the edge of a yummy mud puddle full of minerals and moisture necessary for their survival. Flowers that produce clusters of smaller flowerettes create a good landing pad for the butterflies so they can sip securely.

Those plants that store their pollen inside the anther rather than on top, such as the tomato, need to be shaken to make sure the pollen is released through the pores of the stamen. Bumblebees provide this service. They land on the flower and then vibrate their wings, and voila!

Beetles are another flying creature that can benefit a garden. They love the spicy or fruity scents of large greenish or off-white flowers. Since beetles have fairly efficient chompers, these particular flowers have developed armor to protect the delicate ovules from damage as the beetles go about their pollinator task.

Hummingbirds have a good sense of smell and are drawn to red, orange and pink tubular flowers in your garden. I’m sure you’ve seen a hummer sipping nectar from a hanging fuschia or potted petunia. They require flower petals that are curved away from their fast-beating wings as they feed. Pollen is transferred to their chest, beak and head in the process.

Songbirds do not have a strong sense of smell, so they seek brightly colored flowers such as red, orange, pink, yellow and purple. They not only spread pollen via their beaks, heads, chests and feet, but distribute the seeds that they have eaten via their droppings. A location where birds congregate on a regular basis will yield ‘surprise’ gardens, which have automatically been planted and fertilized by our beautiful aviators.

Additionally, birds consume a huge amount of insects. Bugs that can do damage to our flowers, vegetables and fruits are fed to baby birds as a nutrient-rich protein source. This helps the baby birds grow fast and strong. Adult birds benefit from consuming these protein snacks as well. Blue Jays even use ants to ‘comb’ their feathers and repel other insects with the formic acid they exude! Thankfully, our backyard birds do a number on vast quantities of insects every day.

All this biodiversity insures a vastly varied gene pool. The larger the gene pool, the better the chance a lot of different species survive to reproduce. Resist the temptation to swat a bee or squash a ladybug. Remember, they do great things for our orchards, farms and gardens.

Without birds and other flying creatures to provide these essential benefits to our gardens we would be overrun by harmful insects, which would then destroy our wonderful flowers, vegetables and fruit trees. Even if they weren’t done in by insects, without the pollination process so efficiently performed by our pollinator friends, there would be no more flowers, veggies or fruits. Our ecological balance would be destroyed and us along with it. That’s how important these vastly underrated birds and other flying creatures are to all of us!

Posted on

Home Remedies from the Garden for Itch, Indigestion, and Insomnia

Home Remedies from the Garden for Itch, Indigestion, and Insomnia

A calm day can turn rough fast. An itch flares. Your stomach feels tight. Night comes and sleep will not. The good news sits close. Relief grows in your garden and waits in your kitchen. We can make simple cups, gentle compresses, and soothing steams in minutes. In other words, you already have what you need to feel better—without fuss, fear, or hard-to-find ingredients.

This is your friendly, step-by-step guide. We’ll use common herbs and pantry staples. We’ll keep doses clear and the tone steady. We’ll also keep safety in sight, because comfort and care should always travel together. Use what fits your day. Skip what doesn’t. Your notes will teach you what helps most.

Educational only, not medical care. Seek help fast for trouble breathing, swelling of lips or tongue, chest pain, black stools, vomiting blood, severe rash, or lasting symptoms. Children under one year must not have honey. If you are pregnant, nursing, caring for a child, or take daily medicines, check with your clinician before new herbs.

Garden Remedies That Work Now

Let’s start with quick wins you can make today. We’ll group them by need—itch, indigestion, and insomnia—so you can jump to the part you want. Keep it simple. Choose one remedy. Try it. If it helps, keep it. If not, switch to another. Our bodies are different, and that’s okay.

ITCH RELIEF (gentle, fast, and plant-forward)

  • Cool Oat Soak (whole-body calm).
    Blend plain rolled oats to a soft powder. Stir 1 cup into a tub of lukewarm water. Soak 10–15 minutes. Pat dry.
    Why it helps: Oats form a silky gel that soothes skin.
    When to use: Dry itch, mild rashes, heat rash, winter skin.
  • Aloe Vera Leaf Gel (spot relief).
    Cut a fresh aloe leaf. Slice lengthwise. Scoop the clear gel (avoid the yellow sap near the skin if you are sensitive). Chill the gel 10 minutes, then smooth a thin layer over clean skin.
    Why it helps: Cool, moist, and calming.
    Where it shines: Bug bites, mild sunburns, razor burn.
  • Plantain Leaf Poultice (yard-to-skin helper).
    Rinse clean leaves of plantain (Plantago major or P. lanceolata). Bruise with the back of a spoon until juicy. Press on the bite or sting 10–15 minutes. Cover with a clean cloth if needed.
    Why it helps: Plantain’s soothing juice calms the area and reduces the urge to scratch.
    Good for: Fresh bites, nettle stings, garden scrapes.
  • Calendula Cool Compress (petals to the rescue).
    Steep 2 tablespoons dried calendula petals (or a loose handful fresh) in 1 cup hot water for 15 minutes. Cool to room temp. Soak a clean cloth and press on the area for 10 minutes.
    Why it helps: Gentle, skin-friendly comfort.
    Use for: Dry, irritated patches after you wash and pat dry.
  • Baking Soda + Oat Paste (itchy patches).
    Mix 1 tablespoon oat powder with 1 teaspoon baking soda and enough water to make a spreadable paste. Apply 10 minutes. Rinse and pat dry.
    Note: Skip on broken skin.
  • Diluted Apple Cider Vinegar Dab (sweat or heat itch).
    Mix 1 tablespoon vinegar with 10 tablespoons cool water. Dab with a cotton pad. Rinse after 5 minutes.
    Note: Do not use on open skin. Stop if it stings.
  • Garden Peppermint Cool Cloth (for those who tolerate mint).
    Steep a small handful fresh peppermint in 1 cup hot water for 10 minutes. Cool. Soak a cloth and press briefly.
    Caution: Peppermint can irritate some folks. Patch-test first. Avoid for infants and pets.

Itch safety we keep in mind: Wash poison ivy oils off skin and gear with soap and cool water quickly. Do not scratch until skin breaks. If you see streaking redness, pus, fever, or intense swelling, get medical care. For severe allergy signs (wheezing, throat tightness, fainting), call emergency care.


INDIGESTION SOOTHERS (steady, simple, stomach-kind)

  • Ginger & Honey Warm Cup (post-meal ease).
    Simmer 4–6 thin ginger slices in 1 cup water for 8–10 minutes. Cover 5 minutes, strain, and add 1–2 teaspoons honey. Sip warm.
    Why it helps: Supports smooth movement so meals don’t linger.
    When to use: After heavy meals, on queasy days.
  • Fennel Seed Chew or Tea (sweet finish).
    Chew 1/2–1 teaspoon fennel seeds after meals. Or lightly crush 1 teaspoon seeds, steep in 1 cup just-boiled water for 10 minutes, and sip.
    Why it helps: Calms gas and gentle cramping.
    Tip: A dash of caraway or dill seed plays well here too.
  • Chamomile + Lemon Balm Calm Cup (stress-belly ally).
    Steep 1 teaspoon chamomile and 1 teaspoon lemon balm in 1 cup hot water for 7–10 minutes, covered. Strain, add honey if you like, sip slowly.
    Why it helps: Soothes nerves and belly at the same time.
  • Basil Digestive Sip (mint-free, reflux-friendly for many).
    Tear 4–6 fresh basil leaves. Steep in warm water or warm almond milk for 5–7 minutes. Strain and sip.
    Why it helps: Gentle, aromatic ease without mint’s valve-relaxing effect.
  • Warm Rice Water (plain and kind).
    Simmer 1/4 cup rice in 2 cups water for 15 minutes. Strain the liquid. Sip warm with a pinch of salt.
    Why it helps: Light, soothing, and easy when everything feels touchy.
  • Apple Cider Vinegar Honey Tonic (only if it suits you).
    Stir 1 teaspoon vinegar and 1–2 teaspoons honey into 1 cup warm water. Sip slowly.
    Note: Skip if you have reflux or sensitive enamel. It helps some, not all.
  • Bitter Greens “Pre-Meal” Bite (tiny but useful).
    Take a few leaves of arugula, dandelion, or a small slice of lemon zest before meals. Chew well.
    Why it helps: Signals the gut to prepare for food. Tiny dose is enough.

Indigestion habits that stack the win: Small meals. Sit tall. Chew well. Leave two to three hours between dinner and bed. Walk 10–15 minutes after eating. Sleep on your left side if nights are hard. If peppermint worsens your burn, skip mint and use lemon balm or chamomile instead.

When to see a clinician for stomach issues: Heartburn more than twice a week, trouble swallowing, weight loss without trying, black stools, severe pain, or chest pressure. Quick care is wise care.


INSOMNIA HELPERS (night rituals that truly soothe)

  • “Goodnight Garden” Tea (soft, cozy, effective).
    Mix 1 teaspoon chamomile + 1 teaspoon lemon balm + 1/2 teaspoon dried lavender buds. Steep in 1 cup hot water for 7–10 minutes, covered. Strain. Add honey if you like.
    Why it helps: Eases body and mind without a groggy hangover.
  • Warm Foot Soak with Lavender (body signal: bedtime).
    Add a small handful dried lavender to a basin of warm water. Soak feet 10 minutes. Pat dry. Pull on soft socks.
    Why it helps: Heat and scent shift the nervous system toward rest.
    Note: If you use essential oil, one drop swirled into a spoon of carrier oil, then into the water, is plenty. Keep oils away from pets and eyes.
  • Lavender Pillow Sachet (scent, not sip).
    Fill a small fabric pouch with dried lavender. Tuck near your pillow. Squeeze once to refresh scent as you settle.
    Why it helps: Gentle aroma cues the brain that night has begun.
  • Banana-Oat Evening Bowl (sleep-steady snack).
    Simmer 1/3 cup oats in 2/3 cup water or almond milk. Stir in half a ripe banana, mashed. Sprinkle cinnamon.
    Why it helps: Light, calm fuel so your stomach stays quiet.
  • Passionflower or Valerian?
    If you know and tolerate them, a light cup can help. But start low, go slow, and skip in pregnancy or with sedatives unless your clinician agrees. Many of us sleep well with chamomile, lemon balm, and lavender alone. In other words, begin gentle.

Night habits that make sleep stick: Dim lights an hour before bed. Set your phone aside. Keep the bedroom cool, dark, and quiet. If thoughts race, write a “tomorrow list,” close the notebook, and breathe out slow. Try this four-square breath: inhale 4 counts, hold 4, exhale 4, hold 4—five rounds. If snoring, gasping, or morning headaches are common, ask about sleep apnea. Good sleep is health, not a luxury.


Simple “mix and match” plans you can copy today

  • Itchy Evening Reset (15 minutes): Cool Oat Soak → pat dry → thin layer Aloe Gel → soft cotton shirt.
  • Calm Belly Afternoon (10 minutes): Fennel Seed Tea → 10-minute walk → sit tall, loose waist.
  • Sleep-Ready Hour (30–45 minutes): Warm Lavender Foot Soak → Goodnight Garden Tea → lights dim → lavender sachet squeeze → bed on time.

Grow, Store, and Stay Safe

Your remedies last longer when you grow smart, harvest right, and store well. Let’s keep this easy and practical.

What to grow (small list, big payoff)

  • Aloe vera (bright, indirect light).
    Loves a sunny window or warm porch. Water deeply, then let soil dry. Harvest outer leaves when thick and heavy. Store cut gel in the fridge up to 3 days.
  • Calendula (full sun).
    Blooms from spring to frost. Pick flowers as they open. Dry on a screen in shade. Great for compresses and salves.
  • Chamomile (sun to part sun).
    Harvest blooms at peak. Dry gently. A little goes a long way for tea.
  • Lemon balm (part sun, in a pot).
    It spreads. Keep it contained. Pinch tips often for fresh growth. Use fresh or dry fast for jars.
  • Lavender (full sun, sharp drainage).
    Prune lightly after bloom. Dry flower spikes in bundles. Use for sachets, baths, and light room scent.
  • Fennel (full sun, well-drained soil).
    For seeds, let umbels brown on the plant. Clip into a paper bag to finish drying, then store.
  • Basil (full sun, warm).
    Pinch blooms to keep leaves tender. Perfect for evening digestif sips.
  • Plantain (common yard herb).
    Grows almost anywhere. Harvest clean leaves away from streets. Rinse well.
  • Ginger (bright shade).
    Start a knobby piece with eyes in a wide pot. Keep evenly moist. Harvest a knob and replant the rest.

How to dry and store herbs

  • Pick on a dry late morning after dew lifts.
  • Rinse fast, shake dry, and pat with a towel.
  • Dry in a warm, shaded, airy place (not in harsh sun).
  • When crisp, jar them in glass. Label with plant and date.
  • Store cool and dark. Most herbs keep 9–12 months when dried well.

Infused oils and simple salves (skin helpers you’ll love)

  • Calendula or Plantain Infused Oil:
    Fill a clean jar halfway with thoroughly dried petals or leaves. Cover with olive oil by an inch. Stir to release bubbles. Cap and infuse 2–4 weeks in a warm, shaded spot, shaking every few days. Strain. Label.
    Use: Thin layer on clean, intact skin. Avoid eyes and open wounds.
  • Basic Salve (stays where you put it):
    Warm 1/4 cup infused oil with 1 tablespoon beeswax in a water bath until melted. Stir and pour into a small tin. Cool and label.
    Shelf life: About 1 year if kept cool and clean.

Kitchen staging that makes remedies happen

  • A “comfort shelf” with jars of dried chamomile, lemon balm, lavender, and fennel.
  • Ginger in the freezer (grates easily while frozen).
  • A sticky note on the kettle: “Warm first.”
  • A dedicated gargle mug and a small jar of sea salt.
  • A clean washcloth stack in the bathroom for compresses.

Safety we keep top of mind

  • Allergies: If you react to daisies, skip chamomile and calendula.
  • Honey: Not for children under one year.
  • Essential oils: Strong. Do not take by mouth. Do not use undiluted on skin. Keep away from pets, especially cats. Vent rooms and stop if you feel irritated.
  • Licorice root: Avoid with high blood pressure, kidney or heart disease, pregnancy, or with certain medicines.
  • Skin care: Do not put herbs on deep or infected wounds. If redness spreads, warmth increases, or pain worsens, seek care.
  • Stomach care: Severe or lasting symptoms need evaluation. Home care supports healing; it does not replace medical guidance.
  • Sleep care: If insomnia is tied to snoring, choking, or gasping, get checked for sleep apnea. Herbs help, but oxygen wins first.

Troubleshooting (fast fixes)

  • Tea tastes “too strong.” Use fewer herbs, cooler water, or shorter steep times.
  • Skin got red after a compress. You may be sensitive or the tea was too strong. Rinse, rest, and dilute next time.
  • Peppermint worsened heartburn. Switch to lemon balm or chamomile.
  • Bath made skin tight. Shorten the soak and moisturize after with a plain, fragrance-free lotion or a thin layer of infused oil.
  • Still itchy after a week. Reassess. Could it be detergent, wool, new skincare, or a plant exposure? Remove the source and see a clinician if needed.

Tiny trackers that teach you what works

  • Itch log: “What touched my skin?” “What I tried.” “What helped.”
  • Belly log: “What I ate.” “How I sat.” “Which cup helped.”
  • Sleep log: “Lights-out time.” “Screen-off time.” “Tea used.” “Wakeups.”
    After more than a few days, patterns appear. You gain clarity, and your plan gets easier.

Five-minute weekly reset

  • Refill tea jars.
  • Check your salve tin.
  • Pick and dry a small batch of thyme, lemon balm, or lavender.
  • Wipe the kettle.
  • Put a fresh sachet by the pillow.

Small tasks keep the whole system smooth. Instead of big chores, you keep a gentle rhythm.

A quick “garden-to-care” toolkit

  • Kitchen scale or measuring spoons
  • Kettle and two strainers (fine mesh + cloth)
  • Two pint jars with lids
  • Clean tins for salve
  • Label tape and a marker
  • Soft washcloths and a small basin
  • A notebook and a calm pen

When tools are close, care happens fast. That is how you turn good ideas into daily comfort.

Quiet Skin, Calm Stomach, Rested Nights

This is the heart of garden care. We use simple plants and steady habits. We brew, soak, sip, and rest. We choose kind methods first. We listen to our bodies and adjust. In other words, we let nature help us in small, honest ways—right where we live.

Itch meets oats, aloe, plantain, and calendula—and steps back. Indigestion meets ginger, fennel, basil, and chamomile—and settles down. Sleepless nights meet lavender, lemon balm, and soft, evening light—and soften into rest. After more than a few days, you’ll know which cup or compress is your best match. You’ll keep those herbs close. You’ll feel the difference in your skin, your stomach, and your sleep.

So let’s begin tonight. Warm the kettle. Pick a sprig. Stir in a spoon of honey. Press a cool cloth where it bothers you. Dim the lights. Then breathe. These are small moves, but they add up. Your garden—and your kitchen—are ready to help, one gentle ritual at a time.

Posted on

Compost Tea Bags – Best Organic Fertilizer For Hydroponic Nutrients and Container Gardening

You cannot use the same fertilizer for growing crops in soil to grow hydroponic gardens. The reason is because soil will interact with the fertilizer in a much different way than water without soil. Therefore, a different fertilizer must be employed for hydroponic nutrients.

Then there are the arguments that chicken manure makes the best fertilizer. I have even heard people telling you to mix it with cow manure and add it directly to your gardens. That is a definite mistake because fresh manure of any kind will be too “hot” and burn up your plants. Chicken and cow droppings must be aged and composted to yield the beneficial microbes in safe amounts. This is now as simple as using a compost tea bag.

Compost tea is a nutritionally rich “extract” of microbes, enzymes and bio-active plant compounds made from compost. It is a true organic fertilizer.

I have discovered the best compost tea bags that are created by a certain family farm in Stony Point, North Carolina.

At first glance, I did not see anything special about their compost tea until I tried it on my own garden. The results were nothing short of amazing. I grow everything in 10′ flower pots. The plants are greener. The peppers, tomatoes and cucumbers are beautiful.

I went personally to the Smith Farm to inquire about the formula for creating compost tea bags. You see, they have a “secret recipe” in creating the whole process to make compost teabags.

Shhhh! They use dairy milk cow manure.

“There is virtually no smell because it is made from Dairy cows’ manure which is the creme de la creme of gourmet cow pies!”

At Smith Farm they pointed out that plant roots have little hairs and if these ever dry out, the plants will die. Compost tea bags will add enough hydroponic nutrients to the irrigation solution to satisfy your plants. It is truly a beneficial organic fertilizer whether you grow in hydroponic systems or in container gardening.

Posted on

The Importance of Garden Edging

Gardens add beauty to any home. It does not matter if a garden is large or just a pocket garden around the corner, it still provides an aesthetic advantage. A garden adds color to surroundings and brings in fresh air to your home as well. However, if you have a medium to large sized garden and you have varieties of bushes and flowering plants on it, then it is important to add something that will make your yard more functional as well as attractive. This is where garden edging comes into the picture.

Garden edging is simply a border that frames your plant beds. The initial use of garden bed edging is to separate your plants from the grass lawn. By doing this, your garden will have a well defined look that is definitely more attractive. Adding a border also eliminates the need of frequent grass plucking from the plant beds. It also keeps mulch in its place and provides a mowing path that makes mowing easier; no more accidental clipping of your flowering plants. The edging will guide your mower and prevent it from cutting your plants by mistake.

Garden borders and edging can make garden maintenance easier. Most homeowners do not like the idea of tending their gardens regularly and doing things such as weeding and mulching. Another common but dreaded gardening task is keeping the grass in shape.

Garden edgings, as a matter of fact, reduce the need of frequent weeding. They also keep mulch in the plant bed, thus eliminating the need of mulching repeatedly. If you have garden edgings in your yard, you will have a more defined pathway so your visitors would not have to guess where to walk.

One of the most common struggles homeowners encounter when tending a garden is the grass that keeps growing out of place. This can be very frustrating, especially to those who have no much time to care for their lawns in regular intervals. When grasses, and sometimes even plants, go out of way, this result in unattractive lawn. However, with the properly placed edgings, this problem will surely be eliminated.

Since landscape edgings aid in defining and separating particular garden areas, you will be able to take care of your garden with ease. Edgings mark the areas where the plants and grasses are not supposed to meet; therefore you will be able to determine if they are going astray.

There are different designs of edgings for gardens. Most designs or layouts match the edges of traditional lawn mowers. This makes it easier for you to control your mower while trimming around the edges.

Although some disagree that edgings are vital to the plants’ health, most people swear that border installation plays a great role in their plants’ life. This is because borders keep out weeds, which can bring in diseases. Therefore, by properly placing garden borders, you won’t need to spray herbicide much often.

Apart from the benefits, it is obvious that garden edging also brings artistic value to your lawn. This reason alone might be enough to help you understand why it is important to install borders in your garden.

Posted on

Choosing the Right Outdoor Plant Container

From teacups to oil drums, there is nothing you can’t use as an outdoor plant container. Your choice of plants, your decorative style, your budget, and your creative imagination will all influence your plant container choices. However, there are several things to consider before you start adding plants to your outdoor pots.

Very small containers will dry out quickly, and they offer limited growing room, so that teacup is probably not a wise choice. Very slow growing plants, such as sedum or cactus, will grow well in a restricted environment. However, keep water needs in mind. Some succulents do need a fair amount of moisture.

Be certain that any container you choose has good drainage. With the exception of pond plants, decorative plants do not like to have their feet constantly wet. If you are concerned that your potting soil will be drained out along with excess water, cover the holes with a single layer of newspaper or a coffee filter before adding your planting soil.

Clay or Terra Cotta Planters

Available in just about any size and shape, clay plant containers are traditional garden standbys. Their look is especially attractive in warm and sunny southern or Mediterranean garden designs.

Un-glazed clay pots are porous, which means that water in the soil will evaporate through the sides of the container. They will have to be watered more frequently than less porous containers. Painted or glazed clay pots will retain more moisture through a hot day.

These pots are heavy for their size. If you are planting a large pot, moving it will be difficult. If you anticipate having to move a large terra cotta pot, place it on a decorative wheeled dolly before filling it with your planting mixture. This way you will be able to move it even when the soil within is moist and heavy.

If you line these containers with plastic before planting you can reduce water loss through the sides. The easiest thing to use is a plastic bag large enough to touch the sides of the pot all around. Remember to punch drainage holes in the bottom. When you add your planting mix, hide the sides of the bag by pushing them down into the mix before you plant.

Because all clay pots are porous, they do not do well outside during cold winters. Moisture in the pot will expand if it freezes, often cracking the pot. Cement and other stone containers will also often crack in freezing temperatures for the same reason. Consider whether you will be able to bring your pots into warmer shelter during the winter. If this will not be possible, and you want to keep your plantings, choose another kind of container.

Wooden Plant Containers

Whiskey barrels and other wooden patio containers are popular. Because wood will eventually deteriorate when exposed to water and sunlight, lining wooden plant containers with heavy plastic will extend their life and reduce water stains on the outside.

Cedar, redwood and teak are naturally resistant to water decay. Containers made of treated wood or lumber will usually last quite a bit longer than untreated wood. However, some chemicals used to treat wood are not suitable for edible plants, and may pose a health risk. Always check the materials used to treat any wooden planter for safety.

Metal Pots, Tubs and Wagons

So long as there is drainage at the bottom you can use any metal container to hold garden plants. Be aware that any large metal container will be heavy, so place it where you want it to remain unless it has wheels.

Plastic and Resin Containers

Plastic plant containers are the most lightweight and often the most inexpensive containers for the garden. Of course, this is why your plant nursery uses plain plastic pots.

You can find resin containers that mimic the look of cement or glazed pottery. These pots are handy if you don’t want to worry about freezing and cracking or excess weight. Most are quite handsome, as well.

Plastic and resin pots are not porous, so they will not lose moisture as quickly as un-glazed pottery. Because they don’t lose moisture, it is especially important to be sure that they have sufficient drainage at the bottom so that plant roots do not become waterlogged. Many resin containers have holes that must be opened by the end user. Be sure that you do this before you begin planting.

Thin plastic pots will have a short lifespan, as they will eventually crack in the sun. However, because they are inexpensive, they will be less costly to replace every few years.

Color Makes a Difference

Dark plant containers will absorb summer heat. If the roots of your plants get too hot they will be damaged or even killed. In hot climates choose lighter colored containers to reduce heat buildup.

Avoid Outdoor Pot Saucers

Many planting containers come with saucers to hold water outflow. Avoid saucers under your outdoor plants as these are great places for mosquitoes to lay their eggs. Your plants may wick up a little extra water between watering, although this is not always the case. However, your yard and patio will be overrun with mosquitoes.

Whatever container you choose as a planter, the three main things to remember are: 1) choose the correct size for your plants. A too-small container will not have growing room, and a too-large container will overwhelm and dwarf your plants; 2) make sure your container drains well; 3) monitor soil moisture regularly and maintain the kind of moisture that your plants require. Don’t plant a cactus and a rose in the same container – their water needs are vastly different.

Posted on

Using Neem Insecticide – Seven Things You Must Know Before You Spray Neem

The neem tree (Azadirachta indica) is an incredibly versatile plant with many uses. In India it is known as “the village pharmacy”–over 75% of Ayurvedic remedies contain some form of neem!–and lately the tree has also been called “the world’s most researched tree.” But even though neem has been used traditionally for several thousand years it is still relatively unknown in the western world.

Apart from the seemingly all powerful neem oil–pressed or extracted from the seeds–there are a whole range of other neem products: neem capsules, neem soap, neem tea, neem bark powder… Most people have heard about neem oil only and they don’t know much about it. For neem to live up to its reputation you need to use the right neem product the right way, at the right time for the right purpose!

In this article I will look at the most common use of the oil: as an insect spray in the garden.

Neem oil is an absolutely wonderful alternative to chemical insecticides because it is totally non toxic to humans. If used correctly it works wonders and it only affects the bad bugs while leaving the good bugs unharmed.

The keywords in the above sentence are “if used correctly.” Here are seven things you should understand about neem oil before you use it in the garden.

  1. Neem oil is NOT an instant knock down insecticide. Neem does not kill insects or grubs instantly! It acts as a feeding repellent and it also interrupts their breeding cycle. Neem is similar to insect hormones. When insects take up the neem ingredients they “forget” to eat, to mate, or they stop laying eggs. Some forget that they can fly. If eggs are produced they don’t hatch, or the larvae don’t moult. Don’t conclude neem doesn’t work just because it doesn’t kill everything instantly. Neem oil needs to be used regularly. Spray it once a week to once a fortnight and it WILL protect your garden from sucking and chewing bugs.
  2. Neem CAN kill honey bees. Neem is not toxic to honey bees or other beneficial insects but it can certainly kill them! Any oil you spray can coat insects and suffocate them. In that respect neem oil makes no difference between good and bad bugs: coat them with oil and they suffocate. To protect beneficial insects, only spray neem in the very early morning or late afternoon, when insects are least active. Once the oil has dried it only harms the bad bugs.
  3. Neem CAN harm your plants. If a little bit helps, then more will help better. Right? Wrong! Any oil spray can burn plants. If you spray during the day it burns better. Again, use neem spray early in the morning or late in the afternoon, so it can dry before the sun hits it. Some plants are so sensitive, they don’t need the sun to suffer. Having their delicate leaves coated with too much oil is bad enough. Stick to the instructions! Use the lowest concentration and do a little test application first. Neem oil is strong stuff. A little goes a long way.
  4. Neem CAN harm aquatic organisms. This aspect is rarely mentioned. Research studies showed that neem ingredients can hurt many aquatic organisms, including fish and tadpoles. Luckily it takes more than just traces to do damage. Spraying near ponds is generally safe, but do not spray neem directly into the water.
  5. Neem oil is NOT registered as an insecticide. In most countries neem oil is not registered as an insecticide or insect repellent. So the sellers are not allowed to call it that or to mention that it kills or deters insects. If you try to buy neem at the local hardware store, don’t look in the aisle with the poisons. Rather look for leaf polish… Seriously, that’s what one manufacturer sells it as. The easiest way to find it? Ask for it. But beware…
  6. All neem oils are NOT made equal. Many people hear about neem oil, go to the hardware store or garden center and buy some “neem plant spray” or “neem based insecticide” or other ready to use mixture of who knows what. Some of those bottles contain nasty chemicals with a bit of token neem. Few contain raw neem oil–the most potent neem oil–but rather a clarified hydrophobic extract. Those extracts are not as powerful as the raw or crude neem oil. The best neem oil to buy is raw, cold pressed, organic oil with a high Azadirachtin content. Azadirachtin is the main insecticidal ingredient and most sellers of good neem oil advertise the high Azadirachtin content. By the way, you are unlikely to find the raw oil at your local hardware store. Try health food stores instead!
  7. Neem oil STINKS! The descriptions of the smell vary. Rancid peanut butter, rancid garlic, rancid burnt onions… do you detect a theme here? How about garlicky peanut butter with some rotten eggs thrown in?

I’d say, just get some and come up with your own description. And get used to it. Because the stuff really works!

Posted on

Home Remedies from the Garden for Sore Throat That Are Easy and Effective

Home Remedies from the Garden for Sore Throat That Are Easy and Effective

A sore throat can sneak up on any of us. It starts with a scratch. Then the burn grows when we swallow or talk. The good news is simple and close. Relief lives in your kitchen and your garden. Warm cups. Gentle gargles. Soothing steams. In other words, we can calm that ache with everyday plants and pantry staples—and we can do it today.

This guide shows you how. We’ll keep the steps clear. We’ll offer options for daytime and bedtime. We’ll add smart safety notes, because feeling better should also be safe. But most of all, we’ll make it doable. You don’t need fancy gear. You need warm water, fresh herbs, and a few steady habits. Let’s get you there, one easy remedy at a time.

This article is educational and not medical care. If you have high fever, trouble breathing, drooling, severe pain on one side, a rash, stiff neck, blood in saliva, or symptoms that last more than a few days, please seek medical help. Children under one year must not have honey. If you are pregnant, nursing, caring for a child, or take daily medicines, check with your clinician before new herbs.

Why Your Throat Hurts—and How Plants Help

Let’s keep the science simple. Your throat gets sore when the lining is irritated or inflamed. Cold, dry air can do it. A virus is a common cause. Post-nasal drip can drip and sting. Talking all day strains the tissues. Spicy food or acid reflux can add burn. In other words, many small things can turn a normal day into a scratchy one.

What helps most? Moisture, warmth, rest, and gentle coatings. That is where garden plants shine. Some herbs bring soothing gels, called mucilage. They feel silky and form a soft layer. Some herbs relax tight muscles and calm the urge to cough. Others bring fragrance that opens the nose and helps you breathe easier, which takes pressure off the throat.

The plan is simple:

  • Add moisture with warm drinks and humid air.
  • Coat the tissues with soothing sips and syrups.
  • Reduce burn with saltwater gargles.
  • Rest the voice and soften the air you breathe.
  • Keep safety in mind while you heal.

We’ll start with what you can make right now. Then we’ll add small habits that protect you all day. Finally, we’ll plant a few “throat heroes” so you have a living remedy shelf just outside the door.

Garden-to-Mug Remedies You Can Make Today

Use what you have. Pick one remedy. Try it. If it helps, keep it. If not, switch to another. Our bodies are different, and that’s okay. The recipes below are gentle, fast, and easy to repeat.

1) Warm Saltwater Gargle (classic, fast, effective)

Why it works: Saltwater draws extra fluid from swollen tissues and helps clear thick mucus. It also freshens the mouth.

You’ll need:

  • 1 cup warm water
  • 1/2 teaspoon fine salt
  • Optional: 1/4 teaspoon baking soda (softer feel)

Steps:

  1. Stir salt (and baking soda if using) into warm water until clear.
  2. Gargle 20–30 seconds. Spit.
  3. Repeat 2–3 times. Do this 3–4 times a day.

Safety: Do not swallow. If you must limit sodium, skip the baking soda and keep the salt light.

2) Honey-Ginger Soothe Cup (coats, warms, and calms)

Why it works: Honey coats the throat. Ginger adds gentle warmth and supports smooth flow.

You’ll need:

  • 1 cup water
  • 4–6 thin slices fresh ginger
  • 1–2 teaspoons honey
  • Optional: a squeeze of lemon if citrus does not bother you

Steps:

  1. Simmer ginger in water for 8–10 minutes.
  2. Cover and rest 5 minutes. Strain.
  3. Stir in honey. Sip warm.

Notes: Children under one must not have honey. If reflux bothers you, use less lemon or skip it.

3) Thyme & Sage Gargle (garden antiseptic, gentle on tissues)

Why it works: Thyme and sage carry aromatic oils that freshen and support a clean mouthfeel. Warm tea eases stiffness.

You’ll need:

  • 1 teaspoon dried thyme
  • 1 teaspoon dried sage (or 2 teaspoons fresh of each)
  • 1 cup just-boiled water

Steps:

  1. Steep herbs 10 minutes, covered.
  2. Strain. Let it cool to warm.
  3. Gargle 20–30 seconds and spit. Repeat.

Use: 2–3 times daily between meals. You can sip a little if the flavor sits well.
Notes: Culinary amounts are gentle. If pregnant or nursing, keep sage to light culinary levels and ask your clinician before daily use.

4) Chamomile-Lemon Balm Comfort Tea (calms mind and throat)

Why it works: Chamomile is soft and soothing. Lemon balm brings a bright calm without mint’s “cool burn.” Together they help you rest.

You’ll need:

  • 1 teaspoon dried chamomile flowers
  • 1 teaspoon dried lemon balm (or 2 teaspoons fresh)
  • 1 cup hot water
  • Honey to taste

Steps:

  1. Steep 7–10 minutes with a cover.
  2. Strain and sip warm with honey.

Notes: Skip chamomile if you have ragweed allergy. If you take thyroid medicine, separate lemon balm tea from your pill by several hours.

5) Marshmallow Leaf or Root Cold Infusion (silky throat coat)

Why it works: Marshmallow (Althaea officinalis) makes a slippery gel that coats tissues. It feels like a soft scarf for your throat.

You’ll need:

  • 1–2 tablespoons chopped dried marshmallow leaf or root
  • 1 cup cool water
  • Honey or warm water to blend later

Steps:

  1. Soak the herb in cool water for 2–4 hours.
  2. Strain. Warm gently or mix half-and-half with warm water.
  3. Add a little honey if you like. Sip slowly.

Notes: This one is gentle and great for daytime. If you manage blood sugar with medicines, ask your clinician before daily root use.

6) Licorice Root Tea (soothing with a touch of sweet)

Why it works: Licorice root can calm a dry, scratchy throat.

You’ll need:

  • 1 teaspoon dried licorice root
  • 1 cup hot water

Steps:

  1. Simmer 5 minutes.
  2. Steep 5 minutes more. Strain and sip.

Important: Skip licorice if you are pregnant, have high blood pressure, kidney or heart disease, or take certain meds. If unsure, choose chamomile or marshmallow instead.

7) Turmeric Salt Gargle (warm color, simple relief)

Why it works: Salt eases swelling. Turmeric adds a gentle earthy note many of us find comforting.

You’ll need:

  • 1 cup warm water
  • 1/2 teaspoon fine salt
  • 1/4 teaspoon ground turmeric

Steps:

  1. Stir until smooth.
  2. Gargle, then spit. Rinse your mouth with plain water after so your teeth don’t stain.

8) Steam Tent with Thyme or Oregano (open the nose, moisten the throat)

Why it works: Warm steam adds moisture. Aromatic leaves lift the breath and help you clear mucus. When the nose opens, the throat gets a break.

You’ll need:

  • A heat-safe bowl
  • 2 teaspoons dried thyme or a small handful fresh oregano
  • Hot water

Steps:

  1. Place herbs in the bowl.
  2. Pour hot water over them.
  3. Drape a towel over your head and the bowl.
  4. Breathe gently for 5–10 minutes. Keep eyes closed. Take breaks if you feel too warm.

Safety: Keep hot water away from kids and pets. Do not use essential oils in the bowl; they can be too strong for a close tent.

9) Ginger-Garlic Garden Broth (comfort you can sip)

Why it works: Warm broth hydrates and soothes. Ginger and garlic bring aroma and a cozy feel. It’s easy on a tender throat.

You’ll need:

  • 3 cups water
  • 1-inch fresh ginger, sliced
  • 2 garlic cloves, sliced
  • A pinch of salt
  • Optional: a sprig of thyme or parsley

Steps:

  1. Simmer all for 15 minutes.
  2. Strain and sip warm.
  3. Add honey at the cup if you like sweet-savory comfort.

10) Lemon-Free “Citrus Feel” Tea (for reflux-prone folks)

If citrus stings, try this bright cup without acid.

You’ll need:

  • Lemon balm leaves
  • A thin strip of lemon zest only (no juicy pulp)
  • 1 cup hot water

Steps:

  1. Steep the zest with lemon balm 5–7 minutes.
  2. Strain and sip. You get the scent of lemon with far less acid.

11) Garden Oxymel (herbal vinegar + honey, well-diluted)

Why it works: Honey coats. Vinegar, when well diluted, adds a bright tang that some people enjoy. Use only if vinegar does not bother you.

You’ll need:

  • 1 tablespoon herb-infused apple cider vinegar (thyme or sage works well)
  • 1 tablespoon honey
  • 1 cup warm water

Steps:

  1. Stir honey and vinegar into warm water.
  2. Sip slowly.
    Notes: If you have reflux or sensitive enamel, skip vinegar and choose a honey tea instead.

12) Nighttime “Sleep & Soothe” Cup

You’ll need:

  • 1 teaspoon chamomile
  • 1 teaspoon marshmallow leaf
  • 1 cup hot water
  • Honey to taste

Steps:

  1. Steep 10 minutes, covered.
  2. Sip in bed.
    This blend relaxes and coats. In other words, it sets the stage for true rest.

13) Frozen Honey-Herb Spoons (for daytime scratch)

Why it works: Cold numbs, honey coats, and a tiny bit of herb adds lift.

You’ll need:

  • 1/2 cup honey
  • 1–2 tablespoons very strong cooled thyme tea

Steps:

  1. Whisk together.
  2. Spoon small puddles onto parchment. Freeze.
  3. Pop one and let it melt slowly in your mouth when you need it.
    Notes: Not for kids under one. Keep portions small.

14) Simple Chia Gel (plant-based throat coat)

Why it works: Chia seeds form a soothing gel that’s easy on the throat.

You’ll need:

  • 1 teaspoon chia seeds
  • 1/2 cup warm water

Steps:

  1. Stir and rest 10–15 minutes.
  2. Add a teaspoon of honey if you like. Sip slowly.

Tip: Flaxseed works similarly. Steep 1 tablespoon whole flaxseed in 1 cup hot water 15 minutes; strain the gel and sip.

15) Peppermint Room Steam (not a tent)

If peppermint helps you feel open, use it in the room air, not as a mouth rinse.

Steps:

  • Hang a handful of fresh peppermint in the shower and run hot water to steam the room.
  • Breathe gently.
    Note: A close peppermint tent or strong mint tea can bother reflux for some people. Use room steam instead of direct gargles if you are sensitive.

How often should you treat?

  • Gargles: 3–4 times a day.
  • Teas: 2–4 cups a day as you like.
  • Steam: 1–2 times a day.
  • Coating sips (marshmallow, chia): small amounts, often.
    Start gentle. See how you feel. Adjust the plan tomorrow based on what helped today.

Calm Habits, Quick Tools, and What to Grow Next

Remedies work best when your day supports them. A few tiny habits can cut pain fast and keep it from coming back.

Daily Habits That Help

  • Drink warmly, often. Small, warm sips all day keep tissues moist. Ice water can feel sharp; warm water feels kind.
  • Rest your voice. Whispering strains the voice more than soft speech. Use short sentences and pause. Text if you can.
  • Humidify the air. A cool-mist humidifier at 40–50% humidity helps, especially at night. No machine? Place a bowl of water near a heat vent, or run a kettle on low for short periods while you’re nearby.
  • Nasal care for post-nasal drip. Saline spray or a gentle rinse can cut the drip that stings your throat. Less drip, less burn.
  • Soft foods. Warm broth, oatmeal, mashed potatoes, yogurt (if it suits you), ripe bananas, applesauce, and soft eggs. Skip sharp chips and hot chilies for now.
  • Avoid smoke and harsh sprays. Your throat needs a break.
  • Sleep smart. Raise the head of the bed a few inches if night cough or reflux bothers you. Left-side sleep can help.
  • Hand hygiene. Wash often. Don’t share cups or spoons. Simple steps protect the people you love.

A Tiny “Throat Kit” You Can Build This Week

Keep these together on one kitchen shelf:

  • Jar of local honey with a clean spoon.
  • Dried thyme, dried sage, chamomile, lemon balm.
  • A small bag of marshmallow leaf or root.
  • Fresh ginger in the freezer (grates easily while frozen).
  • Sea salt and a dedicated gargle mug.
  • A soft scarf for outdoor air.
  • A simple notebook and pen.

Why the notebook? Because your notes will guide you. Write the date, what you felt, and what helped. After more than a few days, patterns appear. You’ll see which cup works best in the morning, and which gargle works best at night. That is real power.

Grow Your Own “Throat Garden”

You don’t need a field. A few pots by the back step can carry you through the year.

  • Thyme (sun-lover): Compact, tough, and aromatic. Grow in a pot with gritty soil. Trim often. Use fresh or dry it for winter gargles and teas.
  • Sage (sun-lover): Woody, silver leaves with big flavor. Great for gargles and savory meals. Keep it in full sun and well-drained soil.
  • Chamomile (sun to part sun): Dainty blooms with apple scent. Harvest flowers at peak and dry on a screen. A little goes a long way.
  • Lemon Balm (part sun): Bright, lemony leaves. It can spread, so give it a pot. Pinch tips for bushy growth.
  • Peppermint (part sun): Keep it in its own pot; it roams. Best for room steam and light evening cups if mint suits you.
  • Marshmallow (sun, moist soil): Tall, soft leaves and roots rich in soothing gel. Grow near a downspout or in a deep pot you water well.
  • Ginger (bright shade): Start from a fresh rhizome in a wide pot. Keep evenly moist. Harvest a piece and replant the rest.
  • Calendula (sun): Cheery orange flowers. Petals make a mild, comforting tea and a lovely gargle tint.

Harvest tips:

  • Pick in late morning after dew dries.
  • Rinse quickly, pat dry, and use fresh—or dry herbs in a warm, shaded, airy spot.
  • Store dried herbs in glass jars away from light and heat. Label with the date.

Simple Meal Ideas That Don’t Sting

  • Golden Oats: Oatmeal cooked with water and a pinch of turmeric; finish with honey.
  • Soft Soup Bowl: Broth with soft noodles, sliced ginger, and a handful of chopped parsley.
  • Banana-Chamomile Smoothie: Brew chamomile, cool it, blend with a ripe banana and a spoon of oats.
  • Baked Apple: Core an apple, add honey and cinnamon, bake until soft.
  • Creamy Potato Mash: Boil potatoes, mash with warm broth and a splash of olive oil; top with chopped thyme.

These meals are gentle. They fuel you without scraping already sore tissues. In other words, they feed healing.

Safety You Can Trust

  • Honey: Not for children under one year.
  • Essential oils: Skip internal use. Do not drip them into steams for close face tents. Diffuse lightly in the room only, and stop if you feel irritated.
  • Licorice root: Avoid with high blood pressure, pregnancy, kidney or heart disease, or certain meds.
  • Allergies: If you react to daisies, skip chamomile. If you feel worse after any herb, stop and switch.
  • Fever and pain: If symptoms are severe or last, get checked. A home remedy supports healing; it does not replace care.

A One-Day Plan You Can Copy

Morning

  • Warm Saltwater Gargle.
  • Honey-Ginger Soothe Cup with breakfast.
  • Soft scarf for outdoor air.

Midday

  • Chamomile-Lemon Balm Comfort Tea.
  • Rest voice during lunch. Breathe slowly.

Afternoon

  • Steam Tent with Thyme (5 minutes).
  • Marshmallow Cold Infusion sips while you work.

Evening

  • Turmeric Salt Gargle before dinner.
  • Ginger-Garlic Garden Broth and a soft side.

Bedtime

  • Nighttime “Sleep & Soothe” Cup.
  • Humidifier on. Head slightly raised. Left-side sleep.

That’s it. Simple, steady, and kind. You can adjust any step to fit your day.

Troubleshooting (Fast Fixes)

  • Tea tastes too strong. Use less herb or shorten the steep.
  • Mouth feels dry after astringent herbs. Add honey or switch to marshmallow or chia.
  • Cough wakes you at night. Try a spoon of honey right before bed and raise the head of the bed.
  • Gargles hurt. Let the mix cool more, or switch to a milder tea gargle.
  • Peppermint makes it worse. Skip mint and use lemon balm or chamomile instead.
  • Nothing helps and pain is severe. Time to see a clinician. Quick care is wise care.

Tiny Wins That Add Up

  • Carry a water bottle with a sprig of lemon balm.
  • Keep a honey stick in your bag.
  • Put a note on the kettle: “Warm first.”
  • Set a timer to rest your voice every hour.
  • Open a window or run a fan for fresh air flow.
  • Step into the sun for five minutes. Warmth helps mood and ease.

These are small. But most of all, they are repeatable. That is why they work.

Quiet Throats, Gentle Days Ahead

A sore throat can feel loud and bossy. It tries to set the tone for your day. But you have steady tools. Warm cups. Soft gels. Clean, simple gargles. A breath of steam. A little rest for your voice. In other words, you bring the volume down with comfort and care.

After more than a few calm days, you’ll know your best mix. Maybe it’s honey-ginger in the morning, marshmallow sips at noon, and chamomile at night. Maybe it’s thyme gargles and a steam. Your notes will tell you. Your garden will supply you. And your kitchen will always be ready.

So let’s begin today. Warm the water. Pick a sprig. Stir in a spoon of honey. Sit for a moment and sip. That quiet, gentle rhythm is how healing often happens—one easy cup at a time.

Posted on

Ultimate Guide of Natural Remedies to Rid Yourself of Heartburn

Acid Reflux Garden Remedy

Heartburn is a common, but extremely uncomfortable, affliction that millions of people suffer from. If you often feel an uncomfortable burning sensation after you eat, or if you feel queasy and discomfort in your stomach after a meal, you may be suffering from heartburn or acid reflux. Finding natural ways to get rid of heartburn is important if you want to avoid these unpleasant sensations.

Fortunately, there are some effective remedies that you can use at home to minimize the effects of heartburn. By keeping these ideas in mind, you can make sure that you are able to eat your meals without feeling uncomfortable.

When dealing with heartburn, there are two basic forms of treatment. First of all, you can take steps to prevent an attack from happening in the first place. Second, you can use remedies to deal with an attack that has already begun. Arming yourself with the knowledge of each type of treatment is important so that you are ready to deal with whatever happens.

To prevent heartburn from occurring at all, you need to make sure that you identify the foods that most commonly trigger an attack. These foods can differ from person to person, but certain foods are more likely to cause problems than others. Acidic foods, such as tomatoes or orange juice, can often cause heartburn, as can chocolate, mint, and coffee. It all depends on your body, so keep in mind that some foods don’t affect others, where as it does affect you, and vice-versa.

When you eat your meals, be sure to sit upright afterwards. Lying down too soon after a meal can let the acid come back up out of your stomach and cause an attack. Chew your meals slowly and try not to eat too much at one sitting. Overeating is a common cause of acid reflux.

Once an attack has begun, however, you will need some fast and effective ways to get rid of heartburn. Sometimes, drinking some water can help, since this can wash the stomach acid back out of your esophagus. If this does not work, you can try having a glass of ginger tea.

Ginger has been used as a remedy for various digestive ailments, including heartburn, for thousands of years. Steep some grated ginger root in boiling water for 10 to 15 minutes and then drink it. It will help to relax your esophageal muscles and calm your stomach. They even have ginger chewing gum on the market that targets the problem within minutes of putting it in your mouth.

Other herbs that can be helpful for heartburn include fennel, anise, and chamomile. Making a tea out of any of these can help to soothe your digestive system. While mint can be helpful for intestinal troubles, it can actually exacerbate heartburn, so avoid peppermint tea during an attack.

Baking soda is another common remedy for indigestion and heartburn. The basic nature of baking soda will help to neutralize the acid in your stomach so that it does not produce as many problems. Half a teaspoon of baking soda in a small glass of water can really help.

By finding natural ways to rid yourself of heartburn, you can make sure that you do not suffer too much discomfort after eating. We are confident that these natural procedures will give you the relief that you are looking for.