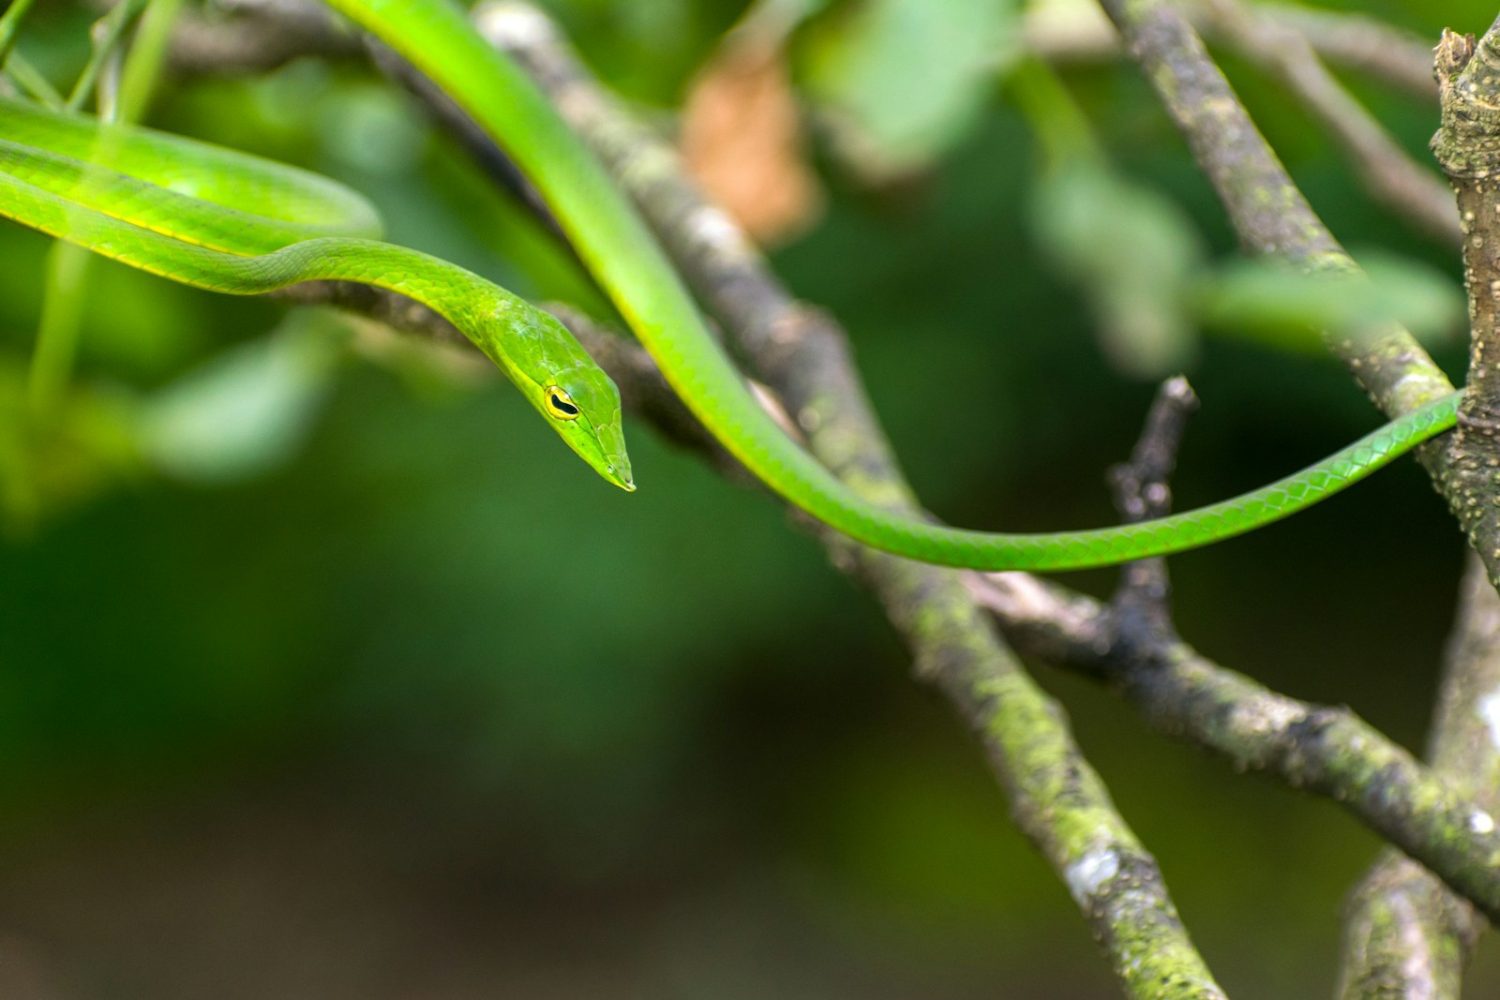
When you see a slender snake slithering through your flower bed or vegetable patch, your first thought might be: “Is it dangerous?” This is a natural worry. After all, many of us grow up hearing about venomous snakes and the risks they pose. But here’s the truth: most garden snakes are harmless. In fact, many of them help more than they harm.
To understand why, let’s explore what garden snakes really are, how they behave, and what role they play in your backyard ecosystem.
Understanding Garden Snakes
When people say “garden snake,” they usually mean garter snake. The name sounds similar, and over time the terms became interchangeable. Garter snakes are among the most common snakes you’ll spot in yards, fields, and gardens across North America.
They are slender, usually two to three feet long, with patterns of stripes or checks running down their bodies. Their colors vary—green, brown, gray, or even black with yellow stripes. They move quickly, but they are not aggressive toward people.
Most important, garter snakes are not poisonous to humans. They do have mild venom in their saliva, which they use to subdue small prey like frogs, worms, and insects. But this venom is so weak that it has no real effect on us. At worst, if one were to bite, you might feel a tiny scratch or mild irritation. For most people, it’s no different than a mosquito bite.
So when you see a garden snake, you can relax. It’s not a threat.
Helpful Role in the Garden
Instead of worrying about garden snakes, it’s better to see them as quiet helpers. They feed on pests that damage plants. Slugs, grasshoppers, crickets, and small rodents are all on their menu. By keeping these populations in check, snakes reduce the pressure on your vegetables and flowers.
Think of them as natural pest control. You don’t need to pay for sprays or traps when a garter snake patrols your beds. They work silently, blending into the mulch, striking only when needed.
Another bonus: their presence means your garden is healthy. Snakes avoid polluted or heavily disturbed areas. If they choose your yard, it often signals balance in your soil, plants, and wildlife.
Separating Fear from Facts
Why, then, do so many of us fear garden snakes? Much of it comes from misunderstanding. We confuse them with venomous species, or we jump at the sudden sight of something moving in the grass. But fear softens when facts take its place.
They are not aggressive. A garter snake would rather flee than fight.
They are not dangerous. Their mild venom only affects small prey.
They are beneficial. By eating pests, they support our gardening efforts.
Of course, it’s wise to show respect. Don’t pick them up, corner them, or handle them roughly. Like any wild creature, they deserve space. But once you understand their role, that quick flash of scales no longer feels like a threat—it feels like a sign your garden is alive and thriving.
Embracing Nature’s Balance
The next time you see a snake in your garden, remember: it’s not out to harm you. It’s there to find a meal, to live quietly, and to play its part in the web of life that surrounds your home.
By welcoming garden snakes instead of fearing them, we invite a healthier, more balanced space. We give up worry and gain an ally. And we discover that sometimes, what looks scary at first is actually a gift in disguise.
A Calmer View of Backyard Visitors
Garden snakes are not poisonous. They are not enemies. They are partners in the quiet work of keeping gardens strong. When we shift our perspective, fear turns to appreciation.
So the next time you glimpse a stripe slipping between the rows, smile. You’ve just spotted one of your garden’s best-kept secrets—a gentle guardian, hidden in plain sight.
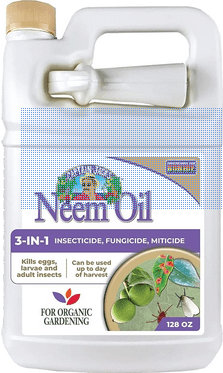
Pest control is the secret battleground of the green-thumbed community. A battleground where effectiveness meets environmental responsibility. Enter Bonide Captain Jack’s Neem Oil, a product that, in my personal experience, epitomizes this balance brilliantly. In a world where the echo of ¢â‚¬Ëœorganic¢â‚¬â„¢ and ¢â‚¬Ëœeco-friendly¢â‚¬â„¢ sometimes drowns out actual impact, this oil stands as a safe and effective pioneer in safeguarding our gardens and homes without compromising on health or environmental ethos.
The first time I used Bonide’s Neem Oil, I was skeptical. My garden was besieged by aphids, and the promise of a natural solution seemed too good to be true. Yet, as I followed the instructions and sprayed the affected flora, the results were astonishing. Within days, the otherwise bustling colony of aphids had vanished, leaving my roses to bloom unharmed. My skepticism was not just quenched; it was replaced with admiration for a product that delivered on its promise, naturally.
What sets neem oil apart is its source¢â‚¬â€direct from the seeds of the Neem tree, an emblem of ecological harmony. This isn’t just any pesticide; it¢â‚¬â„¢s a biodegradable substance documented to have minimal impact on non-target organisms. The safety it assures translates into peace of mind for the user. It doesn¢â‚¬â„¢t form a toxic cloud that lingers in the air, unlike its chemical counterparts, and when I use it, I¢â‚¬â„¢m not just protecting my plants, but my family, too.
Beyond The Garden: A Promise to Behold
Imagine a world where the traces of a pesticide used today don¢â‚¬â„¢t haunt our water systems tomorrow. That¢â‚¬â„¢s what neem oil offers¢â‚¬â€a futuristic approach in the present. It¢â‚¬â„¢s more than just a dream for sustainability enthusiasts; it¢â‚¬â„¢s a momentous stride towards it. I find solace in knowing that each application of Bonide Captain Jack’s Neem Oil upholds the sanctity of our ecosystem. The bees continue to buzz, the earth stays fertile, and my garden thrives organically.
Traditional pesticides have their place, but when held against Bonide¢â‚¬â„¢s Captain Jack’s Neem Oil, they falter in the scales of safety. Synthetic pesticides, while potent, can cast a long shadow of potential harm. In contrast, neem oil is the embodiment of a long-term solution; it strikes the perfect chord between the now and the future of gardening practices. It invites gardeners to take a stand¢â‚¬â€quite literally¢â‚¬â€ against the tide of harmful practices and opt for a more sustainable choice.
Unleash Neem Oil
In a market saturated with options, it¢â‚¬â„¢s easy to get lost in the noise. However, Bonide Captain Jack’s Neem Oil stands out as a beacon of safety, efficacy, and sustainability. My call to action is simple¢â‚¬â€give it a try. In using this product, you don¢â‚¬â„¢t just make a purchase; you become a part of the paradigm shift away from toxic residues and towards a greener, healthier environment. Give your trust to a product that has earnt mine a thousand times over. Your garden, and the world, will surely thank you for it.
Bonide Captain Jack’s Neem Oil isn’t merely a pest control option; it’s a philosophy and a statement. It¢â‚¬â„¢s a pathway to an ecologically brighter future, available for application today. For those mindful of their garden’s health and the planet¢â‚¬â„¢s, it¢â‚¬â„¢s a no-brainer.
Remember, in every drop of Captain Jack’s Neem Oil lies a story¢â‚¬â€an anecdote of greenness, and a testament to our pledge to nurture nature. Try it. And watch how one small choice can lead to a garden, and a world, brimming with life. After all, isn¢â‚¬â„¢t that what gardening is all about?
The Three Sisters are corn, beans, and squash. They grow together. They support each other. They feed us well. This is an old method from many Native nations. It is simple. It is strong. It still works today.
We can learn a lot from it. We learn how plants can be friends. We learn how soil can stay rich. We learn how to work with nature, not against it. In other words, this is more than a way to plant. It is a way to care.
When we plant the Sisters, we join a living story. We honor the people who kept that story alive. We also make our own garden better. Let’s walk through it step by step. We will plan. We will plant. We will tend. We will harvest. And we will eat well, together.
The Wisdom in the Three
Each Sister has a job. Each job matters.
Corn stands tall. It acts like a pole. It lifts the beans up to the sun.
Beans climb the corn. Their roots fix nitrogen. That is plant food. It feeds the whole bed.
Squash sprawls wide. Its big leaves shade the soil. That keeps water in. It blocks weeds. It protects the roots.
Together, they do even more. The mix slows pests. It invites many helpful insects. It softens wind. It breaks hard rain. It keeps soil covered, instead of bare. In other words, they build a living shield.
The Sisters also make a strong meal. Corn gives complex carbs. Beans add protein. Squash brings vitamins and fiber. When we eat them together, we get balance. We get energy that lasts.
Honoring Roots and Respect
This method comes from Native peoples across many regions. The names, stories, and steps can change from place to place. But the core idea stays the same. Grow plants as a family. Let each plant help the others.
We show respect by learning with care. We name the source. We avoid acting like we invented it. We give thanks. Most of all, we try to garden in a way that protects life. The sisters are about care. The sisters are about sharing. We can live that message in our own yard.
Planning Your Three Sisters Bed
Good planning makes a smooth season. Here is how we set up the space so the Sisters can do their best.
Find Sun and Shelter
Pick a spot with full sun. Aim for 6 to 8 hours a day. If wind is strong where you live, add a windbreak on the west or north side. A fence, a row of sunflowers, or a hedge can do the job. This helps the corn stay upright.
Choose the Size
You can start small or go big.
Small bed: one or two mounds with 4–6 corn plants each.
Medium bed: four to six mounds set in a grid.
Large bed: several short rows of mounds, with a path in between for care and harvest.
A mound is a raised circle of soil. It warms fast. It drains well. It also keeps roots from sitting in water.
Prepare the Soil
Add a lot of compost. Mix it into the top 6–8 inches. If soil is heavy clay, add coarse sand and compost. If soil is very light, add compost and some aged manure. We want soil that holds water but still drains. We want a crumbly feel. A pH around neutral is fine.
Do not overdo the nitrogen before planting. Too much nitrogen makes the corn tall and leafy but weak. The beans will add nitrogen later, in a steady way.
Plan the Layout
The classic layout uses mounds. Here is a simple plan:
Make mounds 24–36 inches wide.
Space mounds 3–4 feet apart.
Place pathways so you can reach each mound from all sides.
In each mound, corn goes in the center. Beans go around the corn, but not too close. Squash goes at the edges of the mound. The vines will run between mounds and fill the paths. Instead of wasting space, we create shade for the soil.
Choosing Your Sisters
Variety choice matters. Some types fit better than others.
Corn
Pick a tall, sturdy corn. Many gardeners use flint, flour, or dent types for dry grain. You can also grow sweet corn if you will pick it fresh. The key is strength. Ears should not be too heavy for the stalk. If wind is common, avoid the very tallest types and plant in blocks.
Beans
Choose pole beans, not bush beans. Pole beans climb the corn and keep producing all season. You can pick snap beans to eat fresh. Or you can grow dry beans for storage. Some heirloom beans are bred to climb corn well. They wrap gently and do not choke the stalk.
Squash
Select a vining squash, not a bush type. Winter squash run long and shade the soil. Pumpkins, acorn, Hubbard, and other vining types do well. You can also use vining summer squash if space is tight. But winter squash store better, so they fit the “grow and keep” goal.
Regional Friends
In some places, gardeners add a “fourth sister,” like sunflower or bee balm. Sunflower can act as a windbreak. Bee balm draws pollinators. In drier regions, some people plant amaranth with the Sisters. These choices depend on climate and tradition. Use what suits your place.
When and How to Plant
Timing matters. The order matters. Plant in stages so the corn can lead and the beans can follow.
Step 1: Shape the Mounds
After the last frost, shape your mounds. Add compost. Water them well and let them settle for a few days. This gives a firm base for seeds.
Step 2: Plant the Corn
Plant 4–6 corn seeds in each mound, in a small circle. Set the seeds about 1 inch deep. Space them 6–8 inches apart. Water gently. When the seedlings are 2–3 inches tall, thin to the strongest 3–4 plants per mound. Do not pull the extras; cut them at the base so you do not disturb roots.
Step 3: Wait for Corn to Lead
Let the corn grow to 6 inches tall. This is key. If beans go in too soon, they can pull the corn down. We want the corn to get a head start. In other words, patience now will save trouble later.
Step 4: Plant the Beans
When the corn is 6 inches tall, plant 4–6 bean seeds around the corn, about 6 inches away from the stalks. Place the seeds evenly in a circle. Plant 1 inch deep. Water well. As the vines rise, guide them toward the corn with your fingers. They will find the stalks and climb.
Step 5: Plant the Squash
Plant squash at the outer rim of each mound, two to three seeds per spot, on two sides of the mound. Space these spots so vines can run between mounds. Plant seeds 1 inch deep. Thin to one strong plant per spot when true leaves appear.
Spacing at a Glance
Mounds: 3–4 feet apart
Corn per mound: 3–4 plants
Bean seeds: 4–6 per mound, 6 inches from corn
Squash plants: 1–2 per mound, at the outer edge
Water, Mulch, and Care
Watering
Keep soil evenly moist. Corn needs steady water as it rises and as ears fill. Beans need moisture to set pods. Squash needs water to keep big leaves strong. Water at the base. Avoid soaking leaves. Deep, slow watering is better than quick, light sprays.
Mulching
Mulch helps a lot. After the soil warms, lay straw, leaves, or grass clippings around the mounds. Keep mulch a few inches away from the corn stems. Mulch keeps the soil cool and moist. It also feeds the soil as it breaks down. Instead of bare earth, we keep a living blanket on the ground.
Feeding
If your soil was poor at the start, side-dress with compost when the corn is knee-high. You can also use a light fish or seaweed tea every few weeks. Go easy. Beans add nitrogen. Too much extra food can make the corn tall but weak.
Weeding
Weeds will try to move in early. Hand-weed while plants are small. Once squash fills the gaps, weeds fade. The shade does the work for you.
Pollination and Wind
Corn is wind-pollinated. That is why we plant in blocks or grouped mounds, not in one long line. When tassels open, a soft breeze will drop pollen onto the silks. If you get poor pollination, tap the stalks at midday to shake loose pollen.
Strong winds can lodge (bend) corn. Plant in a place with some shelter. A short fence or a line of sunflowers can help. If a stalk leans after a storm, press soil against the base to brace it.
Pests and Simple Fixes
Corn Earworm
Pinch or clip a tiny bit off the silk tips after pollination. You can also slip on a paper bag to shield the tip. Harvest at the right time and cook soon.
Bean Beetles
Check leaves often. Hand-pick beetles and scrape off yellow egg clusters. Encourage lady beetles and other helpers by keeping flowers nearby.
Squash Vine Borer
Use row cover early, and remove it when flowers open. Check stems for sawdust-like frass. If you see it, slit the stem gently, remove the borer, and mound soil over the wound to help the plant root again.
Powdery Mildew on Squash
Good airflow helps. Water at the base, not on leaves. Remove the worst leaves to slow spread. Plant resistant varieties when you can.
Troubleshooting the Mix
Corn falls over: The bean vines may be too heavy or the soil too loose. Thin bean vines, hill soil at the corn base, and add a windbreak next time.
Beans do not climb: Guide them by hand. If corn stalks are very smooth, a rough string between stalks can give a grip.
Squash smothers beans: Use fewer squash plants and train vines down the paths. You can also tuck leaves back to free bean pods.
Poor corn ears: This may be drought or weak pollination. Water more during tasseling. Plant in blocks so pollen spreads well next time.
Slow growth: Soil may be cold. Wait for warmer days before planting next season. In cool areas, black mulch can warm the soil early.
Harvest and Storage
Corn
For sweet corn, pick when silks are brown and dry and kernels press to milky juice. Cook soon after picking. For dry corn, wait until husks turn papery and ears are hard. Dry the ears in a warm, airy place. Shell and store in jars.
Beans
Pick snap beans when pods are long and crisp. Keep picking to keep vines producing. For dry beans, wait until pods turn tan and rattle. Harvest when dry weather is set. Shell and store in a cool, dry place.
Squash
Harvest winter squash when the rind is hard and the stem is dry on the plant. Leave a short stem on each fruit. Cure in a warm, dry spot for 10–14 days. Then store in a cool room with airflow. Many winter squash keep for months.
Cooking with the Sisters
The Sisters make many good meals. We can cook simply and eat well.
Succotash: sweet corn, beans, and squash in a single pot. Add onions, herbs, and a bit of butter or oil.
Skillet hash: corn off the cob, sliced summer squash, and snap beans sautéed until tender.
Roasted winter squash: serve with a pot of beans and fresh corn bread.
Stew: dry beans, diced winter squash, and cornmeal dumplings for a warm bowl.
The flavors are simple and rich. The meals are filling. After more than a few tries, you will learn your own favorite way.
Seed Saving Basics
Saving seed keeps the story going.
Corn: Space different corn types far apart to avoid cross-pollination. Pick ears from the best plants. Dry well. Store in a sealed jar.
Beans: These are easy to save. Let pods dry on the plant. Shell and store.
Squash: Save seeds from a fully ripe fruit. Rinse and dry the seeds on a plate. Note that squash can cross with other squash in the same species. If you want pure seed, grow one type at a time or hand-pollinate and bag the flowers.
Label your jars with the variety and the year. Test germination next spring by sprouting a few seeds on a damp paper towel.
Small Spaces and Creative Twists
You do not need a huge yard. We can adapt.
Teepee tripod: plant three to four corn stalks as a small cluster. Add beans around them. Plant a single squash at the base.
Raised beds: keep the classic mound idea, but inside a tidy frame. Train squash to run down the aisle.
Containers: use a deep tub for corn and beans and a second tub for a compact vining squash. Water more often.
Fence edge: plant a short block of corn near a sunny fence. Use the fence to guide beans if wind is strong.
Instead of saying “I can’t,” try a small patch. Even one mound teaches a lot.
Climate Tips
Cool, Short Seasons
Start corn indoors in paper pots 2–3 weeks before last frost. Transplant gently to avoid root shock. Use early corn and fast pole beans. Black mulch can warm the soil. Pick a smaller, faster vining squash.
Hot, Dry Regions
Plant a bit deeper to reach moisture. Mulch thick. Consider a drought-tough corn and beans known to thrive in heat. Use a squash with thick leaves and strong vines. A light shade cloth over young plants can help during a heat wave.
Humid Areas
Give more space between mounds for airflow. Thin vines to prevent mildew. Water early in the day. Choose disease-resistant types when you can.
Soil Health for the Long Run
The Sisters keep soil covered and fed. But we can do more.
Add compost every year.
Grow a cover crop in fall, like clover or rye, and cut it in spring.
Avoid heavy tilling. Too much till breaks soil life.
Keep living roots in the ground as long as you can.
In other words, treat soil like a living thing. Feed it. Protect it. It will take care of you.
Teaching and Community
The Sisters make a great school. Kids can see how plants help each other. They learn patience. They learn to share space. They taste food they grew. That is a powerful lesson.
Community gardens can use the Sisters to fill a bed with food and beauty. The vines spill over the paths. The corn tassels shine in late light. The bean flowers bring bees. It is a joyful mix. It invites people to stop and ask, “What is growing here?” Then the story begins.
Cleaning Up After Harvest
When the season ends, we still have work to do.
Cut the corn stalks at the soil line. Leave the roots to rot and feed the soil.
Chop the vines and leave them as mulch, unless pests were heavy. If pests were heavy, compost in a hot pile or bag and remove.
Spread a layer of compost and a fall mulch.
Sow a cover crop if the season allows.
This sets the bed up for next year. After more than one season, you will feel the soil get richer under your hands.
A Yearly Planting Calendar (Simple Guide)
Dates vary by place, but this rough guide helps.
Early spring: add compost and shape mounds.
Late spring (after frost): plant corn.
2–3 weeks later: plant beans when corn is 6 inches tall.
Same week as beans: plant squash at mound edges.
Early summer: mulch and weed.
Mid to late summer: harvest snap beans and sweet corn; keep watering.
Late summer to fall: harvest dry beans and winter squash; cure squash.
Fall: clean up, add compost, and sow a cover crop.
Why This Method Endures
The Three Sisters last because they work. They match plant needs with plant gifts. They give us good food and strong soil. They turn a bed into a small community. We learn to see links, not parts. We learn to watch and adjust. We learn to share the work with the plants themselves.
Instead of pushing nature, we cooperate. Instead of blank rows, we make a living weave. But most of all, we join a tradition of care and respect. That matters in the garden. It also matters beyond the garden.
Your First Planting Plan (Action Steps)
Let’s turn this into action. Here is a quick plan you can follow.
Plant 4–6 corn seeds per mound. Thin to 3–4 strong plants.
When corn is 6 inches tall, plant 4–6 pole bean seeds around each mound, 6 inches from the corn.
Plant 1–2 vining squash plants at the outer edge of each mound.
Mulch once the soil warms. Water deeply each week.
Guide bean vines onto corn by hand.
Side-dress with compost when corn is knee-high.
Harvest in stages: snap beans first, sweet corn next, then dry beans and winter squash.
Cure squash, shell dry beans, and store.
Save some seed for next year if you can.
In other words, start small. Learn. Adjust. Grow with the Sisters.
Common Questions You May Think About (Answered in Practice)
Do I need fertilizer? Compost plus the beans’ nitrogen is often enough. If leaves look pale, add a light, natural feed.
Can I plant all three at once? Wait for corn to lead. Staging is key to balance.
What if I only have room for two? Try corn and beans as a pair, and mulch well. Or beans and squash if you have a sturdy trellis.
Can I grow sweet corn and dry beans together? Yes. Just time harvests and pick your types with care.
These answers come from practice. Your garden will teach you more.
Caring Hands, Living Story
We plant the Three Sisters with respect and hope. We use simple tools. We watch the weather. We listen to the plants. We keep learning.
This is old wisdom, but it feels fresh in our hands. It makes healthy food. It brings life to the soil. It invites birds, bees, and neighbors. It even slows us down in a good way.
So let us begin. One mound is enough to start. Soon, the corn will rise. The beans will climb. The squash will run. And we will stand in the middle of it all, smiling, because we are part of the story.
We all have a garden planter or two dotted around our gardens, perhaps filled with a specimen plant or a seasonal display. But there is a lot to be said for using containers as the design basis for creating a garden. Containers are probably one of the most versatile forms of gardening, allowing you not only to choose type of container but also the plant and its location. There are many advantages to container gardening. You can move your containers to different locations within your garden, thereby creating an instantly different effect. You can change planting displays as often as you like, perhaps making the most of the choice of different seasonal plants. You can also grow plants which like different soil types to your own by simply filling them with the right type of compost.
There are an ever increasing number of different types of container you can buy, with materials and designs to suit every climate and different tastes. Pots and tubs are probably the most popular type of planter available. They are for the most part versatile and easily moved to different positions in the garden. Pots and tubs come in an enormous variety of sizes and designs, both traditional and modern. Materials vary from moss covered terracotta and artificially aged stone planters, to reused car tires and fiber glass. There are no rules when it comes to choosing a type of container and there is no reason why you can’t combine traditional with modern. Just be aware that your designs and materials complement each other in some way.
Pots and tubs are equally as versatile when it comes to planting. You can grow almost anything you like in a container. Formally clipped box and other evergreens look stunning as focal points, as do specimen standard plants such as bay trees. Group a number of planters of different sizes together with a plant type such as herbs. A particularly stunning planter can be filled with seasonal annuals for an all year round display.
Window boxes are another great way to grow plants and enhance the appearance of your house and garden. Window boxes are particularly useful if you have a tiny garden or even if you have no garden at all! You can buy ready- made window boxes, have them made bespoke to your requirements or simply make your own. Window boxes don’t have to be made of wood. I have seen some beautifully aged metal ones as well as reconstituted stone ground-level boxes. Grow seasonal displays or plant up a box outside your kitchen window with herbs or easy to grow edibles like lettuce.
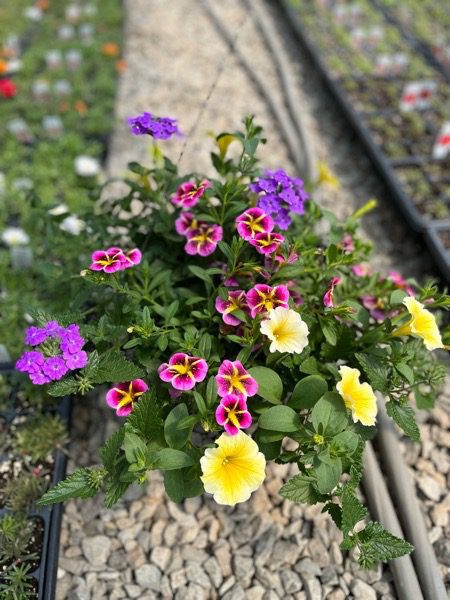
Hanging baskets are probably the most versatile of all containers. They can be hung on walls, fences and even in trees. Not only can your display be changed from season to season, but you can also grow edible plants such as tumbling tomatoes and strawberries and even a selection of herbs, hung near your kitchen door. Hanging baskets also come in a variety of shapes and sizes. More traditionally made from wicker, but I have seen some great modern alternatives made from brightly colored plastics.
Troughs and sinks can be used to create mini container gardens in one place. Although strictly speaking you can grow anything you like in a trough shaped planter, the lack of depth makes them more suited to growing alpines and herbs. Stone troughs probably look the best in any garden but why not also think about getting hold of an old Belfast sink which looks particularly effective when planted with herbs under a kitchen window.
Another type of container not readily thought about is the raised bed. Raised beds are a great way of growing both vegetables and garden plants. They are easy to maintain and therefore popular with gardeners with impaired mobility. They are also an easy way of adding structure to an otherwise flat garden space, lifting plants higher up and creating the illusion of different levels to a garden.
Some Container Planting Rules
If you are going to maintain a healthy container garden, there are a few rules you will need to follow whatever type of planter. Drainage is all important for container grown plants. Make sure your container has adequate drainage holes and always add some broken pot or crocks to the bottom of the planter to aid drainage. If your container is to be placed on a hard surface, sit it on some feet to raise it above ground level slightly. Use the right type of compost. Try not to overcrowd your container, most plants will need plenty of room to spread their roots and grow into healthy specimens. Conversely, don’t let your plants become pot-bound. Although there are a few plants which do well in these conditions, as a rule, either divide you plant or re-pot it into a larger container.
In extremely cold weather both your containers and their plants will need some protection. For those that are not frost hardy it is probably best to over winter them into a cold greenhouse. Others can be wrapped in straw or fleece to protect them from frost.
Perhaps the most important consideration of all for container grown plants is water. During dry weather in the summer months you will have to make sure your pots are well watered. Materials like terracotta dry out quickly as the clay absorbs water, so you will often find yourself having to water at least twice a day. Early morning and evening is best. During the winter water container plants sparingly. Waterlogged containers easily freeze killing the roots of the plants in them.
I am a firm believer that a garden reflects some of the personality of the gardener who tends it. Garden planters are a great way of putting your stamp on a garden, particularly if you are a little bit quirky! I have seen old wooden boats used as planters, odd worn out walking boots, pan tiles, antique wash tubs, old car tires and even a disused toilet!
Reusing Plastic Containers and Planters
Anyone who has a garden or ever got a potted plant has had to deal with those seemingly useless plastic pots. Most people throw them out. I save them until they crumble-re-using over and over again. They can be the “greenest” item in your garden that save you the most green.
I have a very small gardening space including containers but big or small practical ways maybe “green” now but will always make sense far after being GREEN loses fashion.
So what to do with all those unsightly plastic pots? Whether you have an established garden or just starting out; when you buy plants you will have to deal with re-using or disposing of them.
Plastic pots have an endless amount of uses in the garden. So before you just think re-cycle re-think they can save you money before tossing them out:
Seeds eventually become seedlings needing a larger pot; having pots on hand is both convenient and cost-saving.
Small pots make excellent large pot fillers. Place a small pot upside down in a larger one then fill with soil and plant. Container is lighter with less soil used.
Instead of throwing out the cell flats, crumble up and use as a large container filler too. [Or wash and use as packing material.]
Place invasive plants inside of the pot then plant in the ground for keeping them in-check.
Have too many plants? Bought too many? Divide both annuals and perennials using pots to share plants. Don’t have to worry about loaning out your expensive ones.
Don’t have drainage holes in that pretty container? Put plant in a plastic pot then place inside the prettier one. [Don’t forget to pour out any excess water.]
Wish you could afford more expensive containers? Take plastic pots, spray paint assorted colors then add decorative ribbons, beads or sphagnum moss to make appealing.
Don’t like to water? Plastic holds moisture longer so use instead of terra cotta [I still recommend terra cotta for herbs in almost all instances.] Works for indoor/outdoor plants.
Just planted a new plant? Use plastic container as a cloche or shield to protect until established.
Threat of frost? Use containers to cover tender plants. Use 2 pots together to block out holes and create a better insulator.
Weeding. Keep containers around as receptacles when pulling them out.
Use to make compost or save potting soil.
Use small pots as scoops for mulch, fertilizer, etc.
Use to prop up other containers to create different plant levels.
Use to hold garden tools.
Plant below ground level then put smaller pots filled with annuals for easy change-ups.
Storing bulbs or use for overwintering plants.
As you can see the possibilities are endless. These are the pots that cost nothing but continue to save you money over and over again. $$$$$. How Green is that?
5 Gallon Buckets in the Garden
Continuing the discussion of how important the often underestimated 5 gallon buckets at home, we are now revealing how we can make the best use of these pails in the garden.
As pots
Although the appearance of the 5 gallon pails may not look as charming as the real gardening pots, they are highly functional and cheaper. Good quality 5 gallon buckets cost between $ 3 and $ 6; which is nothing compared to gardening pots’ price. With some little preparation, the pails can be turned into flower pots instantly.
All you have to do is to drill the bottom of the 5 gallon buckets with ‚½ or ‚¼-inch holes to allow water drainage. 10 to 15 holes are enough for 5 gallon pails. Next is to fill in the buckets with good quality potting soil and fertilizer. It is now ready to be planted.
If you care about upgrading the look of the modest 5 gallon pails, you may want to put more time before filling in with soil. Get some paint with the color you like, paint the pails, give some accents with different colors of paint, and dry it completely. Remember to paint only on the outer side for vegetables and herbs gardening. You don’t want the vegetables you grow to take the chemical substance of the paint since you will be eating them later.
Another advantage of having 5 gallon buckets garden is that it is extremely practical. You can move the pots wherever and whenever you want. If the growing season is over, you can pile them up and store the soil for the next gardening season, or you can just move them indoor if the plant thrives to survive there. The 5 gallon buckets also make it more difficult for animals like rabbits to destroy your plants.
Now you have not only a cheap way to grow your herbs and plants, but also creative and practical ways too.
As compost containers
Compost plays an important role in the life of a plant. Good homemade compost even plays more important role in the environment. Oddly enough, your plastic 5 gallon pails can help make this happen. As the container of compost making.
First of all, you should drill ‚¼-inch holes around the sides of the bucket. This will allow air circulation and water drainage. Line the bottom of the pail with dry leaves and soil. After that, dump your table scraps like vegetables, napkins, eggshells, coffee grounds or tea bags inside the bucket. Avoid milk and meaty stuff since this could attract vermin. Cover again with dry plant debris and soil. Do one dry layer after the wet one continuously and wait until the 5 gallon pail is filled up. Have a lid to close the pail and let the microorganisms work the compost. Check it out from time to time whether it is too dry or too wet. If it is too dry, add some water and move it to a shadier place. If it is too wet, place it under the sun to dry a little bit. This process takes from several weeks to months to complete.
The better pails to use for homemade composting are the ones in dark colors. Black will be the best. It will absorb more heat for the microorganisms to live under the shade.
If you use 5 gallon buckets in your garden for those purposes mentioned above, you will definitely promote an environment friendly gardening and at the same time save money for a better use at home.
Monstera, often called the Swiss cheese plant, is one of the most popular houseplants in the world. Its large, split leaves are instantly recognizable and bring a lush, tropical vibe to any room. Two main species are commonly grown indoors: Monstera deliciosa and Monstera adansonii. Both are easy to care for, forgiving of small mistakes, and grow beautifully with minimal effort.
In this guide, we’ll explore how to help your Monstera thrive. From light and temperature needs to watering, feeding, and troubleshooting, every detail is here for you.
Why Monsteras Are So Popular
Monsteras are loved for many reasons. Their dramatic leaves with natural holes create a bold look that feels both wild and elegant. They adapt to different light levels, which makes them perfect for apartments, offices, and homes with varied lighting. Most of all, Monsteras forgive the occasional missed watering and still grow vigorously when cared for properly.
Understanding the Two Common Species
Monstera deliciosa: Known for its large, split leaves that can reach over two feet wide. Mature plants may produce fruit in tropical conditions.
Monstera adansonii: Often called the “Swiss cheese vine,” it has smaller, perforated leaves and grows more like a trailing vine. Ideal for hanging baskets or climbing supports.
Both species share similar care needs, so this guide applies to them equally.
Light and Temperature Needs
Monsteras thrive in bright, indirect light. Place them near a window where sunlight is filtered through sheer curtains or bounced off a wall.
Too much sun: Leaves may develop brown or yellow scorch marks.
Too little sun: Stems become leggy and leaves may grow without splits or holes.
The perfect temperature range is 65–85°F (18–29°C). Avoid exposing your plant to cold drafts, heaters, or air conditioners. As tropical plants, Monsteras love humidity—aim for about 60% or higher. Mist the leaves, group plants together, or use a humidifier to boost moisture in the air.
Watering Your Monstera
Watering is one of the most important parts of Monstera care. These plants prefer soil that is slightly moist but never soggy.
Check the soil: Stick your finger one to two inches deep into the pot. If it feels dry, it’s time to water.
Drainage is key: Always use pots with drainage holes. Excess water should flow freely out of the bottom to prevent root rot.
Seasonal adjustment: In spring and summer, Monsteras grow actively and may need watering weekly. In fall and winter, growth slows and watering should be less frequent.
Choosing the Right Soil
Monsteras grow best in a well-draining, chunky mix that mimics their native rainforest environment. A good mix includes:
Quality indoor potting soil
Perlite for aeration
Orchid bark or coco chips for chunkiness
A small amount of peat moss or coco coir to retain moisture
This mix allows roots to breathe and prevents water from sitting around them.
Fertilizing for Strong Growth
Feed your Monstera during its active growing season (spring through early fall). A balanced, water-soluble fertilizer works well. Look for one labeled 20-20-20 or similar.
Frequency: Every 4–6 weeks during the growing season.
Dilution: Use at half the recommended strength to avoid fertilizer burn.
Winter: Pause feeding when the plant is dormant.
Supporting Your Monstera as It Climbs
In the wild, Monsteras climb trees using aerial roots. Indoors, they benefit from a support like a moss pole, trellis, or coir pole. Training your plant to climb encourages larger, more dramatic leaves with more splits.
Place the pole in the pot and secure stems as they grow upward.
Mist the pole to keep it slightly moist—this encourages aerial roots to attach.
Repotting Your Monstera
Monsteras grow fast, especially when happy. Repot every 1–2 years or when roots start circling the pot or growing out of the drainage holes.
Steps for repotting:
Choose a pot 2 inches larger than the current one.
Gently loosen the root ball and remove old soil.
Place the plant in fresh, chunky soil and water thoroughly.
Repotting in spring gives the plant time to recover and adjust.
Pruning and Propagation
Pruning helps control size and shape. Simply cut stems just above a node (where leaves grow from the stem). These cuttings can be rooted in water or soil to grow new plants.
Propagation steps:
Cut a stem with at least one node and one leaf.
Place in water or moist soil until roots form.
Once rooted, pot into fresh soil and care as usual.
Common Problems and Solutions
Even tough plants like Monstera sometimes show signs of stress. Here are the most common issues:
Yellow leaves: Often caused by overwatering or poor drainage.
Brown tips: Usually due to low humidity or underwatering.
Leggy growth: Not enough light—move closer to a bright window.
No splits in leaves: Normal for young plants, but also happens with low light or lack of support.
Pests to Watch For
While Monsteras are generally pest-resistant, they can attract:
Spider mites (tiny webs on leaves)
Mealybugs (white cotton-like spots)
Scale insects (brown bumps on stems)
Wipe leaves with a damp cloth, treat with insecticidal soap, or use neem oil to manage pests. Regularly inspect new growth to catch problems early.
Are Monsteras Pet Safe?
Monsteras contain calcium oxalates, which can be toxic to pets if chewed. Symptoms include drooling, mouth irritation, and vomiting. Keep them out of reach of cats, dogs, and curious children.
Creating the Perfect Monstera Display
Monsteras are versatile in décor. Large Monstera deliciosa look striking in floor pots, while trailing Monstera adansonii shine in hanging baskets or climbing along shelves. Pair them with neutral planters or woven baskets for a natural look. Their bold green leaves complement modern, boho, and tropical interiors alike.
Seasonal Care Tips
Spring/Summer: Focus on growth—fertilize, repot if needed, and encourage climbing.
Fall/Winter: Reduce watering and feeding, but maintain humidity. Clean leaves to maximize light absorption during shorter days.
Why Monsteras Are Worth Growing
Caring for a Monstera isn’t just about keeping a plant alive—it’s about creating a connection to nature inside your home. These plants grow alongside you, changing and unfolding new leaves that seem to surprise you every time. Their forgiving nature makes them ideal for beginners, yet their bold beauty keeps even experienced collectors enchanted.
A Living Work of Art in Your Home
Bringing a Monstera into your space is like inviting in a living sculpture. With the right care, your plant will thrive for years, growing into a bold statement piece that brightens every corner it touches. Embrace its easy-going nature, and you’ll enjoy watching every new leaf unfurl.
Many people are familiar with monstera plants, also known as Swiss cheese plants, due to their large leaves with distinctive holes. These tropical plants are native to Central and South America and thrive in warm, humid environments. While they’re often grown outdoors, monstera plants make excellent indoor houseplants as well. Here are just a few of the benefits of having a monstera plant in your home.
Air Purification
One of the most important benefits of monstera plants is their ability to purify the air. These plants are effective at removing harmful toxins such as formaldehyde and benzene from the air, which can be beneficial for both your physical and mental health. Not only will you be able to breathe easier, but you’ll also feel better mentally knowing that the air in your home is clean and healthy.
Improved Mood
In addition to purifying the air, monstera plants can also improve your mood. Studies have shown that being around plants can boost your mood and reduce stress levels. If you’re looking for a way to feel calmer and happier, adding a monstera plant to your home is a great option.
Increase Productivity
When you feel stressed or anxious, it’s difficult to focus on tasks at hand. However, being aroundmonstera plants has been shown to increase productivity levels. If you find yourself struggling to concentrate, try adding a monstera plant to your workspace. You may be surprised at how much of a difference it makes.
Monstera plants offer a multitude of benefits that make them ideal houseplants. Not only do they purify the air and improve your mood, but they can also increase your productivity levels. So if you’re looking for a plant that does it all, look no further than the monstera plant.
Practical Steps To Buying Monstera Plants
Monstera plants are raised in greenhouses in which the air is warm and humid. When brought into the average home, they need to withstand more adverse conditions than the average outdoor plant. Challenging conditions such as minimum light, inadequate ventilation, warmer temperatures, drafts, and dry air contribute to stressful conditions for plants. Considering the following points will help in the selection of house plants that will complement your interior decor and live for many years to come.
1. Strong and vigorous. Give the plant a quick shake. A plant that’s unsteady in its pot may not be well-rooted. Shaking the plant also tells you whether the plant has whiteflies that will scattered in every direction if the plant is infested.
2. Evergreen – Since it will be seen everyday of the year, plants need to be evergreen. Be sure the leaves aren’t falling off.
3. Attractive – Some of the foliage plants will flower from time to time, but the primary reason for purchasing is the plant’s foliage and how the plants grow. The leaves may be selected for their color or form, or both and the growth habit should be attractive and require minimum maintenance.
4. Slow-growing – Select plants that are slow-growing without a lot of pruning or training. They will perform better over a longer period of time.
5. Crowded roots – Check the bottom of the plant for roots coming out of the drainage hole. Roots emerging from holes in the pot don’t necessarily mean that the plant is under-potted, but it’s frequently a first symptom. Root bound plants will require transplanting when you get the plant home.
6. Unhealthy roots – If you can, have the clerk take the plant out of the pot to check for crowded roots. Roots come in all shapes, sizes, and colors. They should always feel firm and not squishy. Squishy roots are a sign of root rot.
7. Stem or root rot – Sniff the potting mix. Signs of rot smell like the sickly sweet smell of a rotting potato. Don’t buy this plant, as it likely has a bad case of stem rot or root rot.
8. Leaf spots, yellowed leaves, or abundant leaf loss – Leaf spots can be a sign of disease or caused by the jostling of the plants in a garden center. A yellow leaf or two at the base of the plant is nothing to worry about. If you see many yellow or fallen leaves, however, the plant’s probably stressed and therefore not a good choice. Damaged leaves never recover. Ask yourself whether you are willing to wait for the plant to produce new leaves or would you rather purchase a healthier looking specimen.
9. Leggy plants or brown leaf tips – These conditions are signs of a plant that has not received adequate care over a period of time. Spindly plants indicate a lack of adequate light.
10. Signs of insects or disease – Look under the leaves and at the leaf axial (the place where the leaf attaches to the stem) where most often pests hang out. Do not purchase this plant, as not only will you have a problem with it, but you may also infest the other plants in your home.
Variegated Monstera Deliciosa: The Crown Jewel of Houseplants
Few plants capture the imagination of plant lovers like the Variegated Monstera deliciosa. Known for its striking white-and-green marbled leaves, this rare version of the classic Swiss cheese plant has become a social media sensation and a must-have for serious collectors. But beyond the hype lies a plant that demands care, patience, and respect for its unique biology.
This deep guide explores everything about the Variegated Monstera—from its natural mutation to proper care, propagation challenges, and why it commands such high prices in the plant world.
What Makes the Variegated Monstera So Special?
The regular Monstera deliciosa is already admired for its bold, split leaves. The variegated form takes that beauty further, replacing portions of its deep green foliage with creamy white, pale yellow, or silvery tones. No two leaves are ever the same, creating a living artwork that changes with every new leaf unfurling.
This mutation, known as chimera variegation, occurs when some cells in the plant lack chlorophyll. The result is a fascinating patchwork of green (chlorophyll-rich) and white (chlorophyll-free) tissue. While stunning, this also makes the plant more fragile—white sections cannot photosynthesize, so they contribute no energy to the plant’s growth.
Types of Variegated Monstera Deliciosa
Not all variegated Monsteras are alike. Collectors distinguish several unique types:
Monstera deliciosa ‘Albo Variegata’ Features dramatic white patches or entire white leaves. Its variegation is bold and high-contrast.
Monstera deliciosa ‘Thai Constellation’ Displays creamy yellow speckles and marbling, reminiscent of stars. This variety is lab-propagated, making it slightly more available but still highly prized.
Mint Variegated Monstera Extremely rare, with pale minty-white coloration rather than bright white.
Each type has its own growth pattern and variegation style, but all share similar care requirements.
Why Is It So Expensive?
The price of a variegated Monstera often shocks newcomers. A single cutting can cost hundreds of dollars, while large plants sell for thousands. Several factors drive this high price:
Slow Growth: Variegated Monsteras grow significantly slower than fully green plants because the white sections cannot photosynthesize.
Unstable Variegation: Not every new leaf will show perfect variegation. Some revert to solid green, while others emerge fully white (which eventually dies back).
Propagation Difficulty: Producing stable variegated cuttings requires skill and patience.
Skyrocketing Demand: Social media exposure has fueled global demand far beyond available supply.
Understanding Variegation: Chimera vs. Other Types
Variegation in Monsteras is usually chimeral, meaning only certain cells carry the mutation. Unlike stable genetic variegation, chimera variegation can shift over time—plants may become greener (reverting) or whiter (less sustainable).
Key Insights:
White leaves are beautiful but short-lived and stress the plant.
A balanced mix of green and white ensures long-term health.
Pruning can encourage better variegation if done strategically.
Pruning and Encouraging Variegation
Prune strategically to maintain healthy variegation:
Cut back fully green stems if the plant begins reverting.
Avoid propagating entirely white sections—they lack chlorophyll and won’t survive.
Always use sterilized tools to prevent disease.
Common Problems and How to Fix Them
Reversion to Green: Increase light, prune green growth, and propagate variegated sections.
Too Much White: The plant struggles to photosynthesize—encourage greener growth for balance.
Root Rot: Caused by overwatering; trim damaged roots and repot in fresh mix.
Leaf Burn: Move away from harsh sunlight or heat sources.
Styling Your Variegated Monstera
This plant is more than greenery—it’s a statement piece. Showcase it in a minimalist ceramic planter, basket, or elevated stand to highlight its dramatic foliage. It pairs beautifully with natural wood, neutral tones, and bright, airy spaces.
Seasonal Care Guide
Spring/Summer: Active growth; fertilize regularly and repot if needed.
Fall/Winter: Growth slows; reduce watering and monitor humidity levels.
Year-round: Wipe leaves to remove dust and maximize photosynthesis.
Why This Plant Feels Magical
Caring for a variegated Monstera is a rewarding challenge. Each new leaf feels like unwrapping a gift—its pattern unpredictable yet always stunning. Watching it grow connects you to nature’s artistry, making it more than just a plant; it’s an evolving masterpiece.
Bringing Rare Beauty Into Your Home
A Variegated Monstera deliciosa is more than décor—it’s a living treasure. With the right light, care, and patience, this plant rewards you with ever-changing foliage and a touch of tropical luxury. Whether you’re a seasoned collector or just starting your plant journey, adding one to your home is an unforgettable experience.
Frequently Asked Questions
Q: My Monstera is turning yellow?
A: Most often yellowing occurs due to over or underwatering. If you see a combination of yellow and brown on the same leaf, it is typically due to overwatering. If fully yellow leaves, along with some brown crispy spots on additional leaves occur then it could be underwatering.
Q: How often should I fertilize my plant?
A: In general, house plants will thrive when they are fertilized spring through fall. Fertilize once a month with an organic houseplant fertilizer, following the package instructions for dilution and administration.
Q: How often does my plant need to be re-potted?
A: For larger floor plants, we suggest re-potting every 12-18 months. Typically you want to choose a potting vessel 10-20% larger to allow for growth. Don’t choose a pot much larger than the previous as this could drown the plants roots. If you prefer to maintain the current size of your plant, re-pot into the same vessel, providing new soil and trimming away some roots and foliage. Spring or summer is the ideal time to re-pot as the plant is at its strongest.
Davy
Typically replies within a day
Hello, Welcome to the site. Please click below button for chatting me through messenger.