
Why the Three Sisters Still Matter
The Three Sisters are corn, beans, and squash. They grow together. They support each other. They feed us well. This is an old method from many Native nations. It is simple. It is strong. It still works today.
We can learn a lot from it. We learn how plants can be friends. We learn how soil can stay rich. We learn how to work with nature, not against it. In other words, this is more than a way to plant. It is a way to care.
When we plant the Sisters, we join a living story. We honor the people who kept that story alive. We also make our own garden better. Let’s walk through it step by step. We will plan. We will plant. We will tend. We will harvest. And we will eat well, together.
The Wisdom in the Three
Each Sister has a job. Each job matters.
- Corn stands tall. It acts like a pole. It lifts the beans up to the sun.
- Beans climb the corn. Their roots fix nitrogen. That is plant food. It feeds the whole bed.
- Squash sprawls wide. Its big leaves shade the soil. That keeps water in. It blocks weeds. It protects the roots.
Together, they do even more. The mix slows pests. It invites many helpful insects. It softens wind. It breaks hard rain. It keeps soil covered, instead of bare. In other words, they build a living shield.
The Sisters also make a strong meal. Corn gives complex carbs. Beans add protein. Squash brings vitamins and fiber. When we eat them together, we get balance. We get energy that lasts.
Honoring Roots and Respect
This method comes from Native peoples across many regions. The names, stories, and steps can change from place to place. But the core idea stays the same. Grow plants as a family. Let each plant help the others.
We show respect by learning with care. We name the source. We avoid acting like we invented it. We give thanks. Most of all, we try to garden in a way that protects life. The sisters are about care. The sisters are about sharing. We can live that message in our own yard.
Planning Your Three Sisters Bed
Good planning makes a smooth season. Here is how we set up the space so the Sisters can do their best.
Find Sun and Shelter
Pick a spot with full sun. Aim for 6 to 8 hours a day. If wind is strong where you live, add a windbreak on the west or north side. A fence, a row of sunflowers, or a hedge can do the job. This helps the corn stay upright.
Choose the Size
You can start small or go big.
- Small bed: one or two mounds with 4–6 corn plants each.
- Medium bed: four to six mounds set in a grid.
- Large bed: several short rows of mounds, with a path in between for care and harvest.
A mound is a raised circle of soil. It warms fast. It drains well. It also keeps roots from sitting in water.
Prepare the Soil
Add a lot of compost. Mix it into the top 6–8 inches. If soil is heavy clay, add coarse sand and compost. If soil is very light, add compost and some aged manure. We want soil that holds water but still drains. We want a crumbly feel. A pH around neutral is fine.
Do not overdo the nitrogen before planting. Too much nitrogen makes the corn tall and leafy but weak. The beans will add nitrogen later, in a steady way.
Plan the Layout
The classic layout uses mounds. Here is a simple plan:
- Make mounds 24–36 inches wide.
- Space mounds 3–4 feet apart.
- Place pathways so you can reach each mound from all sides.
In each mound, corn goes in the center. Beans go around the corn, but not too close. Squash goes at the edges of the mound. The vines will run between mounds and fill the paths. Instead of wasting space, we create shade for the soil.
Choosing Your Sisters
Variety choice matters. Some types fit better than others.
Corn
Pick a tall, sturdy corn. Many gardeners use flint, flour, or dent types for dry grain. You can also grow sweet corn if you will pick it fresh. The key is strength. Ears should not be too heavy for the stalk. If wind is common, avoid the very tallest types and plant in blocks.
Beans
Choose pole beans, not bush beans. Pole beans climb the corn and keep producing all season. You can pick snap beans to eat fresh. Or you can grow dry beans for storage. Some heirloom beans are bred to climb corn well. They wrap gently and do not choke the stalk.
Squash
Select a vining squash, not a bush type. Winter squash run long and shade the soil. Pumpkins, acorn, Hubbard, and other vining types do well. You can also use vining summer squash if space is tight. But winter squash store better, so they fit the “grow and keep” goal.
Regional Friends
In some places, gardeners add a “fourth sister,” like sunflower or bee balm. Sunflower can act as a windbreak. Bee balm draws pollinators. In drier regions, some people plant amaranth with the Sisters. These choices depend on climate and tradition. Use what suits your place.
When and How to Plant
Timing matters. The order matters. Plant in stages so the corn can lead and the beans can follow.
Step 1: Shape the Mounds
After the last frost, shape your mounds. Add compost. Water them well and let them settle for a few days. This gives a firm base for seeds.
Step 2: Plant the Corn
Plant 4–6 corn seeds in each mound, in a small circle. Set the seeds about 1 inch deep. Space them 6–8 inches apart. Water gently. When the seedlings are 2–3 inches tall, thin to the strongest 3–4 plants per mound. Do not pull the extras; cut them at the base so you do not disturb roots.
Step 3: Wait for Corn to Lead
Let the corn grow to 6 inches tall. This is key. If beans go in too soon, they can pull the corn down. We want the corn to get a head start. In other words, patience now will save trouble later.
Step 4: Plant the Beans
When the corn is 6 inches tall, plant 4–6 bean seeds around the corn, about 6 inches away from the stalks. Place the seeds evenly in a circle. Plant 1 inch deep. Water well. As the vines rise, guide them toward the corn with your fingers. They will find the stalks and climb.
Step 5: Plant the Squash
Plant squash at the outer rim of each mound, two to three seeds per spot, on two sides of the mound. Space these spots so vines can run between mounds. Plant seeds 1 inch deep. Thin to one strong plant per spot when true leaves appear.
Spacing at a Glance
- Mounds: 3–4 feet apart
- Corn per mound: 3–4 plants
- Bean seeds: 4–6 per mound, 6 inches from corn
- Squash plants: 1–2 per mound, at the outer edge
Water, Mulch, and Care
Watering
Keep soil evenly moist. Corn needs steady water as it rises and as ears fill. Beans need moisture to set pods. Squash needs water to keep big leaves strong. Water at the base. Avoid soaking leaves. Deep, slow watering is better than quick, light sprays.
Mulching
Mulch helps a lot. After the soil warms, lay straw, leaves, or grass clippings around the mounds. Keep mulch a few inches away from the corn stems. Mulch keeps the soil cool and moist. It also feeds the soil as it breaks down. Instead of bare earth, we keep a living blanket on the ground.
Feeding
If your soil was poor at the start, side-dress with compost when the corn is knee-high. You can also use a light fish or seaweed tea every few weeks. Go easy. Beans add nitrogen. Too much extra food can make the corn tall but weak.
Weeding
Weeds will try to move in early. Hand-weed while plants are small. Once squash fills the gaps, weeds fade. The shade does the work for you.
Pollination and Wind
Corn is wind-pollinated. That is why we plant in blocks or grouped mounds, not in one long line. When tassels open, a soft breeze will drop pollen onto the silks. If you get poor pollination, tap the stalks at midday to shake loose pollen.
Strong winds can lodge (bend) corn. Plant in a place with some shelter. A short fence or a line of sunflowers can help. If a stalk leans after a storm, press soil against the base to brace it.
Pests and Simple Fixes
Corn Earworm
Pinch or clip a tiny bit off the silk tips after pollination. You can also slip on a paper bag to shield the tip. Harvest at the right time and cook soon.
Bean Beetles
Check leaves often. Hand-pick beetles and scrape off yellow egg clusters. Encourage lady beetles and other helpers by keeping flowers nearby.
Squash Vine Borer
Use row cover early, and remove it when flowers open. Check stems for sawdust-like frass. If you see it, slit the stem gently, remove the borer, and mound soil over the wound to help the plant root again.
Powdery Mildew on Squash
Good airflow helps. Water at the base, not on leaves. Remove the worst leaves to slow spread. Plant resistant varieties when you can.
Troubleshooting the Mix
- Corn falls over: The bean vines may be too heavy or the soil too loose. Thin bean vines, hill soil at the corn base, and add a windbreak next time.
- Beans do not climb: Guide them by hand. If corn stalks are very smooth, a rough string between stalks can give a grip.
- Squash smothers beans: Use fewer squash plants and train vines down the paths. You can also tuck leaves back to free bean pods.
- Poor corn ears: This may be drought or weak pollination. Water more during tasseling. Plant in blocks so pollen spreads well next time.
- Slow growth: Soil may be cold. Wait for warmer days before planting next season. In cool areas, black mulch can warm the soil early.
Harvest and Storage
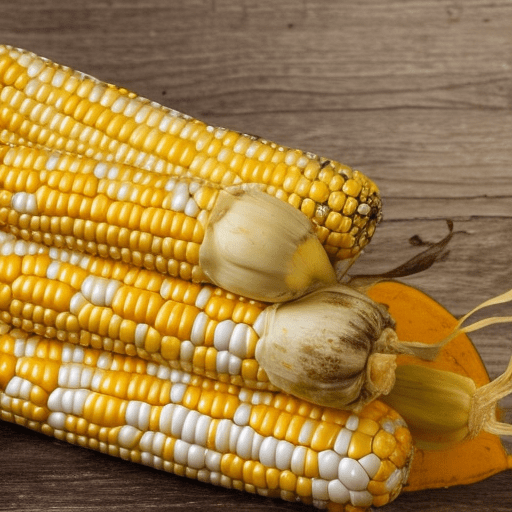
Corn
For sweet corn, pick when silks are brown and dry and kernels press to milky juice. Cook soon after picking. For dry corn, wait until husks turn papery and ears are hard. Dry the ears in a warm, airy place. Shell and store in jars.
Beans
Pick snap beans when pods are long and crisp. Keep picking to keep vines producing. For dry beans, wait until pods turn tan and rattle. Harvest when dry weather is set. Shell and store in a cool, dry place.
Squash
Harvest winter squash when the rind is hard and the stem is dry on the plant. Leave a short stem on each fruit. Cure in a warm, dry spot for 10–14 days. Then store in a cool room with airflow. Many winter squash keep for months.
Cooking with the Sisters
The Sisters make many good meals. We can cook simply and eat well.
- Succotash: sweet corn, beans, and squash in a single pot. Add onions, herbs, and a bit of butter or oil.
- Skillet hash: corn off the cob, sliced summer squash, and snap beans sautéed until tender.
- Roasted winter squash: serve with a pot of beans and fresh corn bread.
- Stew: dry beans, diced winter squash, and cornmeal dumplings for a warm bowl.
The flavors are simple and rich. The meals are filling. After more than a few tries, you will learn your own favorite way.
Seed Saving Basics
Saving seed keeps the story going.
- Corn: Space different corn types far apart to avoid cross-pollination. Pick ears from the best plants. Dry well. Store in a sealed jar.
- Beans: These are easy to save. Let pods dry on the plant. Shell and store.
- Squash: Save seeds from a fully ripe fruit. Rinse and dry the seeds on a plate. Note that squash can cross with other squash in the same species. If you want pure seed, grow one type at a time or hand-pollinate and bag the flowers.
Label your jars with the variety and the year. Test germination next spring by sprouting a few seeds on a damp paper towel.
Small Spaces and Creative Twists
You do not need a huge yard. We can adapt.
- Teepee tripod: plant three to four corn stalks as a small cluster. Add beans around them. Plant a single squash at the base.
- Raised beds: keep the classic mound idea, but inside a tidy frame. Train squash to run down the aisle.
- Containers: use a deep tub for corn and beans and a second tub for a compact vining squash. Water more often.
- Fence edge: plant a short block of corn near a sunny fence. Use the fence to guide beans if wind is strong.
Instead of saying “I can’t,” try a small patch. Even one mound teaches a lot.
Climate Tips
Cool, Short Seasons
Start corn indoors in paper pots 2–3 weeks before last frost. Transplant gently to avoid root shock. Use early corn and fast pole beans. Black mulch can warm the soil. Pick a smaller, faster vining squash.
Hot, Dry Regions
Plant a bit deeper to reach moisture. Mulch thick. Consider a drought-tough corn and beans known to thrive in heat. Use a squash with thick leaves and strong vines. A light shade cloth over young plants can help during a heat wave.
Humid Areas
Give more space between mounds for airflow. Thin vines to prevent mildew. Water early in the day. Choose disease-resistant types when you can.
Soil Health for the Long Run
The Sisters keep soil covered and fed. But we can do more.
- Add compost every year.
- Grow a cover crop in fall, like clover or rye, and cut it in spring.
- Avoid heavy tilling. Too much till breaks soil life.
- Keep living roots in the ground as long as you can.
In other words, treat soil like a living thing. Feed it. Protect it. It will take care of you.
Teaching and Community
The Sisters make a great school. Kids can see how plants help each other. They learn patience. They learn to share space. They taste food they grew. That is a powerful lesson.
Community gardens can use the Sisters to fill a bed with food and beauty. The vines spill over the paths. The corn tassels shine in late light. The bean flowers bring bees. It is a joyful mix. It invites people to stop and ask, “What is growing here?” Then the story begins.
Cleaning Up After Harvest
When the season ends, we still have work to do.
- Cut the corn stalks at the soil line. Leave the roots to rot and feed the soil.
- Chop the vines and leave them as mulch, unless pests were heavy. If pests were heavy, compost in a hot pile or bag and remove.
- Spread a layer of compost and a fall mulch.
- Sow a cover crop if the season allows.
This sets the bed up for next year. After more than one season, you will feel the soil get richer under your hands.
A Yearly Planting Calendar (Simple Guide)
Dates vary by place, but this rough guide helps.
- Early spring: add compost and shape mounds.
- Late spring (after frost): plant corn.
- 2–3 weeks later: plant beans when corn is 6 inches tall.
- Same week as beans: plant squash at mound edges.
- Early summer: mulch and weed.
- Mid to late summer: harvest snap beans and sweet corn; keep watering.
- Late summer to fall: harvest dry beans and winter squash; cure squash.
- Fall: clean up, add compost, and sow a cover crop.
Why This Method Endures
The Three Sisters last because they work. They match plant needs with plant gifts. They give us good food and strong soil. They turn a bed into a small community. We learn to see links, not parts. We learn to watch and adjust. We learn to share the work with the plants themselves.
Instead of pushing nature, we cooperate. Instead of blank rows, we make a living weave. But most of all, we join a tradition of care and respect. That matters in the garden. It also matters beyond the garden.
Your First Planting Plan (Action Steps)
Let’s turn this into action. Here is a quick plan you can follow.
- Pick a sunny spot with some wind protection.
- Build 2–4 mounds, 24–36 inches across, 3–4 feet apart.
- Mix in compost. Water and settle the mounds.
- Plant 4–6 corn seeds per mound. Thin to 3–4 strong plants.
- When corn is 6 inches tall, plant 4–6 pole bean seeds around each mound, 6 inches from the corn.
- Plant 1–2 vining squash plants at the outer edge of each mound.
- Mulch once the soil warms. Water deeply each week.
- Guide bean vines onto corn by hand.
- Side-dress with compost when corn is knee-high.
- Harvest in stages: snap beans first, sweet corn next, then dry beans and winter squash.
- Cure squash, shell dry beans, and store.
- Save some seed for next year if you can.
In other words, start small. Learn. Adjust. Grow with the Sisters.
Common Questions You May Think About (Answered in Practice)
- Do I need fertilizer? Compost plus the beans’ nitrogen is often enough. If leaves look pale, add a light, natural feed.
- Can I plant all three at once? Wait for corn to lead. Staging is key to balance.
- What if I only have room for two? Try corn and beans as a pair, and mulch well. Or beans and squash if you have a sturdy trellis.
- Can I grow sweet corn and dry beans together? Yes. Just time harvests and pick your types with care.
These answers come from practice. Your garden will teach you more.
Caring Hands, Living Story
We plant the Three Sisters with respect and hope. We use simple tools. We watch the weather. We listen to the plants. We keep learning.
This is old wisdom, but it feels fresh in our hands. It makes healthy food. It brings life to the soil. It invites birds, bees, and neighbors. It even slows us down in a good way.
So let us begin. One mound is enough to start. Soon, the corn will rise. The beans will climb. The squash will run. And we will stand in the middle of it all, smiling, because we are part of the story.