Posted on

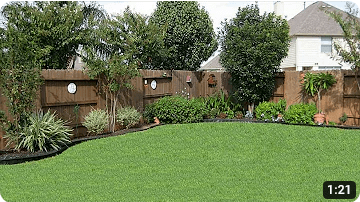
Useful Tips And Ideas For Landscaping Along The Fence Line

Useful Tips And Ideas For Landscaping Along The Fence Line

4 Tips for Landscaping Along Your Fence Line

A well-landscaped yard can make all the difference in terms of curb appeal. But if you’re like most homeowners, you probably don’t have a lot of extra time or money to spend on landscaping your entire property. That’s why focusing on one specific area, like the fence line, can be a great way to make a big impact without breaking the bank.

Here are four tips for landscaping along your fence line:

Useful Tips And Ideas For Landscaping Along The Fence Line
  1. Decide on a style and stick to it.
    You might be tempted to try out a bunch of different styles for your landscaping, but that will only end up making your yard look cluttered and messy. Instead, pick one style that you like and stick to it throughout your landscaping. This will create a cohesive look that is much more visually appealing.
  2. Use low-maintenance plants.
    There’s no need to choose high-maintenance plants that require a lot of watering and upkeep. Stick with low-maintenance plants that are drought-resistant and able to thrive in your climate. This will save you time and money in the long run.
  3. Mulch around your plants.
    Mulching is not only good for your plants, but it also helps to prevent weeds from growing. You can find mulch at most home improvement stores or online retailers. Be sure to spread it around your plants evenly and give them a good amount of coverage.
  4. Consider using decorative stones or other accents.
    In addition to plants, there are other ways to spruce up your fence line landscaping. Decorative stones or other accents can add visual interest and texture to your yard. Be sure to choose accents that complement the overall style of your landscaping for the best results.

By following these tips, you can easily create an attractive and eye-catching fence line landscape that will boost your curb appeal and make your neighbors green with envy!

Grouping Plants Together to Achieve a More Natural Look

Have you ever looked at a landscape and thought it looked too perfect? Maybe the plants were all the same height, or they were spaced too evenly apart. If you’re going for a more natural look, one of the best things you can do is group plants together in clusters.

Why Group Plants Together?
When you group plants together, it gives the landscape a more organic feel. It also helps to camouflage any bare spots in your yard, since the plants will conceal them. Another benefit of grouping plants together is that it can save you money. Buying several small plants is usually cheaper than buying one large plant, so if you group them together, you’ll get more bang for your buck.

How to Group Plants Together
The first step is to plan out your landscaping before you start planting. This will help you figure out how many plants you need, and where they should go. Once you have a plan, make sure all your plants are healthy before putting them in the ground. Once they’re in, water them well and give them some time to adjust to their new home. After a few weeks, you should start to see some new growth.

Grouping plants together is a great way to achieve a more natural look in your landscaping. It’s also economical and can help to camouflage any bare spots in your yard. With a little planning and patience, you can have a beautiful, organic-looking landscape that will be the envy of your neighborhood.

Below are some landscaping tips and ideas you can consider for improving your fence line:

• Before starting to plant along fence the line, make sure you remove any brush and debris on the area. This means removing weeds growing along the privacy fence. You can use a weed trimmer to cut down weeds and grass next to the fence.

• Aside from planting ornamental plants, the area along the fence is the ideal location to grow long, narrow vegetable garden beds. The edible garden will decorate and improve the look of the area while making the space functional to produce your own food.

• If you want to cover some of the wooden fence’s parts (especially the old, rotten ones) plant vines, like bougainvillea or trumpet vine along the base of the fence. These vines will naturally grow up the fence to add color to your fence and at the same time, soften the look of the wood.

• If you want to grow plants along the fence line, grow tall ornamental grasses, such as cape thatching reed or muhly grass, along the area. When they grow, they will fill out to cover a large area of the fence while adding movement and texture to your outdoor space.

• To have blooming flowers near your fence, plant ornamental grasses with flowering perennials such as poppies or hydrangeas. You can also consider growing flowering herbs like chives and lavender since they work great for different types of border gardens.

• You can also consider planting pots. Place large, decorative pots along the fence line. Make sure you pace the pots evenly along the privacy structure. To add color and boost visual interest to the area, grow a variety of plants in one pot.

• Lastly, to improve the look of your fence and outdoor space, you can also hang decorative garden fixtures such as metal lanterns as accent pieces. However, make sure you choose only lightweight garden decorations that won’t cause the fence to sag or lean and screw the pieces into the wood securely.

Posted on

How to Grow Grapes – Backyard Grape Growing Secrets Revealed

Contrary to popular speculation or belief, growing grapes in your backyard is not as difficult as one may presume. When someone mentions the idea of starting a grape garden, one may immediately assume that without acres of free land at their disposal, it will be almost impossible to be successful. This is absolutely NOT true!

As a matter of fact, there are many amateur grape growers today who are content with their small vine garden in their backyard. The grapes they produce are excellent for eating and making wine and the little effort put into it has a high return.

As a full time grape farmer, I have learned the secrets of what it takes to grow the best tasting grapes for decades. As a child I would work with my father on his farm planting and pruning grapevines all day long and continued working with him as a teenager and even now as an adult and family man. I want to teach you how to grow grapes and share with you the secrets of keeping a successful grapevine garden so that you too can enjoy what these delicious fruits have to offer.

First of all backyard grape growing does not require expensive fertilizers or manures. You can get some really good vines from ordinary soil. Another goodie is that you won’t have to invest a lot of time in your garden because the roots themselves will seek out what they need. The only thing you need to concern yourself with is where to put the vine itself.

It really is quite amazing how no matter where you plant your vines, all you have to do is train the vines around your house towards the well sun lit areas. If you have an open garden where the sun hits all day long, then that will work even better.

The best time to plant your grapevines is during the fall. Do not let the vines fruit during the first season of planting. Instead, always remember to cut down your vines to about four buds. The reason for this is that those four buds will become the strongest points and will lead the rest of the vine up the wall where you planted them in. You want your grapevine to use all of its energy producing a strong wood for the next season because it is during the second season of growth that you get the best grapes.

Remember that the wood that is born this year will lead to next year’s fruits. So during the first year, clip away any flower buds that may form, thus making sure that the vine’s energy is focused on producing wood.

When pruning during the summer, you want to cut off all new growth while leaving the old wood to provide for future fruit. Only remove old growth when they become a straggling nuisance hanging all over your garden. When pruning in the fall or early winter, you should cut back the vines this time to about five to six buds only so that once again, the vines will use all their energy for producing strong wood during the winter.

Most grape vines ripen during the late summer, early September. At this time you can enjoy the best tasting home grown grapes and continue preparing your vines for future growths.

Wait! Don’t go planting some grapevines you purchased at your local nursery and then wonder why you are getting poor results. Many of these vines come from other states and were cut from a healthy patch which will never have the strength to ripen once taken home. Learn the fundamental procedures of backyard grape growing first before making a mistake!

Tips For Successful Backyard Grape Growing

done properly. Grapevines are perennial plants and will grow for years to come. There are a few things to consider before you just jump in and start planting your grapevines. Otherwise, mistakes made at planting will haunt you in the future.

Grapes need lots of sunshine. One of the biggest mistakes that the home gardener makes when growing grapes is to plant them in the shade under a tree or where they get shaded by houses most of the day. If you watch wild grapevines grow, you will notice they make all efforts to climb trees and shrubs to get into the daylight. Without proper sunlight, proper ripeness cannot be obtained. Be sure the spot you choose has good sun most of the day.

A second mistake that many home gardeners make is to not take into account the grape variety’s growth habit and vigor. These two factors come into play when planting the grapevine and deciding on how to trellis the vine.

Vigorous varieties need lots of space. You can find out how vigorous a variety is by consulting your local nursery where you bought your vines. Vigorous varieties need eight feet between vines when planting. Less vigorous varieties can be planted closer at six feet between vines. Very low vigor vines can be planted as close as four feet.

Growth habit determines the trellis type and how the grapevine will be trained and pruned. Grape varieties with a large portion of their ancestry coming from wild American species tend to droop. These are like the wild vines that grow to the top of small trees and shrubs then cascade downward during the summer. The gardener will find that it is best to mimic this natural growth.

Vines of this type will be trained to a high wire about six feet off the ground. The grapevines are pruned to two to four long canes each year. As the shoots grow each year from the canes left at pruning time, they will grow outward from each side and soon start drooping towards the ground, forming a curtain of leaves by the end of the growing season.

Many varieties have the European grape, V.vinifera, in their ancestry. The European grape varieties tend to have a more upright growth. These grape varieties need a more extensive trellis system. At least four wires are needed to contain them. The first wire is approximately three feet off the ground with the two additional wires at eight inch intervals above the bottom wire. The vines are trained to a trunk that extends to the bottom wire.

Two to four canes are pruned and tied to the bottom wire on each side of the trunk. As the shoots grow during the spring and summer they are tied straight up to the wires above. Once the shoots have reached approximately 16 inches above the top wire, they are cut off at the tips. This “hedging” prevents further growth and shading of the vine below.

Grapes need a good water supply when they are actively growing in the spring and summer. They should be watered at least once a week in areas of little rain. More often under drought conditions. This watering should be continued until the berries begin to turn color. After coloring, watering is not needed and will in fact slow the ripening process. Once the leaves have fallen in the fall, one last large watering should be undertaken before the ground freezes to get the vines through the winter.

Perhaps the biggest mistake I see with home gardeners growing grapes is neglecting pruning the vines each year. This is a must! Without pruning the grapevine becomes an overgrown tangled mess. The grapevines overbear and the berries don’t ripen properly. Disease sets in as the vine is over shaded and doesn’t receive drying winds. The vines will weaken over time and eventually die before their time.

Pruning removes 90-95% of the previous year’s growth. It keeps the vines in balance and aids in controlling the crop and ripening the fruit. Pruning the grapevine is an art, not a science. Information on grapevine pruning can be obtained through your local Ag Extension agent. They have agricultural bulletins that detail the pruning process.

Growing grapevines can be a nice hobby that will provide you and your family with fresh fruit or grapes to make wine with. Table grape varieties and wine varieties are distinct. Make sure you are planting the proper varieties for the wanted purpose. Home gardeners should also make sure that the varieties they are planting are adapted to their local climate. Some varieties cannot take cold winters, while others can tolerate freezing temperatures down to -25-30F.

Varieties that have American grape species in their ancestry can tolerate colder winters. Make sure you consult with your nurseryman to fit the variety you are planting to your conditions. The variety you choose must also be able to ripen in your climate. I see too many home gardeners planting varieties that take up to 170 days or more to ripen in areas that have only 150 days or less in their growing seasons.

If you are thinking of growing grapevines in your backyard or garden, be sure to consider the above factors before you start planting. Choose your grape varieties based upon what you plan to use them for, how they are adapted to the local growing conditions, and plan the trellis according to the variety’s growth habit. I wish you all the luck in your endeavor.