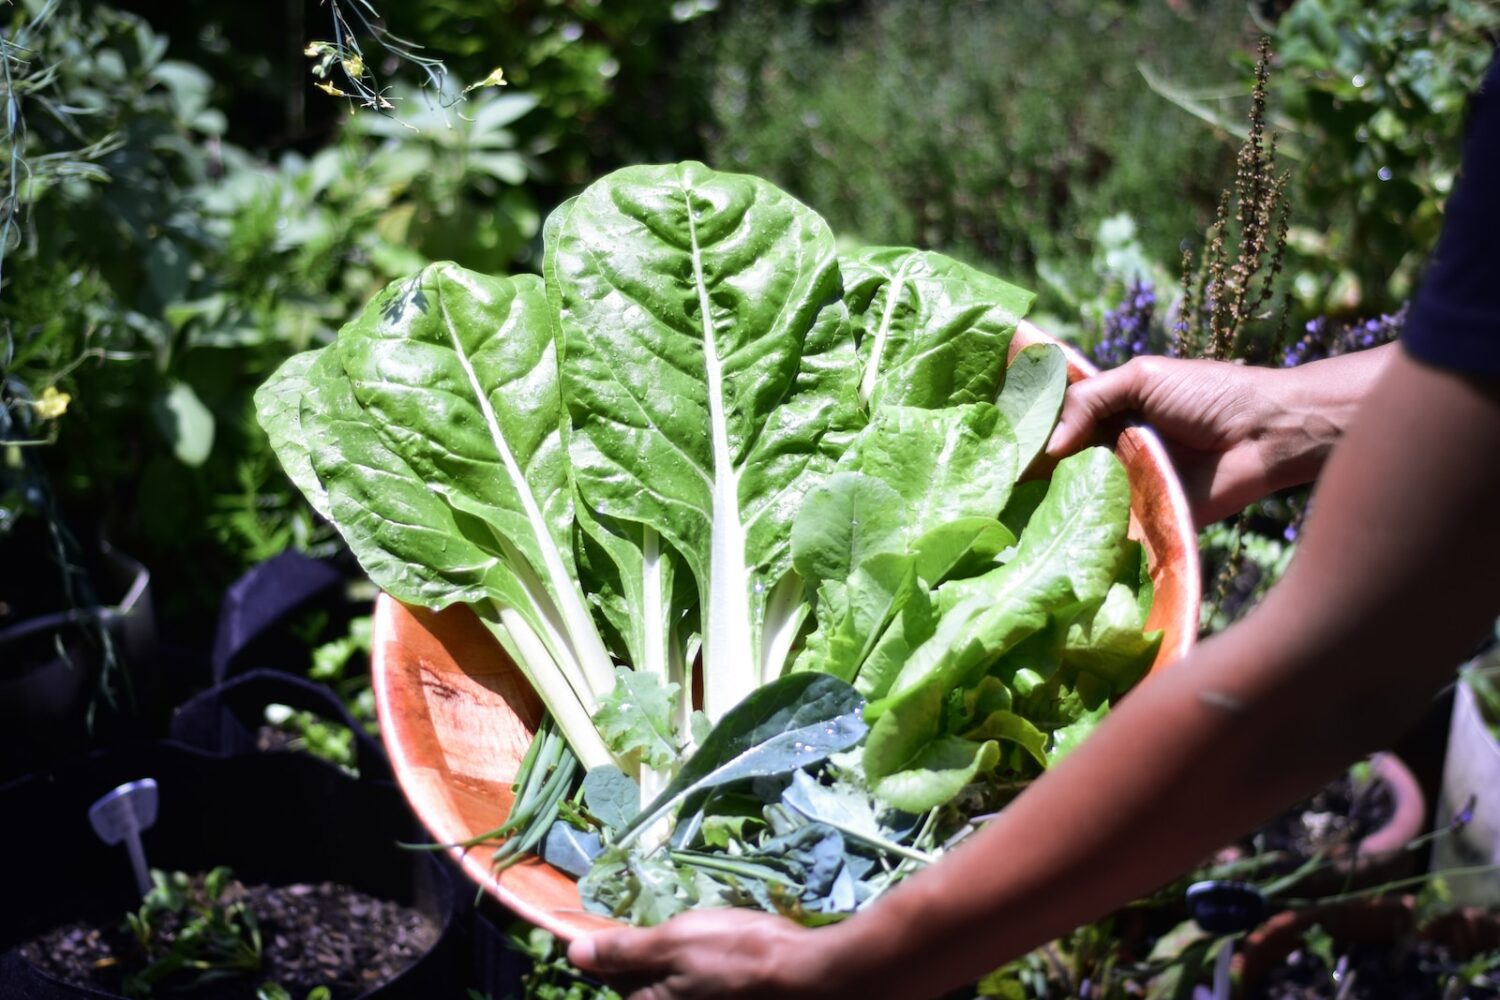
Posted on

Native American Gardening: The Three Sisters

corn

Why the Three Sisters Still Matter

The Three Sisters are corn, beans, and squash. They grow together. They support each other. They feed us well. This is an old method from many Native nations. It is simple. It is strong. It still works today.

We can learn a lot from it. We learn how plants can be friends. We learn how soil can stay rich. We learn how to work with nature, not against it. In other words, this is more than a way to plant. It is a way to care.

When we plant the Sisters, we join a living story. We honor the people who kept that story alive. We also make our own garden better. Let’s walk through it step by step. We will plan. We will plant. We will tend. We will harvest. And we will eat well, together.

The Wisdom in the Three

Each Sister has a job. Each job matters.

  • Corn stands tall. It acts like a pole. It lifts the beans up to the sun.
  • Beans climb the corn. Their roots fix nitrogen. That is plant food. It feeds the whole bed.
  • Squash sprawls wide. Its big leaves shade the soil. That keeps water in. It blocks weeds. It protects the roots.

Together, they do even more. The mix slows pests. It invites many helpful insects. It softens wind. It breaks hard rain. It keeps soil covered, instead of bare. In other words, they build a living shield.

The Sisters also make a strong meal. Corn gives complex carbs. Beans add protein. Squash brings vitamins and fiber. When we eat them together, we get balance. We get energy that lasts.

Honoring Roots and Respect

This method comes from Native peoples across many regions. The names, stories, and steps can change from place to place. But the core idea stays the same. Grow plants as a family. Let each plant help the others.

We show respect by learning with care. We name the source. We avoid acting like we invented it. We give thanks. Most of all, we try to garden in a way that protects life. The sisters are about care. The sisters are about sharing. We can live that message in our own yard.

Planning Your Three Sisters Bed

Good planning makes a smooth season. Here is how we set up the space so the Sisters can do their best.

Find Sun and Shelter

Pick a spot with full sun. Aim for 6 to 8 hours a day. If wind is strong where you live, add a windbreak on the west or north side. A fence, a row of sunflowers, or a hedge can do the job. This helps the corn stay upright.

Choose the Size

You can start small or go big.

  • Small bed: one or two mounds with 4–6 corn plants each.
  • Medium bed: four to six mounds set in a grid.
  • Large bed: several short rows of mounds, with a path in between for care and harvest.

A mound is a raised circle of soil. It warms fast. It drains well. It also keeps roots from sitting in water.

Prepare the Soil

Add a lot of compost. Mix it into the top 6–8 inches. If soil is heavy clay, add coarse sand and compost. If soil is very light, add compost and some aged manure. We want soil that holds water but still drains. We want a crumbly feel. A pH around neutral is fine.

Do not overdo the nitrogen before planting. Too much nitrogen makes the corn tall and leafy but weak. The beans will add nitrogen later, in a steady way.

Plan the Layout

The classic layout uses mounds. Here is a simple plan:

  • Make mounds 24–36 inches wide.
  • Space mounds 3–4 feet apart.
  • Place pathways so you can reach each mound from all sides.

In each mound, corn goes in the center. Beans go around the corn, but not too close. Squash goes at the edges of the mound. The vines will run between mounds and fill the paths. Instead of wasting space, we create shade for the soil.

Choosing Your Sisters

Variety choice matters. Some types fit better than others.

Corn

Pick a tall, sturdy corn. Many gardeners use flint, flour, or dent types for dry grain. You can also grow sweet corn if you will pick it fresh. The key is strength. Ears should not be too heavy for the stalk. If wind is common, avoid the very tallest types and plant in blocks.

Beans

Choose pole beans, not bush beans. Pole beans climb the corn and keep producing all season. You can pick snap beans to eat fresh. Or you can grow dry beans for storage. Some heirloom beans are bred to climb corn well. They wrap gently and do not choke the stalk.

Squash

Select a vining squash, not a bush type. Winter squash run long and shade the soil. Pumpkins, acorn, Hubbard, and other vining types do well. You can also use vining summer squash if space is tight. But winter squash store better, so they fit the “grow and keep” goal.

Regional Friends

In some places, gardeners add a “fourth sister,” like sunflower or bee balm. Sunflower can act as a windbreak. Bee balm draws pollinators. In drier regions, some people plant amaranth with the Sisters. These choices depend on climate and tradition. Use what suits your place.

When and How to Plant

Timing matters. The order matters. Plant in stages so the corn can lead and the beans can follow.

Step 1: Shape the Mounds

After the last frost, shape your mounds. Add compost. Water them well and let them settle for a few days. This gives a firm base for seeds.

Step 2: Plant the Corn

Plant 4–6 corn seeds in each mound, in a small circle. Set the seeds about 1 inch deep. Space them 6–8 inches apart. Water gently. When the seedlings are 2–3 inches tall, thin to the strongest 3–4 plants per mound. Do not pull the extras; cut them at the base so you do not disturb roots.

Step 3: Wait for Corn to Lead

Let the corn grow to 6 inches tall. This is key. If beans go in too soon, they can pull the corn down. We want the corn to get a head start. In other words, patience now will save trouble later.

Step 4: Plant the Beans

When the corn is 6 inches tall, plant 4–6 bean seeds around the corn, about 6 inches away from the stalks. Place the seeds evenly in a circle. Plant 1 inch deep. Water well. As the vines rise, guide them toward the corn with your fingers. They will find the stalks and climb.

Step 5: Plant the Squash

Plant squash at the outer rim of each mound, two to three seeds per spot, on two sides of the mound. Space these spots so vines can run between mounds. Plant seeds 1 inch deep. Thin to one strong plant per spot when true leaves appear.

Spacing at a Glance

  • Mounds: 3–4 feet apart
  • Corn per mound: 3–4 plants
  • Bean seeds: 4–6 per mound, 6 inches from corn
  • Squash plants: 1–2 per mound, at the outer edge

Water, Mulch, and Care

Watering

Keep soil evenly moist. Corn needs steady water as it rises and as ears fill. Beans need moisture to set pods. Squash needs water to keep big leaves strong. Water at the base. Avoid soaking leaves. Deep, slow watering is better than quick, light sprays.

Mulching

Mulch helps a lot. After the soil warms, lay straw, leaves, or grass clippings around the mounds. Keep mulch a few inches away from the corn stems. Mulch keeps the soil cool and moist. It also feeds the soil as it breaks down. Instead of bare earth, we keep a living blanket on the ground.

Feeding

If your soil was poor at the start, side-dress with compost when the corn is knee-high. You can also use a light fish or seaweed tea every few weeks. Go easy. Beans add nitrogen. Too much extra food can make the corn tall but weak.

Weeding

Weeds will try to move in early. Hand-weed while plants are small. Once squash fills the gaps, weeds fade. The shade does the work for you.

Pollination and Wind

Corn is wind-pollinated. That is why we plant in blocks or grouped mounds, not in one long line. When tassels open, a soft breeze will drop pollen onto the silks. If you get poor pollination, tap the stalks at midday to shake loose pollen.

Strong winds can lodge (bend) corn. Plant in a place with some shelter. A short fence or a line of sunflowers can help. If a stalk leans after a storm, press soil against the base to brace it.

Pests and Simple Fixes

Corn Earworm

Pinch or clip a tiny bit off the silk tips after pollination. You can also slip on a paper bag to shield the tip. Harvest at the right time and cook soon.

Bean Beetles

Check leaves often. Hand-pick beetles and scrape off yellow egg clusters. Encourage lady beetles and other helpers by keeping flowers nearby.

Squash Vine Borer

Use row cover early, and remove it when flowers open. Check stems for sawdust-like frass. If you see it, slit the stem gently, remove the borer, and mound soil over the wound to help the plant root again.

Powdery Mildew on Squash

Good airflow helps. Water at the base, not on leaves. Remove the worst leaves to slow spread. Plant resistant varieties when you can.

Troubleshooting the Mix

  • Corn falls over: The bean vines may be too heavy or the soil too loose. Thin bean vines, hill soil at the corn base, and add a windbreak next time.
  • Beans do not climb: Guide them by hand. If corn stalks are very smooth, a rough string between stalks can give a grip.
  • Squash smothers beans: Use fewer squash plants and train vines down the paths. You can also tuck leaves back to free bean pods.
  • Poor corn ears: This may be drought or weak pollination. Water more during tasseling. Plant in blocks so pollen spreads well next time.
  • Slow growth: Soil may be cold. Wait for warmer days before planting next season. In cool areas, black mulch can warm the soil early.

Harvest and Storage

Corn

For sweet corn, pick when silks are brown and dry and kernels press to milky juice. Cook soon after picking. For dry corn, wait until husks turn papery and ears are hard. Dry the ears in a warm, airy place. Shell and store in jars.

Beans

Pick snap beans when pods are long and crisp. Keep picking to keep vines producing. For dry beans, wait until pods turn tan and rattle. Harvest when dry weather is set. Shell and store in a cool, dry place.

Squash

Harvest winter squash when the rind is hard and the stem is dry on the plant. Leave a short stem on each fruit. Cure in a warm, dry spot for 10–14 days. Then store in a cool room with airflow. Many winter squash keep for months.

Cooking with the Sisters

The Sisters make many good meals. We can cook simply and eat well.

  • Succotash: sweet corn, beans, and squash in a single pot. Add onions, herbs, and a bit of butter or oil.
  • Skillet hash: corn off the cob, sliced summer squash, and snap beans sautéed until tender.
  • Roasted winter squash: serve with a pot of beans and fresh corn bread.
  • Stew: dry beans, diced winter squash, and cornmeal dumplings for a warm bowl.

The flavors are simple and rich. The meals are filling. After more than a few tries, you will learn your own favorite way.

Seed Saving Basics

Saving seed keeps the story going.

  • Corn: Space different corn types far apart to avoid cross-pollination. Pick ears from the best plants. Dry well. Store in a sealed jar.
  • Beans: These are easy to save. Let pods dry on the plant. Shell and store.
  • Squash: Save seeds from a fully ripe fruit. Rinse and dry the seeds on a plate. Note that squash can cross with other squash in the same species. If you want pure seed, grow one type at a time or hand-pollinate and bag the flowers.

Label your jars with the variety and the year. Test germination next spring by sprouting a few seeds on a damp paper towel.

Small Spaces and Creative Twists

You do not need a huge yard. We can adapt.

  • Teepee tripod: plant three to four corn stalks as a small cluster. Add beans around them. Plant a single squash at the base.
  • Raised beds: keep the classic mound idea, but inside a tidy frame. Train squash to run down the aisle.
  • Containers: use a deep tub for corn and beans and a second tub for a compact vining squash. Water more often.
  • Fence edge: plant a short block of corn near a sunny fence. Use the fence to guide beans if wind is strong.

Instead of saying “I can’t,” try a small patch. Even one mound teaches a lot.

Climate Tips

Cool, Short Seasons

Start corn indoors in paper pots 2–3 weeks before last frost. Transplant gently to avoid root shock. Use early corn and fast pole beans. Black mulch can warm the soil. Pick a smaller, faster vining squash.

Hot, Dry Regions

Plant a bit deeper to reach moisture. Mulch thick. Consider a drought-tough corn and beans known to thrive in heat. Use a squash with thick leaves and strong vines. A light shade cloth over young plants can help during a heat wave.

Humid Areas

Give more space between mounds for airflow. Thin vines to prevent mildew. Water early in the day. Choose disease-resistant types when you can.

Soil Health for the Long Run

The Sisters keep soil covered and fed. But we can do more.

  • Add compost every year.
  • Grow a cover crop in fall, like clover or rye, and cut it in spring.
  • Avoid heavy tilling. Too much till breaks soil life.
  • Keep living roots in the ground as long as you can.

In other words, treat soil like a living thing. Feed it. Protect it. It will take care of you.

Teaching and Community

The Sisters make a great school. Kids can see how plants help each other. They learn patience. They learn to share space. They taste food they grew. That is a powerful lesson.

Community gardens can use the Sisters to fill a bed with food and beauty. The vines spill over the paths. The corn tassels shine in late light. The bean flowers bring bees. It is a joyful mix. It invites people to stop and ask, “What is growing here?” Then the story begins.

Cleaning Up After Harvest

When the season ends, we still have work to do.

  • Cut the corn stalks at the soil line. Leave the roots to rot and feed the soil.
  • Chop the vines and leave them as mulch, unless pests were heavy. If pests were heavy, compost in a hot pile or bag and remove.
  • Spread a layer of compost and a fall mulch.
  • Sow a cover crop if the season allows.

This sets the bed up for next year. After more than one season, you will feel the soil get richer under your hands.

A Yearly Planting Calendar (Simple Guide)

Dates vary by place, but this rough guide helps.

  • Early spring: add compost and shape mounds.
  • Late spring (after frost): plant corn.
  • 2–3 weeks later: plant beans when corn is 6 inches tall.
  • Same week as beans: plant squash at mound edges.
  • Early summer: mulch and weed.
  • Mid to late summer: harvest snap beans and sweet corn; keep watering.
  • Late summer to fall: harvest dry beans and winter squash; cure squash.
  • Fall: clean up, add compost, and sow a cover crop.

Why This Method Endures

The Three Sisters last because they work. They match plant needs with plant gifts. They give us good food and strong soil. They turn a bed into a small community. We learn to see links, not parts. We learn to watch and adjust. We learn to share the work with the plants themselves.

Instead of pushing nature, we cooperate. Instead of blank rows, we make a living weave. But most of all, we join a tradition of care and respect. That matters in the garden. It also matters beyond the garden.

Your First Planting Plan (Action Steps)

Let’s turn this into action. Here is a quick plan you can follow.

  1. Pick a sunny spot with some wind protection.
  2. Build 2–4 mounds, 24–36 inches across, 3–4 feet apart.
  3. Mix in compost. Water and settle the mounds.
  4. Plant 4–6 corn seeds per mound. Thin to 3–4 strong plants.
  5. When corn is 6 inches tall, plant 4–6 pole bean seeds around each mound, 6 inches from the corn.
  6. Plant 1–2 vining squash plants at the outer edge of each mound.
  7. Mulch once the soil warms. Water deeply each week.
  8. Guide bean vines onto corn by hand.
  9. Side-dress with compost when corn is knee-high.
  10. Harvest in stages: snap beans first, sweet corn next, then dry beans and winter squash.
  11. Cure squash, shell dry beans, and store.
  12. Save some seed for next year if you can.

In other words, start small. Learn. Adjust. Grow with the Sisters.

Common Questions You May Think About (Answered in Practice)

  • Do I need fertilizer? Compost plus the beans’ nitrogen is often enough. If leaves look pale, add a light, natural feed.
  • Can I plant all three at once? Wait for corn to lead. Staging is key to balance.
  • What if I only have room for two? Try corn and beans as a pair, and mulch well. Or beans and squash if you have a sturdy trellis.
  • Can I grow sweet corn and dry beans together? Yes. Just time harvests and pick your types with care.

These answers come from practice. Your garden will teach you more.

Caring Hands, Living Story

We plant the Three Sisters with respect and hope. We use simple tools. We watch the weather. We listen to the plants. We keep learning.

This is old wisdom, but it feels fresh in our hands. It makes healthy food. It brings life to the soil. It invites birds, bees, and neighbors. It even slows us down in a good way.

So let us begin. One mound is enough to start. Soon, the corn will rise. The beans will climb. The squash will run. And we will stand in the middle of it all, smiling, because we are part of the story.

Hands in Soil, Stories Alive

Native American Gardening: The Three Sisters
Posted on

Grow Your Own Italian Herb Garden

Italian herb garden

7 Essential Italian Herbs

There are seven amazing herbs in an Italian herb garden that gives most Italian cuisine its rich, scrumptious flavors. I haven’t met anyone who doesn’t cook Italian dishes at home. Don’t you agree that it’s more practical and convenient to grow these plants in your garden so you’ll always have a flavorful and fresh supply every time you need to cook tasty Italian meals?

Do you know that the most popular and the tastiest dishes come from Italy because they use herbs from their Italian herb garden? In fact, records in the culinary industry show that some of the best dishes in the world come from Italy.

Italian herb garden

Let’s go over the 7 essential herbs found in an Italian herb garden, and their uses and benefits:
1. Basil is one of the most commonly used herbs. It is said that its distinct flavor is the soul of Italian cuisine. It is also beneficial to your garden — If you plant Basil with tomatoes and peppers, it will help improve the flavor of these plants. Basil is also a known repellent to mosquitoes and flies. Grow it with thyme, as they make a perfect pair, growing together.

2. Parsley is known in the culinary industry as an excellent flavoring too. In ancient times, many people use Parsley as breath mints. Very nutritious, eating parsley raw also helps eradicate bad breath. This is why parsley is used as a wonderful garnish.

3. Oregano on the other hand is used as decorative and has a distinct flavor that can complement many meals. This herb delivers the best flavor when harvested as soon as its beautiful purple flowers start to bloom. It also has great medicinal properties, and is widely used as an effective anti-oxidant, anti-fungal, as a digestive aid, and for relieving pain and inflammation.

4. Fennel is another great Italian herb that is used in making Italian sausages. This perennial plant should be replanted and divided every two to three years, because it loses its flavor when it reaches maturity. Fennel leaves are used in soups, condiments and sauces, and its oil is used to flavor candy, liqueurs, medicine and fish. It is used to make soaps too!

5. Another perennial plant that is noted for its numerous culinary contributions is Rosemary. It is very sensitive to frost and is known to attract bees. It’s a kind of shrub herb plant with color blue flowers. Use it as a gorgeous ornamental plant or as a welcome culinary flavoring.

6. Garlic is one of the most popular herbs in any garden and is a basic ingredient in many Italian dishes. I’m sure of one thing – if you don’t grow garlic in your garden, it cannot be considered as an Italian garden! Garlic can thrive with very little attention. Once harvested, they can be pickled, frozen, or stored in the fridge for future use.

7. Sage is a popular herb that graces countless Italian recipes, ranging from meats to salads. If you want to grow sage, I suggest that you keep your plants well trimmed so that you can take advantage of the new shoots – the most delicious plant part. Harvest these plants after they have bloomed. Sage is also known for its health benefits – it is a great memory enhancer, has anti-inflammatory properties and acts as a powerful antioxidant too!

There are other herbs that can serve as a nice addition to your Italian herb garden but starting off with these 7 essential herbs is a great idea since they are used in a wide variety of recipes.

The Benefits of Adding Organic Matter and Compost to Your Soil

If you want your garden to be healthy and productive, it’s important to start with healthy soil. One of the best ways to improve the quality of your soil is by adding organic matter and compost. Here’s a look at some of the benefits of adding organic matter and compost to your soil.

Improved Nutrient Content

Organic matter and compost help to improve the nutrient content of your soil. This is because they add essential nutrients, such as nitrogen, phosphorus, and potassium, which are vital for plant growth. Adding organic matter and compost to your soil can also help to improve the overall structure of your soil, making it more loose and easy for plant roots to penetrate.

Improved Water Retention

One of the biggest benefits of adding organic matter and compost to your soil is improved water retention. This is because organic matter helps to hold water in the soil, making it available for plants to use when they need it most. This is especially beneficial during times of drought or extended periods of dry weather.

Increased Soil Fertility

Adding organic matter and compost to your soil can also help to increase its fertility. This is because organic matter helps to promote the growth of beneficial microorganisms in the soil, which can help improve plant growth. Additionally, organic matter and compost can help add essential nutrients back into the soil that may have been depleted by previous crops.

As you can see, there are many benefits to adding organic matter and compost to your soil. If you want your garden to be healthy and productive, be sure to add these important ingredients!

How to Plant and Care for Your Italian Herbs

Growing your own Italian herbs can be a rewarding experience. Not only do you get to enjoy the delicious results of your labor, but you also get to control how your herbs are grown and cared for. Here are a few tips on how to get started.

Choose the Right Location

Herbs need plenty of sunlight to grow, so choose a spot in your yard or on your windowsill that gets at least six hours of direct sunlight each day. Once you’ve found the perfect spot, it’s time to prepare the soil.

Prepare the Soil

Herbs thrive in well-drained soil, so be sure to loosen the soil and remove any rocks or debris before planting. You can also improve drainage by mixing in some sand or organic matter. Once your soil is ready, it’s time to plant!

Plant Your Italian Herbs

When planting your herbs, be sure to give them plenty of space to grow. If you’re planting multiple herbs in one container, make sure each herb has its own individual pot. Once you’ve planted your herbs, water them regularly and fertilize them every two weeks with an all-purpose fertilizer.

With a little care and attention, your herbs will thrive! Remember to choose a sunny location, prepare the soil before planting, and water and fertilize regularly. With these tips, you’ll be enjoying fresh herbs in no time!

The Best Time to Harvest Herbs

Do you love the taste of fresh Italian herbs in your cooking? Growing your own herbs is a great way to have them on hand whenever you need them. But when is the best time to harvest them? Read on to find out!

Harvest the herbs when they are mature, but before they flower. This will give you the best flavor. Most herbs are ready to harvest 4-6 weeks after planting.

To dry your herbs, tie them in small bundles and hang them upside down in a dark, dry place. Or, lay them out on a screen or paper towels in a single layer and set them in a warm, dry place out of direct sunlight. Once they’re dried, store them in an airtight container in a cool, dark place.

If you want to freeze your herbs, wash and dry them thoroughly. Chop them finely and then put them into ice cube trays or freezer bags, pressing out as much air as possible before sealing. Label and date the containers, and then store them in the freezer for up to 6 months.

Now that you know when to harvest your Italian herbs, get out there and start picking! Fresh (or frozen) herbs can really take your cooking to the next level. Bon appƒÂ©tit!

Posted on

Outdoor Planter Boxes for Highlighting The Landscape

Outdoor planter boxes can be used for highlighting a landscape, garden, patio, balcony and the inside of your home. Outdoor planter boxes are generally used in a container garden to grow flowers, vegetables, or herbs. Most of these containers are constructed of weather resistant materials that will withstand the outdoor elements.

https://www.youtube.com/watch?v=-I6I0Q6Kp3k

Wood outdoor garden boxes that hold up to outdoor conditions are mostly made of redwood, cedar, or teak. You can find them in different shapes and sizes and can be used almost anywhere particularly a rustic outdoor setting. Many raised beds are constructed of these in the natural state or they can be painted to match any area of your garden. Raised beds are convenient for gardeners with knee or back problems and they are excellent for drainage.

PVC is a very durable material used in the construction of planter boxes. They sometimes give the appearance of beautiful wood or clay and you cannot tell the difference until pick one up and realize it is PVC. They are inexpensive lightweight containers that will last through many seasons of harsh weather and they do not need very much care. Some of these containers are so beautiful and self-watering they can be used on a front porch or door step to enhance the landscape in front of your house. Clay planter boxes are good for your plants health but the soil will dry out much quicker than other planters. They can be very heavy and are fragile so are best if used in a location where you do not have to move them around. They are also available in various sizes, shapes, and styles; you may even find some to match some of your outdoor yard decorations.

Some outdoor planter boxes are constructed of metal and are quite common. Some have decorative feet to lift them off the ground for drainage. Some may come with an inner lining or you can use a plastic liner for protection. You can find many window-boxes that are constructed of metal and are self-watering. Hanging planters are also classified as planter boxes for planting flowers that drape or hang over the side. Hanging planters can be hung from house eaves or patio covers and are available as self-watering.

Almost anything can be used as a planter box for growing vegetables, herbs, or flowers. You just need to find one large enough to handle the root system of what you intend to plant such as plastic milk containers, bushel baskets, large pressed fiber pots or even an old wheel barrow. If you want to plant tomatoes the container should be very deep but to plant radishes you only need about a 6-inch deep container. The larger the container and the more soil used will give the roots more room to spread and less watering on the gardeners’ part.

Be sure the containers you use have ample holes for drainage; they can be on the bottom or on the sides. The excess water needs to drain out so the roots do not get waterlogged. Most large containers have the holes on the bottom so elevating them on blocks or bricks will give the water a place to go. The larger the container the more drainage holes it will need. A well-aerated soil will not need any stones in the bottom because you want as much room as possible for the roots of the plant.

You need to check your containers a couple times a day, especially during the hotter days of summer, for moisture if you do not have self-watering planters or are not using a drip watering system. Your large containers can use a layer of mulch to help retain some of the moisture. You need to use outside water that has not been through a water softener; the salts used in a softener can be toxic to your plants. Collected rainwater is the best and cheapest water that can be used for your outdoor planter boxes.

Posted on

Garden Shrubs for Different Seasons of the Year

Shrubs are a useful asset to any garden. They add height and architectural interest. Evergreen shrubs added to herbaceous borders can give substance to a border and hold interest during winter months when most perennials die down. For the most part they are hardy and easy to maintain, requiring little pruning, and long lived. Here is a guide to a few of my favorite shrubs which will add interest to a garden at different times of the year.

Shrubs for a winter garden

Hamamelis or Witch Hazel has to be a favorite to add winter interest to any garden. It is a winter flowering shrub with spidery flowers and a spicy scent. Flowers come in shades of yellow, orange and reds. Witch Hazel will thrive in any garden but an open sunny position is best. It is quite a large shrub and can grow up to 4m in height. They require little pruning, especially if you have the room to let them grow to their full potential. Just remove any dead or diseased wood. They also have few problems with disease, but look out for honey fungus and vine weevil larvae amongst those grown in containers. Particularly good varieties include Hamamelis x intermedia ‘Barmstedt Gold’ with bright yellow flowers and Hamamelis x intermedia ‘Diane’ with its rich red spidery flowers.

Daphne is one of the best shrubs you can buy for winter scent. It flowers in January/February and has scented pink or white flowers. This shrub is very hardy and can grow up to 2m in height. They grow very well in borders and also in semi-woodland areas. Place them near to paths where their fragrance can be easily enjoyed. But beware, once planted they do not like to be moved. Daphne prefers a well-drained lime-free soil in a sunny spot, although it will tolerate semi-shade. They have few problems, but watch out for aphids and leaf spot. Two lovely varieties include Daphne bholua which has high scent pinkish white flowers, and Daphne odora ‘Aureomarginata’ which has pretty evergreen leaves and fragrant white flowers.

There are some shrubby climbers you can buy to add winter color to deciduous trees. Lonicera standishii ‘Budapest’ is one such example. Semi-evergreen this shrubby honeysuckle has many scented pink-tinged white flowers in mid-winter, followed by red berries. It will grow up to 2m in height and prefers a sheltered position.

Shrubs for spring

Camellias are probably one of the most popular shrubs for early spring flowers. They can be problematic as they need acidic soil, but they can easily be grown in containers in the right compost. Because Camellias are native woodland plants, they grow best in shade or semi-shade. They prefer free-draining conditions with plenty of organic matter and can grow up to 3m in height. Perhaps the main problem for Camellias is frost which can damage flowers. A Good variety is Camellia x williamsii ‘Saint Ewe’ which has rose-pink flowers from January to April and seems to be quite resistant to frost. Azaleas are beautiful spring flowering shrubs. Growing in sun or shade in well-drained soil, varieties can grow up to 15ft and have flowers ranging from white to deep purple/pink. Azalea ‘Adonis’ has gorgeous white flowers in May and grows up to 75cm. Azalea ‘Aladdin’ also flowers in May but has strong red flowers. You just can’t ignore the gorgeous yellow flowers of Forsythia in early spring. It can be grown as a stand-alone specimen or as part of a border and is a useful shrub for hedging. It likes moist but well-drained soil but will grow well anywhere. Forsythia x intermedia ‘Spectabilis’ is a vigorous variety which has deep yellow flowers from mid to late spring and grows up to 300cm in height. Kerria Japonica or Japanese Yellow Rose is another spring flowering shrub with sunny yellow flowers. Varieties can have either single or double flowers. It is suitable for a border or a woodland garden and grows to around 2m in height. Pieris Japonica is an all-year-round shrub, with attractive foliage in summer and slightly fragrant clusters of bell-shaped white, pink or red flowers in early spring. They can be grown in a shrub border but are just as at home in garden planters. ‘Mountain Fire’ has particularly attractive glossy red leaves.

Summer flowering shrubs

Hydrangea is a deciduous shrub that can suit any type of garden. There are many varieties that are divided up into two main groups. ‘Lacecaps’ that have flattened flower heads, and ‘Hortensias’ that have spherical flower heads of large flowers. Flower colors range from pinks to blues. He more acidic the soil, the bluer the flower will be. Hydrangea paniculata ‘Limelight’ is a spectacular variety, with large conical blooms from July to September which open in a soft shade of pea green and gradually change to cream and finally a delicate soft pink as they mature. It will grow to up to 250cm. Hibiscus syriacus, also called Rose of Sharon, is a deciduous flowering shrub that can reach a height of around 4m. It likes very warm conditions in full sun where it displays an abundance of attractive white, pink, red, lavender, or purple flowers. It is an easy plant to grow as it develops quickly once planted and doesn’t mind being moved. Buddleja’s are also very easy to grow. They like well drained soil and plenty of sunshine. Their flowers of pink to blue/purple provide a summer spectacle in August when they are covered in butterflies which feed on their nectar. They do require hard pruning in spring to encourage plenty of new growth. ‘Pink Delight’ has conical spikes of claret buds opening to produce lovely, orange-eyed flowers in a strong pink.

Shrubs for autumn interest

Euonymus can be deciduous or evergreen shrubs or small trees, often with fine autumn color. The leaves of Euonymus alatus turn a beautiful rosy-crimson in autumn. It is very hardy and grows up to 2.5m in height and spread. Cotinus or Smoke Tree is a true delight. They are large deciduous shrubs or small trees whose leaves produce wonderful autumn color from yellow to deep reds. Very hardy, they have a bushy habit and can grow up to 8m in height. Berberis can also be large deciduous shrubs or small trees with spiny shoots bearing tiny leaves. Berberis thunbergii has leaves that turn a deep orange/red in autumn followed by red fruit. It has an ultimate height and spread of around 1.5m and is therefore suitable form most gardens.

Posted on

Simple Ways to Take Care of the Flower Garden

Flower gardens are extremely wonderful to look at. More so if you are the one who is taking care of the flower garden – it will truly be one relaxing experience to see all your hard work in full bloom.

So, for those who have tried in vain to get their flower garden in tip-top shape might want to follow some of these simple rules:

First things first, remember that to able to give great care to your flower garden, it must get the basics. Sunlight, water and a good soil are the most essential components to get nice blooms. A plant would need around six hours of sunlight each day and regular watering. A good soil can be maintained by adding fertilizer from time to time.

Second, you can mix up your garden. Perennials are the types of plants that can last for more than two seasons while annuals can last up to a single season only. Mixing them up in your garden would assure you that you have some blooms to wait for each time.

Third, deadheading is also important. Flowers need to be trimmed when they wither. This will encourage more flowers to bloom and besides, dead flowers will not make your garden attractive. Also, make sure that you do not leave the trimmings in your flower garden as it can attract insects or may cause diseases to your plants.

Fourth, harmful bugs are different from the helpful ones. There are many types of insects that you should encourage into your flower garden. There are those that help decompose the soil and thus provide nutrients to the plants in your garden. There are also other insects that feed off on the smaller insects that could destroy your plants. Also, insects like butterflies and bees help in spreading pollen of one plant to another. They also make great additional accessories and can make your garden look more colorful and lively.

It is not very hard to take care of the flower garden. The basics and a little pampering once in awhile is all it takes to ensure that they keep producing wonderful blooms for your eyes to watch in awe.

Posted on

Garden Decor Ideas That You Cannot Get Enough Of

With most of us living in concrete jungles, having a garden in your home can be considered nothing short of lucky! From a small flowerbed to a large lush green space, there is a lot you can do with your garden that helps put your own personal stamp on it. From installing garden ornaments to adding outdoor lighting, you are only limited by your imagination.

https://www.youtube.com/watch?v=zbeqLA-AD8Q

Plants of various colors and shapes add to the beauty of your garden. Think green holly, ivy or fuchsia. Consider enhancing the place further by creating live ornaments from plants. Prune them into columns and craft hedges that have everyone in awe. In fact you can enhance the look of the garden by creating an archway with plants such as draped wisteria vines. Alternately consider flanking the garden gates with bougainvillea. There will be many people wanting to get a sneak peek into this haven!

You could also consider a whole lot of other ornaments as a garden decor idea. A wrought-iron gate, a lantern or an iron bell hung on a tree, a bench are great outdoor accessories that add to the appeal. You can also repurpose old items such as those metal watering cans that make for lovely planters or those antique dresser drawers that add oodles of style. Pro tip-Ensure that all the decor elements are subtly placed though, so the garden doesn’t look too contrived or overdone.

Add charm to regular terracotta pots by doing them up in vibrant paint. You can also create a mosaic on those pots with broken ceramic pieces. They add loads of color and texture to your garden. If you run out of space, you can also look at creating a vertical garden with spray painted cans hung on a fence with lovely blooms.

Give your creativity free reign as you think of the garden furniture. You can turn a workbench into a place to display greenery as also a great venue for those potluck parties. Opt for a small table that adds a dash of color with a corner flower vase and just enough space to enjoy that morning cuppa.
Outdoor lighting is another aspect that lends oodles of style to your garden. Go in for those bistro lights and savor their warm glow. Alternately you can also hang outdoor lanterns or those spring lights. The romance that they add to the garden is indescribable.

With a garden as charming as this, you certainly would want some privacy to be able to enjoy this calm haven. Opt for artificial plant wall coverings that are awfully easy to install and yet look like real foliage. That it is low on maintenance, is an added perk. You can also add to the charm with other artificial plant decor. Tree ferns and other colorful buds kept in beautiful pots create one enchanting space. Whoever said you need a green thumb to maintain a garden, hadn’t heard of these artificial plants.

Posted on

Choose The Right Outdoor Planters For Easy Gardening

Taking care of our plants and flowers is not very easy for most of us especially for those who have busy lifestyles. Gardening may be last in their priorities. So for those who love to garden but doesn’t have much time, the best way to take care of our plants is to choose the right planter boxes to use.

We usually put our plants on the ground or in ordinary pots. But using the right planter boxes can help a lot to make gardening easier for each one of us. Here are some factors that we should consider:

1. Durable materials. Outdoor planters should be made of durable materials so that it can withstand bad or strong weather conditions. Stone and fiberglass planters are just some of the durable planter boxes that are ideal for outdoor settings. Commercial planters are usually high in quality so their durability may be out of question.

2. Self-watering devices. Gardening would be easier for us if we choose outdoor planters that have self-watering devices. This will keep the plants and flowers moist for a long period of time. So this will reduce the number of times that we have to water them.

3. Size. Consider the size of the outdoor planter that you are going to use for your plants. Large planters may be necessary for trees or tall plants. Whereas small modern planters are ideal for your patio especially those that have beautiful designs.

4. Function. Planter boxes that have other functions other than being plant containers can be an added benefit for us. There are illuminated planters that can be a stylish source of light in our garden at night. They can also be an added protection for the plants so that they won’t be stepped on at the dark.

In this technologically-advanced world, it is now possible for everyone to maintain a beautiful garden at home. With the high quality and functional commercial planters, our plants and flowers will be well-taken cared of without taking much of our time. In addition to that, modern planters have excellent designs that can further enhance the beauty of our garden.

Posted on

How to Compost in the Garden

Raised bed garden

Starting Guide to Composting

When organic matter has finished decomposing the end result is compost. Although there are many types of organic matter such as manure, leaves, garden waste and kitchen scraps etc. although there are many types of composting organic matter will eventually do its job with or without you.

Composting does not have be a difficult task, most people can achieve quick results it’s just a matter of managing your time properly. If you want your compost to be ready faster then let’s get started.

To start we will use kitchen and garden waste. The only materials required at this time are a shovel or pitchfork. If you do not know where to build your compost pile there are compost bins or tumblers that you can use. In this case we will just use the ground but in the future a bin is more effective and keeps unwanted animals from your site.

Make sure that the compost is a safe distance from the house. All you need now are the ingredients. In the house you can start to collect kitchen scraps in a large coffee can or you may even use a large pail with a lid. You know when to take the scraps to your compost when you start to smell an odor. Make sure not to mix the compost too much, start out by mixing the compost once a week or less. This will speed up the process your compost needs to complete itself.

Try to obtain grass clippings and leaves for your compost. Leaves will provide carbon and your kitchen scraps will provide nitrogen. Try to stay away from scraps that are oily or greasy this will only attract unwanted pests. The best things for your compost are egg shells, coffee grinds, tea bags, bones and even hair. Many baseball diamonds have used hair to get their grass started. Undertake if possible a search for green manure if you can, if not regular steer manure will do.

When is the compost complete?

Once the organic matter has finished decomposing your will know by the texture and smell. When your compost has a strong odor your will know that it is not getting enough oxygen. If the end result smells woodsy or earthy then your compost is complete.

If you are concerned that you are using too much compost then stop worrying as your soil will never reject the amount that you use. The end result should be a proud yard, garden or plant you can enjoy.

Improving Soil with Compost

Soil modification is a key ingredient for how to start a garden. The content and texture of your soil is critical. To have a successful garden, you will need to have good soil. The best soil is not sandy, and it’s not too much like clay. It needs to be able to drain adequately, but hang on to enough moisture so that your plants don’t go thirsty. Too much sand and the water runs off, too much clay and you drown your plants. You may need to modify your soil before you start your garden.

If your soil sticks together, it’s too much like clay and you will need to amend it. If your soil is too sandy, meaning it won’t hardly stick together at all, you will also need to amend it. The way that you amend both kinds of soil is to add organic matter, or compost.

Luckily, organic matter is nothing more than plant or animal matter that is decomposing. The easiest way that you can add organic matter to your soil is to add compost or apply mulch. If you have a heavy clay like soil, it’s best to add manure, or green plant material since they break down more rapidly, instead of peat moss, straw or shredded bark, because they don’t break down as quickly. Even if you have good soil adding compost is always a good idea.

Adding compost to clay like soil makes it more pliable and improves its ability allow water to flow through. Sandy soil doesn’t have enough organic matter, so adding large amounts helps to give sandy soil a better ability to hold water. Large amounts of organic matter are likely to be needed to make your soil suitable. You will usually want to use a ratio of 2 to 1 compost to soil for it to be effective.

Air, water, minerals, and organic matter are all components of healthy soil. There are benefits of adding decomposed matter to good soil, in addition to compensating for poor soil like sand or clay, and that is it adds carbon, which promotes good bacteria growth, and it is more likely that you will have hearty plants.

You can’t have too much compost. In fact, you shouldn’t till your soil more than once or twice a year after you have worked in appropriate amounts of organic matter. This is because as the soil is turned, oxygen is added and it feeds the microbial activity that breaks down the organic matter. So if you don’t till it, it slows down the destruction of your organic matter.

If you invest the time to make sure you soil is healthy it will pay dividends when it comes to growing your garden.

Compost Bins

You can compost for nothing ( zero pounds / dollars) by piling your garden and food waste up in a corner. How do you decide whether to pay 20, 60, 140 or even 900 pounds (yes really!) for a compost bin? You ‘justify’ the cash by convincing yourself of the ‘value’. We show you how to do this by checking the composting features meet your needs at a price you can afford.

Sounds like hard work – why not just go online, look for a 5 star ratings and best price – job done. Almost all the online reviews look like this “arrived/did not arrive on time (score 1-5), it was easy/hard to set up (score 1-5). I’d let you know how it works! The all important bit is missing – few return 12 months to let you know if it worked and how well.

We can summarize the process of how do choose the ‘right compost bin’ or the ‘best compost bin’ for you into seven steps:

Step 1 – WHY – define your goals

Step 2- WHERE – review your available space and site for the bin

Step 3 – WHAT & WHEN – how much garden and food waste you produce

Step 4 – EFFORT – how much time and effort you are willing to invest

Step 5 – HOW – which method (ex. hot, cold, digesters, vermicompost) and which bin features are essential and which are nice to have (ex. low odor, no rats, no flies, handle all food waste, kills pathogens, kills weed seeds)?

Step 6 – CHECK – build a feature list

Step 7 – MATCH – which compost bin will deliver the best price / performance

Before we go any further, let’s consider your time and effort to read this article. You might have the time and interest in composting to fully research the topic – if so read the detail below), but many will just want a ‘fast track’ to help them make a quick decision with a degree of confidence that they are choosing a one that will work.

The fast track

Read between the lines of the vendor marketing hype (that’s the polite term!).

Seek user recommendations. Ignore the ‘arrived/did not arrive’ on time, ‘easy/hard’ to assemble. Look for reviews that state “It works, it does what it says, I have great compost out fast, worth every penny, best compost bin used in 20 years.

Validate vendor promises (ex. compost in 7-days). Look for detailed scientific study from reputable independent organization that supports the claim. Walk away if nothing.

Check vendor ability do they offer in-depth hands-on composting advice or just regurgitate the ‘list of things to compost’ that only applies to ‘cold’ composting? Look for advice that explains hot versus cold composting, how long it takes in each situation an why it differs when hot composting.

Look for vendors with ability in composting science & engineering. Composting obeys the laws of nature such as heat loss & cooling, rates/speed of biochemical reactions. You do not need to know about the science and engineering of composting – but I believe your compost bin vendor should.

For those who want to look into the detail, here is a little more depth around the seven steps to help you choose a compost bin

Step 1 – Consider your composting goals

Do you want to make lots of rich/great compost for your garden that will improve its fertility and cut down how much fertilizer and maybe even peat you use?

Do you just want to keep the garden tidy?

Do you want to make a more positive contribution to the environment by recycling all your food waste so your local council no longer has to collect and transport it to landfill?

Are you just fed up with allocating more and more of your flower or vegetable patch to overflowing compost bins that never seem to do anything?

What are your goals on sustainability, organic gardening, good use of limited resources.

Step 2 – Review your available space and site for the compost bin

Some compost bins need a certain site (ex. a sunny spot, or the opposite keep in the shade’, ‘only use on soil’, ‘do not use on clay soil’. You may have very little choice (ex. it needs to go on the concrete by the garage). Your site may limit your compost bin choice.

You might have a small garden and no space for a large compost bin, conversely you might have very large garden and taking 9 square feet for a traditional 3-bay compost bin system might pose no issues.

Do you want to the compost bin close to the kitchen so you can pop out easily in the rain to empty your food caddy?

Step 3 – Review the volume of garden and food waste you produce

Are you just going to compost seasonal garden waste (summer/autumn)

Do you want to compost grass cuttings (spring, summer, autumn)

Do you want to compost food waste – produced all year-round – ie compost through winter

How much of each type of waste do you have? In my experience, very few garden composters or food waste recyclers accurately know how many pounds of waste they produce. Very few want to record and measure it either. Choosing the right compost bin size is also further complicated as compost bins can (given the right conditions ‘hot compost’). Hot compost 32 times faster than a competitor bin that only facilitates ‘cold composting. So 5 gallons of waste a week in one bin would rapidly break down within a week, but in another bin build up over time and need a 100 gallon bin.

Step 4 – Consider if you want to ‘hot’ or ‘cold’ compost?

The headline benefits of ‘hot’ composting over ‘cold’ composting are:

  • Hot composting will destroy weed seeds – saving you time and effort in future
  • Hot composting will destroy dangerous bacteria – you can compost all food waste
  • Hot composting requires far less space to compost the same amount of waste
  • Hot composting requires dramatically less time (ex. 30 days Vs 360 days)
  • Hot composting works all year-round (cold heaps stop in winter below 5C)

Step 5 – How much time and effort you are willing to spend on composting

This is hard – everyone tends to answer – ‘none / minimal’. The more a vendor knows this is critical to your choice, the more pressure to use the term ‘easy’ and the bigger the potential expectation gap and likely hood of user disappointment. There is always some effort (ex. collecting food, turning, mixing, shredding). In our experience, it is easier when you follow simple steps. Investing the time to form habits is challenging – especially at the start when people perceive the habits are taking more time not saving time.

So, now you have a clear picture of what you want. Next, how do you check and match the compost bin against your composting goals?

Step 6 – Build a compost bin feature list

Build a feature list, find the top 10 commercial bins, score each feature, ignore those compost bins that do not fit your needs to produce a short list; then weight/score the remaining compost bins to find the best match.

Step 7 – Assess which compost bin will deliver the best price/performance

Score each compost bin against each feature to find the overall value for money score – the million dollar question!

Commercial Product managers do this kind of work as their day job – but it is likely very few composters, gardeners or food waste recyclers have the time or inclination to do this. Follow our link to the ‘compost bin competitive evaluation sheet’. You will find 12 widely available compost bins types and brands analyzed. You can play around with the scores and weighting to see which you think is best.

How To Improve Garden Soil Naturally

Healthy garden soil is teeming with life: there are earthworms and micro-organisms by the millions, each with a particular function in making soil fertile. Like any living thing, the soil must have food. Without food, the life in soil either leaves or dies. Eventually, the garden itself weakens and dies.

Soil life eats organic matter, decomposing it and creating a crucial soil element called humus. Humus is decayed organic material. The process of decomposition releases nutrients in forms that plants can absorb. In other words, decomposition of organic material has a fertilizing effect.

But fertility is only part of the value of regularly feeding the soil with organic material. Humus also contributes to the sponge-like soil texture that allows air circulation and moisture retention. Loam — the ideal soil for growing plants – is a balanced mixture of sand, clay, silt, and organic matter. Humus will bind sandy soil or loosen hard-packed clay.

For these beneficial results (for fertility and texture), the life in soil needs fresh food. Regular doses of organic material will ensure that garden dirt is enhanced rather than depleted over the lifetime of the garden. Every year, a 30 by 40 foot garden needs around 400 pounds (equivalent to 10 bales of hay) of organic material, but it doesn’t need to be added all at once.

Additions of organic material take a variety of forms. For starters, chop garden residues into the soil: weeds, mulch, and plants left after harvest. Hauling in compost by the yard from nurseries or hauling animal manures from nearby farms is also an option. But the easiest and most cost effective method of continuous additions of organic material is to grow cover crops, also known as green manures.

Cover crops are grown and tilled into the soil, replenishing rather than removing nutrients. Even in a small garden, this is an effective method when a harvest crop and a green manure are grown in rotation. For instance, plant a late summer green manure after an early crop such as peas or broccoli.

Some suggestions for cover crops include legumes, buckwheat, and rye grass.

Legumes such as peas and soybeans fix atmospheric nitrogen into the soil when inoculated seeds that attract certain micro-organisms are used. In addition, these legumes are vegetables, making a single planting both a harvest crop and a green manure.

For bulk and quick growth, rye grass or other annual grains are good choices. In colder climates these are especially good cover crops for the end of summer because they die over the winter and are easy to till in the spring. For the poorest soils, buckwheat is most useful.

Green manures can work with or without using powered equipment, but in larger gardens a rotor-tiller certainly makes the process easier. In smaller gardens, the question of whether it makes financial sense to invest in renting or buying a rotor-tiller has to be weighed against the cost of hauling in compost and animal manures.

Either way – hauling or tilling – some form of additional organic material beyond chopping in garden residues must happen in order for the soil to function and for the plants it supports to thrive.

Posted on

Creating and Planting a Beautiful Container Garden

Creating and Planting a Beautiful Container Garden

We all have a garden planter or two dotted around our gardens, perhaps filled with a specimen plant or a seasonal display. But there is a lot to be said for using containers as the design basis for creating a garden. Containers are probably one of the most versatile forms of gardening, allowing you not only to choose type of container but also the plant and its location. There are many advantages to container gardening. You can move your containers to different locations within your garden, thereby creating an instantly different effect. You can change planting displays as often as you like, perhaps making the most of the choice of different seasonal plants. You can also grow plants which like different soil types to your own by simply filling them with the right type of compost.

Types of Garden Planters and Containers

There are an ever increasing number of different types of container you can buy, with materials and designs to suit every climate and different tastes. Pots and tubs are probably the most popular type of planter available. They are for the most part versatile and easily moved to different positions in the garden. Pots and tubs come in an enormous variety of sizes and designs, both traditional and modern. Materials vary from moss covered terracotta and artificially aged stone planters, to reused car tires and fiber glass. There are no rules when it comes to choosing a type of container and there is no reason why you can’t combine traditional with modern. Just be aware that your designs and materials complement each other in some way.

Pots and tubs are equally as versatile when it comes to planting. You can grow almost anything you like in a container. Formally clipped box and other evergreens look stunning as focal points, as do specimen standard plants such as bay trees. Group a number of planters of different sizes together with a plant type such as herbs. A particularly stunning planter can be filled with seasonal annuals for an all year round display.

Window boxes are another great way to grow plants and enhance the appearance of your house and garden. Window boxes are particularly useful if you have a tiny garden or even if you have no garden at all! You can buy ready- made window boxes, have them made bespoke to your requirements or simply make your own. Window boxes don’t have to be made of wood. I have seen some beautifully aged metal ones as well as reconstituted stone ground-level boxes. Grow seasonal displays or plant up a box outside your kitchen window with herbs or easy to grow edibles like lettuce.

Hanging baskets are probably the most versatile of all containers. They can be hung on walls, fences and even in trees. Not only can your display be changed from season to season, but you can also grow edible plants such as tumbling tomatoes and strawberries and even a selection of herbs, hung near your kitchen door. Hanging baskets also come in a variety of shapes and sizes. More traditionally made from wicker, but I have seen some great modern alternatives made from brightly colored plastics.

Troughs and sinks can be used to create mini container gardens in one place. Although strictly speaking you can grow anything you like in a trough shaped planter, the lack of depth makes them more suited to growing alpines and herbs. Stone troughs probably look the best in any garden but why not also think about getting hold of an old Belfast sink which looks particularly effective when planted with herbs under a kitchen window.

Another type of container not readily thought about is the raised bed. Raised beds are a great way of growing both vegetables and garden plants. They are easy to maintain and therefore popular with gardeners with impaired mobility. They are also an easy way of adding structure to an otherwise flat garden space, lifting plants higher up and creating the illusion of different levels to a garden.

Some Container Planting Rules

If you are going to maintain a healthy container garden, there are a few rules you will need to follow whatever type of planter. Drainage is all important for container grown plants. Make sure your container has adequate drainage holes and always add some broken pot or crocks to the bottom of the planter to aid drainage. If your container is to be placed on a hard surface, sit it on some feet to raise it above ground level slightly. Use the right type of compost. Try not to overcrowd your container, most plants will need plenty of room to spread their roots and grow into healthy specimens. Conversely, don’t let your plants become pot-bound. Although there are a few plants which do well in these conditions, as a rule, either divide you plant or re-pot it into a larger container.

In extremely cold weather both your containers and their plants will need some protection. For those that are not frost hardy it is probably best to over winter them into a cold greenhouse. Others can be wrapped in straw or fleece to protect them from frost.

Perhaps the most important consideration of all for container grown plants is water. During dry weather in the summer months you will have to make sure your pots are well watered. Materials like terracotta dry out quickly as the clay absorbs water, so you will often find yourself having to water at least twice a day. Early morning and evening is best. During the winter water container plants sparingly. Waterlogged containers easily freeze killing the roots of the plants in them.

I am a firm believer that a garden reflects some of the personality of the gardener who tends it. Garden planters are a great way of putting your stamp on a garden, particularly if you are a little bit quirky! I have seen old wooden boats used as planters, odd worn out walking boots, pan tiles, antique wash tubs, old car tires and even a disused toilet!

Reusing Plastic Containers and Planters

Anyone who has a garden or ever got a potted plant has had to deal with those seemingly useless plastic pots. Most people throw them out. I save them until they crumble-re-using over and over again. They can be the “greenest” item in your garden that save you the most green.

I have a very small gardening space including containers but big or small practical ways maybe “green” now but will always make sense far after being GREEN loses fashion.

So what to do with all those unsightly plastic pots? Whether you have an established garden or just starting out; when you buy plants you will have to deal with re-using or disposing of them.

Plastic pots have an endless amount of uses in the garden. So before you just think re-cycle re-think they can save you money before tossing them out:

Seeds eventually become seedlings needing a larger pot; having pots on hand is both convenient and cost-saving.

Small pots make excellent large pot fillers. Place a small pot upside down in a larger one then fill with soil and plant. Container is lighter with less soil used.

Instead of throwing out the cell flats, crumble up and use as a large container filler too. [Or wash and use as packing material.]

Place invasive plants inside of the pot then plant in the ground for keeping them in-check.

Have too many plants? Bought too many? Divide both annuals and perennials using pots to share plants. Don’t have to worry about loaning out your expensive ones.

Don’t have drainage holes in that pretty container? Put plant in a plastic pot then place inside the prettier one. [Don’t forget to pour out any excess water.]

Wish you could afford more expensive containers? Take plastic pots, spray paint assorted colors then add decorative ribbons, beads or sphagnum moss to make appealing.

Don’t like to water? Plastic holds moisture longer so use instead of terra cotta [I still recommend terra cotta for herbs in almost all instances.] Works for indoor/outdoor plants.

Just planted a new plant? Use plastic container as a cloche or shield to protect until established.

Threat of frost? Use containers to cover tender plants. Use 2 pots together to block out holes and create a better insulator.

Weeding. Keep containers around as receptacles when pulling them out.

Use to make compost or save potting soil.

Use small pots as scoops for mulch, fertilizer, etc.

Use to prop up other containers to create different plant levels.

Use to hold garden tools.

Plant below ground level then put smaller pots filled with annuals for easy change-ups.

Storing bulbs or use for overwintering plants.

As you can see the possibilities are endless. These are the pots that cost nothing but continue to save you money over and over again. $$$$$. How Green is that?

5 Gallon Buckets in the Garden

Continuing the discussion of how important the often underestimated 5 gallon buckets at home, we are now revealing how we can make the best use of these pails in the garden.

As pots

Although the appearance of the 5 gallon pails may not look as charming as the real gardening pots, they are highly functional and cheaper. Good quality 5 gallon buckets cost between $ 3 and $ 6; which is nothing compared to gardening pots’ price. With some little preparation, the pails can be turned into flower pots instantly.

All you have to do is to drill the bottom of the 5 gallon buckets with ‚½ or ‚¼-inch holes to allow water drainage. 10 to 15 holes are enough for 5 gallon pails. Next is to fill in the buckets with good quality potting soil and fertilizer. It is now ready to be planted.

If you care about upgrading the look of the modest 5 gallon pails, you may want to put more time before filling in with soil. Get some paint with the color you like, paint the pails, give some accents with different colors of paint, and dry it completely. Remember to paint only on the outer side for vegetables and herbs gardening. You don’t want the vegetables you grow to take the chemical substance of the paint since you will be eating them later.

Another advantage of having 5 gallon buckets garden is that it is extremely practical. You can move the pots wherever and whenever you want. If the growing season is over, you can pile them up and store the soil for the next gardening season, or you can just move them indoor if the plant thrives to survive there. The 5 gallon buckets also make it more difficult for animals like rabbits to destroy your plants.

Now you have not only a cheap way to grow your herbs and plants, but also creative and practical ways too.

As compost containers

Compost plays an important role in the life of a plant. Good homemade compost even plays more important role in the environment. Oddly enough, your plastic 5 gallon pails can help make this happen. As the container of compost making.

First of all, you should drill ‚¼-inch holes around the sides of the bucket. This will allow air circulation and water drainage. Line the bottom of the pail with dry leaves and soil. After that, dump your table scraps like vegetables, napkins, eggshells, coffee grounds or tea bags inside the bucket. Avoid milk and meaty stuff since this could attract vermin. Cover again with dry plant debris and soil. Do one dry layer after the wet one continuously and wait until the 5 gallon pail is filled up. Have a lid to close the pail and let the microorganisms work the compost. Check it out from time to time whether it is too dry or too wet. If it is too dry, add some water and move it to a shadier place. If it is too wet, place it under the sun to dry a little bit. This process takes from several weeks to months to complete.

The better pails to use for homemade composting are the ones in dark colors. Black will be the best. It will absorb more heat for the microorganisms to live under the shade.

If you use 5 gallon buckets in your garden for those purposes mentioned above, you will definitely promote an environment friendly gardening and at the same time save money for a better use at home.

Happy gardening!