Posted on

Plant Seeds: Pollination to Germination

mixture of seeds

Seeds are one of the most important parts of a plant. Not only do they allow plants to reproduce, but they also contain the embryo that will grow into a new plant. Seeds are formed as part of the process of reproduction in seed plants, which includes both gymnosperms and angiosperms. In this blog post, we’ll take a closer look at how seeds are formed, and what goes into making them such an integral part of the plant reproductive process.

When a seed plant is pollinated, the pollen grain germinates and produces a tube that grows down into the ovule. At the tip of this tube, the nucleus of the pollen grain – which contains the male gametes – enters the embryo sac. One of these gametes fertilizes the egg cell in the embryo sac, forming a zygote. The zygote then begins to divide, and the resulting cells begin to grow and differentiate.

mixture of seeds
mixture of seeds

As the embryo grows, it starts to accumulate food reserves. These reserves are stored in the cotyledons, which are thickened leaves that form part of the seed coat. The seed coat itself develops from the integuments of the ovule, and serves to protect the embryo from damage. Once the seed coat is fully formed, the seed is complete.

Seeds play a vital role in plant reproduction, and are essential for ensuring that new plants can grow and thrive. By understanding how they are formed, we can better appreciate the important role that they play in the life cycle of plants.

Seed Dormancy

Seeds can remain dormant – or inactive – for long periods of time. Dormancy is a survival mechanism that helps seeds to survive unfavorable conditions, such as drought or cold temperatures. Once the conditions become favorable again, the seed will germinate and start to grow.

Dormancy can be broken by a number of different methods, including exposure to light, temperature changes, or chemicals. By understanding dormancy, we can better control the germination of seeds, and ensure that they grow when and where we want them to.

Seed Dispersal

Seeds need to be dispersed in order to find suitable conditions for germination. Dispersal can be achieved by a number of different means, including wind, water, animals, and humans.

Wind dispersal is the most common form of seed dispersal. Seeds are carried away by the wind to other locations, where they may find suitable conditions for germination. Water dispersal is another common method, and involves seeds being carried away by water to other areas.

Animals and humans can also play a role in seed dispersal. Animals may eat fruits or seeds and then defecate them in other locations, while humans may deliberately or accidentally transport seeds to new areas.

Seed dispersal is essential for the survival of plants, and helps to ensure that new plants can germinate and grow in suitable areas. By understanding how it works, we can better appreciate the role that dispersal plays in the life cycle of plants.

Seed germination

Seed germination is the process by which a seed starts to grow into a new plant. It involves the growth of the embryo, and the development of the root system and the shoot system. The first step in germination is the activation of the seed, which is usually caused by water. Once the seed is activated, it begins to take in water and nutrients from the surrounding soil.

The embryo then starts to grow, and the root system develops first. The root system anchors the plant in the soil and absorbs water and nutrients from the ground. The shoot system then develops, and the plant begins to grow taller. Once the seedlings have reached a certain size, they become self-sufficient and can start to produce their own food.

Germination is an important step in the life cycle of plants, and is necessary for ensuring that new plants can be grown. By understanding how it works, we can better appreciate the process by which plants come into existence.

Seed dormancy, germination, and dispersal are all essential steps in the life cycle of plants. By understanding how they work, we can better appreciate the role that seeds play in the reproduction of plants.

Basic Seed Starting Steps

There are a few basic steps you need to take in order to start seeds:

1. Choose the right container: You’ll need something that has drainage holes in the bottom, and is big enough to fit all of the soil and seeds you’ll be planting.

2. Choose the right soil: Use a quality potting mix that will allow your seeds to germinate and grow properly.

3. Plant your seeds: Follow the specific instructions on the seed packet for how deep to plant your seeds and how far apart to space them.

4. Water your plants: Seeds need water in order to germinate, so make sure to keep the soil moist but not soggy.

5. Monitor your plants: Keep an eye on your plants and make sure they’re getting enough light, water, and nutrients.

With a little care and attention, you can successfully start your own seeds at home! Follow these tips and you’ll be well on your way to growing your own plants from seed.

Posted on

Growing Olive Trees: Everything You Need to Know

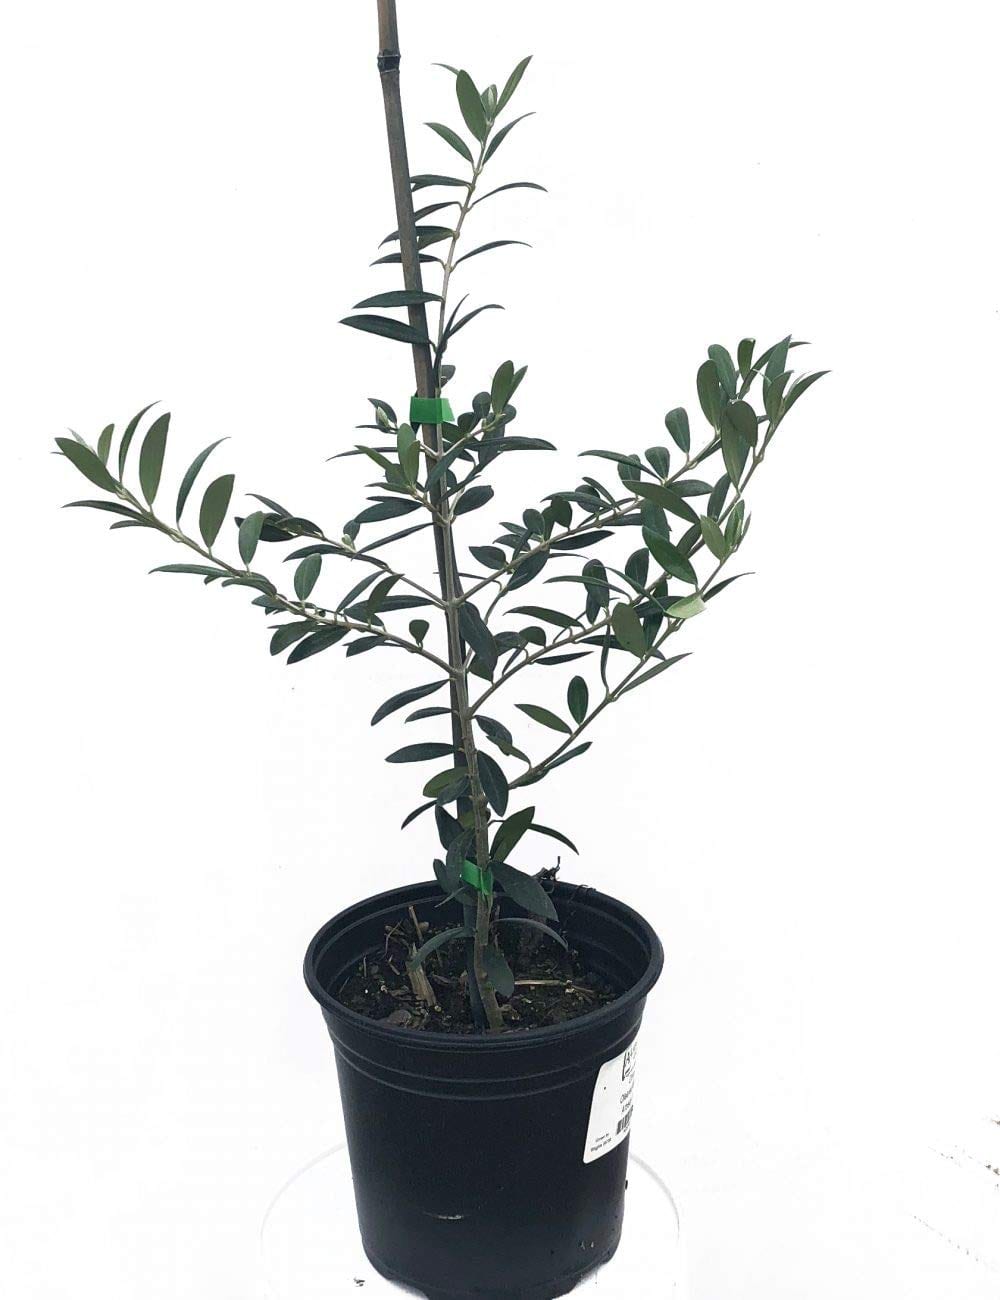
olive trees

Well, maybe not everything you will need to know. But this is a good start. Olive trees are a popular choice for the garden, as they are drought tolerant and can thrive in a variety of climates. They are also relatively easy to care for, making them a good option for novice gardeners.

When growing olive trees in the garden, it is important to choose a sunny spot with well-drained soil. These trees do not tolerate wet soil, so make sure to plant them in an area that will drain properly. Olive trees can be planted outdoors in USDA zones 7b+. Indoor planting in a large pot is an option for cooler climates and can be moved outdoors during the summer.

Once you have chosen a spot for your olive tree, it is time to plant it. Be sure to dig a hole that is twice the size of the tree’s container. If you are planting a bare root olive tree, make sure to soak it in water for at least 12 hours before planting. Then, place the tree in the hole and fill in with soil, making sure to pack it down firmly. Water well after planting.

Olive trees do not need much attention once they are established, but they will benefit from regular watering during periods of drought. Fertilize your olive tree once a year with a balanced fertilizer. Prune lightly every few years to keep the tree healthy and shapely.

If you live in an area where temperatures drop below freezing, you will need to protect your olive tree during winter months. One option is to wrap the trunk in insulation; another is to bring the tree indoors and place it in a sunny spot.

Shop for Olive Trees

Growing Olive Trees Indoors

In order to grow an olive tree indoors, you will need a pot that is at least 12 inches wide and 12 inches deep. You will also need to make sure that the pot has a drainage hole in the bottom so that the water can drain out. The pot should also be placed in a sunny location.

Once you have found the right pot, you will need to fill it with a soil mix that is light and well drained. You can either make your own soil mix or buy a premade mix from a garden center. Be sure to add some organic matter to the mix, such as compost, to help improve the soil’s fertility and drainage.

Once you have the pot ready, plant the olive tree in it. Be sure to spread the roots out evenly and then cover them with soil. Water thoroughly and then continue to water regularly, keeping the soil moist but not wet.

If you live in a cold climate, you will need to bring your olive tree inside during the winter months. Place it in a sunny location near a south-facing window. Avoid placing near heater vents.

Posted on

How to Grow Grapes – Backyard Grape Growing Secrets Revealed

Contrary to popular speculation or belief, growing grapes in your backyard is not as difficult as one may presume. When someone mentions the idea of starting a grape garden, one may immediately assume that without acres of free land at their disposal, it will be almost impossible to be successful. This is absolutely NOT true!

As a matter of fact, there are many amateur grape growers today who are content with their small vine garden in their backyard. The grapes they produce are excellent for eating and making wine and the little effort put into it has a high return.

As a full time grape farmer, I have learned the secrets of what it takes to grow the best tasting grapes for decades. As a child I would work with my father on his farm planting and pruning grapevines all day long and continued working with him as a teenager and even now as an adult and family man. I want to teach you how to grow grapes and share with you the secrets of keeping a successful grapevine garden so that you too can enjoy what these delicious fruits have to offer.

First of all backyard grape growing does not require expensive fertilizers or manures. You can get some really good vines from ordinary soil. Another goodie is that you won’t have to invest a lot of time in your garden because the roots themselves will seek out what they need. The only thing you need to concern yourself with is where to put the vine itself.

It really is quite amazing how no matter where you plant your vines, all you have to do is train the vines around your house towards the well sun lit areas. If you have an open garden where the sun hits all day long, then that will work even better.

The best time to plant your grapevines is during the fall. Do not let the vines fruit during the first season of planting. Instead, always remember to cut down your vines to about four buds. The reason for this is that those four buds will become the strongest points and will lead the rest of the vine up the wall where you planted them in. You want your grapevine to use all of its energy producing a strong wood for the next season because it is during the second season of growth that you get the best grapes.

Remember that the wood that is born this year will lead to next year’s fruits. So during the first year, clip away any flower buds that may form, thus making sure that the vine’s energy is focused on producing wood.

When pruning during the summer, you want to cut off all new growth while leaving the old wood to provide for future fruit. Only remove old growth when they become a straggling nuisance hanging all over your garden. When pruning in the fall or early winter, you should cut back the vines this time to about five to six buds only so that once again, the vines will use all their energy for producing strong wood during the winter.

Most grape vines ripen during the late summer, early September. At this time you can enjoy the best tasting home grown grapes and continue preparing your vines for future growths.

Wait! Don’t go planting some grapevines you purchased at your local nursery and then wonder why you are getting poor results. Many of these vines come from other states and were cut from a healthy patch which will never have the strength to ripen once taken home. Learn the fundamental procedures of backyard grape growing first before making a mistake!

Tips For Successful Backyard Grape Growing

done properly. Grapevines are perennial plants and will grow for years to come. There are a few things to consider before you just jump in and start planting your grapevines. Otherwise, mistakes made at planting will haunt you in the future.

Grapes need lots of sunshine. One of the biggest mistakes that the home gardener makes when growing grapes is to plant them in the shade under a tree or where they get shaded by houses most of the day. If you watch wild grapevines grow, you will notice they make all efforts to climb trees and shrubs to get into the daylight. Without proper sunlight, proper ripeness cannot be obtained. Be sure the spot you choose has good sun most of the day.

A second mistake that many home gardeners make is to not take into account the grape variety’s growth habit and vigor. These two factors come into play when planting the grapevine and deciding on how to trellis the vine.

Vigorous varieties need lots of space. You can find out how vigorous a variety is by consulting your local nursery where you bought your vines. Vigorous varieties need eight feet between vines when planting. Less vigorous varieties can be planted closer at six feet between vines. Very low vigor vines can be planted as close as four feet.

Growth habit determines the trellis type and how the grapevine will be trained and pruned. Grape varieties with a large portion of their ancestry coming from wild American species tend to droop. These are like the wild vines that grow to the top of small trees and shrubs then cascade downward during the summer. The gardener will find that it is best to mimic this natural growth.

Vines of this type will be trained to a high wire about six feet off the ground. The grapevines are pruned to two to four long canes each year. As the shoots grow each year from the canes left at pruning time, they will grow outward from each side and soon start drooping towards the ground, forming a curtain of leaves by the end of the growing season.

Many varieties have the European grape, V.vinifera, in their ancestry. The European grape varieties tend to have a more upright growth. These grape varieties need a more extensive trellis system. At least four wires are needed to contain them. The first wire is approximately three feet off the ground with the two additional wires at eight inch intervals above the bottom wire. The vines are trained to a trunk that extends to the bottom wire.

Two to four canes are pruned and tied to the bottom wire on each side of the trunk. As the shoots grow during the spring and summer they are tied straight up to the wires above. Once the shoots have reached approximately 16 inches above the top wire, they are cut off at the tips. This “hedging” prevents further growth and shading of the vine below.

Grapes need a good water supply when they are actively growing in the spring and summer. They should be watered at least once a week in areas of little rain. More often under drought conditions. This watering should be continued until the berries begin to turn color. After coloring, watering is not needed and will in fact slow the ripening process. Once the leaves have fallen in the fall, one last large watering should be undertaken before the ground freezes to get the vines through the winter.

Perhaps the biggest mistake I see with home gardeners growing grapes is neglecting pruning the vines each year. This is a must! Without pruning the grapevine becomes an overgrown tangled mess. The grapevines overbear and the berries don’t ripen properly. Disease sets in as the vine is over shaded and doesn’t receive drying winds. The vines will weaken over time and eventually die before their time.

Pruning removes 90-95% of the previous year’s growth. It keeps the vines in balance and aids in controlling the crop and ripening the fruit. Pruning the grapevine is an art, not a science. Information on grapevine pruning can be obtained through your local Ag Extension agent. They have agricultural bulletins that detail the pruning process.

Growing grapevines can be a nice hobby that will provide you and your family with fresh fruit or grapes to make wine with. Table grape varieties and wine varieties are distinct. Make sure you are planting the proper varieties for the wanted purpose. Home gardeners should also make sure that the varieties they are planting are adapted to their local climate. Some varieties cannot take cold winters, while others can tolerate freezing temperatures down to -25-30F.

Varieties that have American grape species in their ancestry can tolerate colder winters. Make sure you consult with your nurseryman to fit the variety you are planting to your conditions. The variety you choose must also be able to ripen in your climate. I see too many home gardeners planting varieties that take up to 170 days or more to ripen in areas that have only 150 days or less in their growing seasons.

If you are thinking of growing grapevines in your backyard or garden, be sure to consider the above factors before you start planting. Choose your grape varieties based upon what you plan to use them for, how they are adapted to the local growing conditions, and plan the trellis according to the variety’s growth habit. I wish you all the luck in your endeavor.