Posted on

Native American Gardening: The Three Sisters

corn

Planting a garden with “The Three Sisters Crops” is a great way to incorporate Native American gardening practices into your outdoor space. The Three Sisters refers to the traditional companion planting technique of growing corn, squash, and beans together in the same plot. This method was used by many North American Indigenous peoples to ensure the plants worked symbiotically and yielded a larger harvest.

The Three Sisters crops have an interesting history. According to some Native American creation stories, these three crops were given as gifts alongside fire and pottery from their respective creators. Corn, squash, and beans are all easy-to-grow vegetables that thrive in warm climates with plenty of sunshine. Growing them together can also help maximize space since they all take up relatively little room compared to other vegetables such as tomatoes or peppers.

When cultivating the Three Sisters crops in a garden, it is important to remember that each plant has a place in the symbiotic relationship. Corn will provide the climbing pole for the bean plant and is the second crop to harvest. While squash is first to harvest, it prefers slightly cooler conditions of early Spring and will be finished producing before crowded out by the corn and beans. The bean plant will climb up the stalks of the corn, provide nitrogen fixation from the air and finish as the last crop harvested. All three sisters crops should be planted together.

In addition to providing sustenance for human consumption, these three vegetables offer many benefits for wildlife. For example, pollinators such as bees are attracted to the flowers of both corn and squash while birds love snacking on bean seeds when they ripen in late summertime. Planting the Three Sisters together gives back to nature by providing food sources for beneficial creatures like these which can help maintain healthy ecosystems in our gardens year round.

Finally, it’s worth noting that companion planting isn’t limited only to these three specific veggies; you can combine any number of compatible species in your garden plot. Experimenting with different combinations may yield additional benefits such as pest control since various plants can contain compounds that ward off insects or attract beneficial predators like ladybugs or lacewings! With this knowledge in hand you can tailor your outdoor space according to your own unique designs while still incorporating an essential aspect of Native American culture into your landscape design—a beautiful reminder of our shared history with nature’s gifts!

Native American Gardening: The Three Sisters
corn

The Tall Sister: Corn

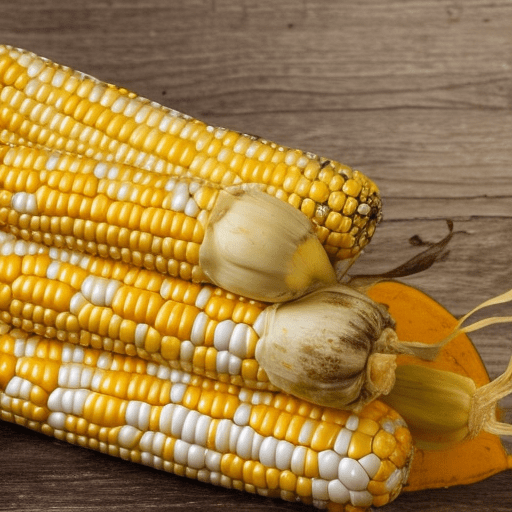
Growing corn is a great way to enjoy fresh and delicious sweet corn right off the cob in your own backyard. With its long history of cultivation, growing corn is an easy and rewarding experience for gardeners of all skill levels. As the tall sister, it provides a climbing pole for the bean plant.

When it comes to planting, you will want to find an open sunny area in your yard with plenty of space for your crop. Corn requires around three feet of space between each plant in order to reach full maturity; consider this when deciding how much land you’ll need to allocate for your crop. For best success, it is recommended that you prepare the soil by tilling it before planting. This ensures any weeds or pests are removed from the soil and helps create a more nutrient-rich environment for your plants to grow. Additionally, make sure that your soil has a pH level between 5.5 and 7.0, as this will help produce the most flavorful kernels that your family can enjoy!

Once prepared, you can begin planting seeds directly into the ground about 1 inch deep every two or three inches apart; be sure not to overplant as overcrowding can reduce yields! Once planted, be sure to keep the soil moist at all times until sprouts appear above ground (about one-two weeks); then reduce waterings down to once per week while making sure they still receive one inch of water each time. If you’re looking for an added boost of nutrition later on during the growing season, consider using a light fertilizer roughly six weeks after planting; this helps ensure strong growth and increases yields come harvesting time!

As far as selecting varieties go, there are four main types: standard (su), supersweet (sh2), low-sugar/starch (se) and small-kerneled (sd). Standard varieties have traditional corny flavor yet may not retain their sugar content as long after harvest; supersweet varieties offer extra sweetness but may not be as vigorous during growth; low-sugar/starch varieties have lower sugar content but greater starchiness; whereas small kerneled varieties are smaller in size with higher sugar content but lower yield potential overall. Be sure to pick the variety that suits your needs best for maximum enjoyment in the garden!

Finally, come harvesting time – usually about two months after sowing – check ears regularly every few days by feeling them through their husks: if they feel plump and firm when gently squeezed then they’re ripe! Once harvested, eat them fresh off the cob within a few days– if not sooner–to ensure optimal flavor and texture before they start losing their sweetness due to starchy conversion.

Overall, growing corn is an enjoyable experience both in terms of tending its development over time as well as ultimately savoring its delicious rewards at harvest time! By following these steps outlined above – along with some additional research – you can bring sweet corn straight from farm-to-table right in your own backyard!

The Short Sister: Squash

Growing squash is a great way to get delicious, healthy vegetables and can be done relatively easily – even by beginner gardeners! Squash plants are easy to grow, require minimal care and maintenance, and can be grown in both summer and winter.

When it comes to growing squash, the most important thing to consider is location. Choose a spot that gets plenty of sunlight throughout the day and also has well-drained soil. To increase your chances of success, add compost or fertilizer to enrich the soil before planting. Make small mounds around where you plan on planting the squash to ensure proper drainage around the plant.

If sowing from seeds, make sure to sow four or five seeds a few inches apart in each mound. Once the seedlings begin emerging, thin out any excess so that only one or two plants remain per mound – this will give them enough space for proper growth and development. If purchasing seedlings from a nursery instead of starting from seed, simply transplant them into the prepared mounds.

In terms of care and maintenance, squash plants don’t require much attention after they have been planted. Water when necessary – usually once every one or two weeks depending on weather conditions – but avoid over-watering as it can lead to fungal diseases. Mulching around the plant can help retain moisture during dry spells too. You can also fertilize lightly once or twice during the season if desired; just make sure not to over-fertilize as this can lead to excessive vegetative growth (which means fewer flowers which leads to fewer fruits).

Harvesting squash is simple — just wait until they reach their desired size then pick them off either right away or store them for use later in the year if needed. Knowing when exactly to harvest depends on what type of squash you’re growing; some types are meant for eating when young while others are best picked when more mature and full sized (for example pumpkins). In either case it’s best not to leave any fruits on the vine for too long since they will eventually start rotting and attract pests/diseases which could damage your crop further down the line.

Overall, growing squash is an easy way for gardeners of all levels of experience to enjoy fresh produce with very little effort required! With some basic knowledge about where/when/how to plant them plus regular watering/mulching/fertilizing (if needed), you should have no problem producing a healthy crop of tasty winter or summer squash each year!

The Other Sister: Beans

Beans are one of the most popular vegetables grown in gardens, and with good reason – they’re easy to grow, require little maintenance and are highly nutritious. Not to mention that beans can be used for a variety of dishes, from soups and salads to stews and side dishes. Whether you choose pole or climbing beans, you can have a bumper crop of these tasty veggies in no time!

Before getting started, it’s important to understand a few basics about bean growing. One key factor is soil temperature – beans prefer soil temperatures between 65°F (18°C) and 75°F (23°C). Soil should be well-draining but still moist. If your soil is too wet, your plants won’t do as well. It’s also important to keep weeds away; when left alone, they will consume the nutrients meant for your bean plants.

If you’re new to growing beans, you may not know that there are two main types: pole beans and climbing beans. Pole beans need a trellis or support structure to grow up; this helps them stay upright and gives them something to climb on as they reach for sunlight. Climbing beans don’t require a support structure since they use their long tendrils to attach themselves onto whatever is available — like fences or posts — as they grow upward. Both types need space between each plant so that air can circulate freely; otherwise, heat can build up around the plants which can lead to disease issues.

Legumes are an essential part of any garden because of their nitrogen-fixing capabilities. Legumes create a symbiotic relationship with bacteria called rhizobia that live inside nodules on the roots of the bean plant; this process is known as nitrogen fixation. The root provides food for the bacteria while the bacteria convert atmospheric nitrogen into ammonia which can then be absorbed by the plant and converted into nitrate – a form plants can use more efficiently than atmospheric nitrogen alone. Nitrogen is an essential nutrient for healthy plant growth so having legumes in your garden is hugely beneficial!

Harvesting times will vary depending on what type of bean you’ve chosen; some varieties take 59 days while others take 79 days or more before they’re ready for picking! When picking your beans, make sure that they’re firm with no soft spots or discoloration; this indicates that they might be past their prime quality-wise and should probably be composted instead! Store freshly picked beans in an air-tight container either in your fridge or freezer—this will help protect them from spoiling quickly so you can enjoy them later!

Growing your own beans at home has many benefits including getting fresh veggies straight from your garden as well as providing valuable nitrogen fixation for other non-legume crops surrounding them. There are two main types—pole and climbing—that all require adequate spacing between each plant and some kind of support if needed like a trellis for pole varieties. When harvested correctly at peak ripeness, store them properly for maximum shelf life enjoyment later down the line!

Posted on

Plant Seeds: Pollination to Germination

mixture of seeds

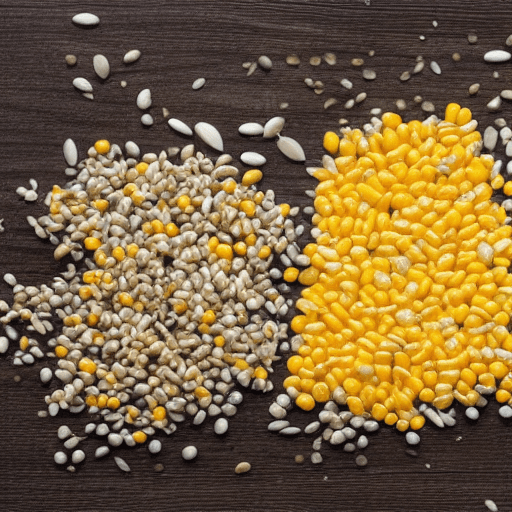
Seeds are one of the most important parts of a plant. Not only do they allow plants to reproduce, but they also contain the embryo that will grow into a new plant. Seeds are formed as part of the process of reproduction in seed plants, which includes both gymnosperms and angiosperms. In this blog post, we’ll take a closer look at how seeds are formed, and what goes into making them such an integral part of the plant reproductive process.

When a seed plant is pollinated, the pollen grain germinates and produces a tube that grows down into the ovule. At the tip of this tube, the nucleus of the pollen grain – which contains the male gametes – enters the embryo sac. One of these gametes fertilizes the egg cell in the embryo sac, forming a zygote. The zygote then begins to divide, and the resulting cells begin to grow and differentiate.

mixture of seeds
mixture of seeds

As the embryo grows, it starts to accumulate food reserves. These reserves are stored in the cotyledons, which are thickened leaves that form part of the seed coat. The seed coat itself develops from the integuments of the ovule, and serves to protect the embryo from damage. Once the seed coat is fully formed, the seed is complete.

Seeds play a vital role in plant reproduction, and are essential for ensuring that new plants can grow and thrive. By understanding how they are formed, we can better appreciate the important role that they play in the life cycle of plants.

Seed Dormancy

Seeds can remain dormant – or inactive – for long periods of time. Dormancy is a survival mechanism that helps seeds to survive unfavorable conditions, such as drought or cold temperatures. Once the conditions become favorable again, the seed will germinate and start to grow.

Dormancy can be broken by a number of different methods, including exposure to light, temperature changes, or chemicals. By understanding dormancy, we can better control the germination of seeds, and ensure that they grow when and where we want them to.

Seed Dispersal

Seeds need to be dispersed in order to find suitable conditions for germination. Dispersal can be achieved by a number of different means, including wind, water, animals, and humans.

Wind dispersal is the most common form of seed dispersal. Seeds are carried away by the wind to other locations, where they may find suitable conditions for germination. Water dispersal is another common method, and involves seeds being carried away by water to other areas.

Animals and humans can also play a role in seed dispersal. Animals may eat fruits or seeds and then defecate them in other locations, while humans may deliberately or accidentally transport seeds to new areas.

Seed dispersal is essential for the survival of plants, and helps to ensure that new plants can germinate and grow in suitable areas. By understanding how it works, we can better appreciate the role that dispersal plays in the life cycle of plants.

Seed germination

Seed germination is the process by which a seed starts to grow into a new plant. It involves the growth of the embryo, and the development of the root system and the shoot system. The first step in germination is the activation of the seed, which is usually caused by water. Once the seed is activated, it begins to take in water and nutrients from the surrounding soil.

The embryo then starts to grow, and the root system develops first. The root system anchors the plant in the soil and absorbs water and nutrients from the ground. The shoot system then develops, and the plant begins to grow taller. Once the seedlings have reached a certain size, they become self-sufficient and can start to produce their own food.

Germination is an important step in the life cycle of plants, and is necessary for ensuring that new plants can be grown. By understanding how it works, we can better appreciate the process by which plants come into existence.

Seed dormancy, germination, and dispersal are all essential steps in the life cycle of plants. By understanding how they work, we can better appreciate the role that seeds play in the reproduction of plants.

Basic Seed Starting Steps

There are a few basic steps you need to take in order to start seeds:

1. Choose the right container: You’ll need something that has drainage holes in the bottom, and is big enough to fit all of the soil and seeds you’ll be planting.

2. Choose the right soil: Use a quality potting mix that will allow your seeds to germinate and grow properly.

3. Plant your seeds: Follow the specific instructions on the seed packet for how deep to plant your seeds and how far apart to space them.

4. Water your plants: Seeds need water in order to germinate, so make sure to keep the soil moist but not soggy.

5. Monitor your plants: Keep an eye on your plants and make sure they’re getting enough light, water, and nutrients.

With a little care and attention, you can successfully start your own seeds at home! Follow these tips and you’ll be well on your way to growing your own plants from seed.

Posted on

Outdoor Planter Boxes for Highlighting The Landscape

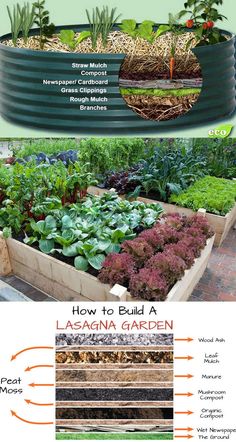
Outdoor planter boxes can be used for highlighting a landscape, garden, patio, balcony and the inside of your home. Outdoor planter boxes are generally used in a container garden to grow flowers, vegetables, or herbs. Most of these containers are constructed of weather resistant materials that will withstand the outdoor elements.

https://www.youtube.com/watch?v=-I6I0Q6Kp3k

Wood outdoor garden boxes that hold up to outdoor conditions are mostly made of redwood, cedar, or teak. You can find them in different shapes and sizes and can be used almost anywhere particularly a rustic outdoor setting. Many raised beds are constructed of these in the natural state or they can be painted to match any area of your garden. Raised beds are convenient for gardeners with knee or back problems and they are excellent for drainage.

PVC is a very durable material used in the construction of planter boxes. They sometimes give the appearance of beautiful wood or clay and you cannot tell the difference until pick one up and realize it is PVC. They are inexpensive lightweight containers that will last through many seasons of harsh weather and they do not need very much care. Some of these containers are so beautiful and self-watering they can be used on a front porch or door step to enhance the landscape in front of your house. Clay planter boxes are good for your plants health but the soil will dry out much quicker than other planters. They can be very heavy and are fragile so are best if used in a location where you do not have to move them around. They are also available in various sizes, shapes, and styles; you may even find some to match some of your outdoor yard decorations.

Some outdoor planter boxes are constructed of metal and are quite common. Some have decorative feet to lift them off the ground for drainage. Some may come with an inner lining or you can use a plastic liner for protection. You can find many window-boxes that are constructed of metal and are self-watering. Hanging planters are also classified as planter boxes for planting flowers that drape or hang over the side. Hanging planters can be hung from house eaves or patio covers and are available as self-watering.

Almost anything can be used as a planter box for growing vegetables, herbs, or flowers. You just need to find one large enough to handle the root system of what you intend to plant such as plastic milk containers, bushel baskets, large pressed fiber pots or even an old wheel barrow. If you want to plant tomatoes the container should be very deep but to plant radishes you only need about a 6-inch deep container. The larger the container and the more soil used will give the roots more room to spread and less watering on the gardeners’ part.

Be sure the containers you use have ample holes for drainage; they can be on the bottom or on the sides. The excess water needs to drain out so the roots do not get waterlogged. Most large containers have the holes on the bottom so elevating them on blocks or bricks will give the water a place to go. The larger the container the more drainage holes it will need. A well-aerated soil will not need any stones in the bottom because you want as much room as possible for the roots of the plant.

You need to check your containers a couple times a day, especially during the hotter days of summer, for moisture if you do not have self-watering planters or are not using a drip watering system. Your large containers can use a layer of mulch to help retain some of the moisture. You need to use outside water that has not been through a water softener; the salts used in a softener can be toxic to your plants. Collected rainwater is the best and cheapest water that can be used for your outdoor planter boxes.

Posted on

Asian Vegetables You Can Grow in Your Organic Garden

As oriental dishes are becoming more popular in America, so are the vegetables used in those dishes. You can grow these unusual Asian vegetables in your own organic garden.

Mizuna: Also know as Japanese Greens, Japanese Mustard, Spider Mustard and many more.

Mizuna is a compact green plant with fringed, dark green leaves that can be used cooked or fresh. This plant has been described to be slightly spicy and have mild peppery flavor. One can use the leaves in a fresh salad, cooked in a stir fry, steamed, or even boiled. Add them to a clear soup to add color and texture.

The best time to sow seeds is in early spring. You will want to grow this plant like spinach. Space the plants about 6 inches apart. This plant is good for successive plantings. You can harvest the entire plant, or just some of the leaves.

Shungiku: Also known as Chrysanthemum, Tong Hao in Chinese, Ssukgat in Korean, and Kikuna in Japanese.

Shungiku is a beautiful plant that has single yellow flower which are edible, but it is mostly known for the leafy green leaves. Both the leaves and the flowers can be enjoyed in a fresh salad either alone or with other Asian vegetables. You may use the leaves in stir fry, casseroles, soups or many other hot dishes although it is recommended that you wait to the last minute to add the Shungiku leaves. These leaves cook quickly and are known to loose their structure.

Sow seeds in early to mid spring and early fall. This vegetable will not do well during summer conditions causing it to go into premature flowering. You may harvest individual leaves or the entire plant. Thin the plants as needed while enjoying the thinned plants in your favorite dishes.

Daikon: Also known as Chinese Radish, Aukobi-Daikon, or Asian Radish.

Daikon is a torpedo shaped radish that comes in many colors but most commonly white. Larger breeds can get up to 2 ft long and 3 in wide. The root (radish part) is mildly spicy and adds flavor to salads, sauces, and stir fries. In Korea, the daikon is traditionally made into a diced sweet pickle. You can steam the peppery leaves or add them to a soup.

Sows seeds during the spring for a summer harvest, and fall for a winter harvest. When purchasing your seeds, select the variety for the season you are planning on planting. Plants should be spread 6 inches apart. They take about 60 days until harvest. Carefully dig up the entire plant.

Growing unusual Asian vegetables in your own organic garden is fun and exciting. If you decide to grow these or any other Asian vegetables, you better get your Asian cookbook out and get ready to make some delicious meals!

Vegetable Gardening in Small Spaces

Do not let the lack of space be a reason or an excuse to not have a vegetable garden at your home. Thousands of people are in the same situation as you and that is the space they have available to grow fresh fruits, vegetables and herbs from seeds is very limited.

Related Links:

Maybe you live in a big city and land available is scarce, or you reside in a condominium or apartment and the only thing available to you is a patio. Either way, there are some great solutions to help you through this. You can be growing your own fresh veggies in no time.

I recently spoke with Tracy Godsey who runs the small container blog Eden’s Container. Tracy started her small space vegetable gardening adventures when growing fruits, vegetables and herbs in containers is all she could do with her limited apartment space, which consisted mainly of a balcony.

“I currently grow herbs on my patio including basil, parsley oregano, thyme, mint and chives. The basil and parsley are the only plants that won’t overwinter in my containers outdoors.”, says Tracy. “In a vegetable garden, full-sized plants can grow in any pot that holds 3-5 gallons of soil. Large plants like tomatoes need 5 gallons, while plants with shallow roots like lettuce can get by in a 3 gallon pot. Even smaller plants like radishes can grow well in trays and produce a harvest very quickly. If you don’t have a container handy, you can make one by filling a plastic tube (such as a garbage bag or bread wrapper) with potting soil. These types of tubes are known as grow bags.”

Tracy reminded me of a very important factor that I had not thought about and that was the weight of what you are growing. If you are on a second floor balcony where weight will be an issue, Tracy recommends, selecting smaller heirloom varieties and grow them in hanging baskets.

Just because you are limited on space does not mean you are limited on what you can grow. Remember to select fruits, vegetables and herbs that you and your family will consume. Since space is a premium you do not want to waste any with items that will get discarded. Be careful not to over water your items in containers and make sure your containers have adequate drainage holes. To protect from the loss of dirt through those drainage holes use coffee filters at the bottom or paper towels. Both options allow water to pass through but not dirt.

On a final note, “never put ordinary dirt in containers, only potting soil,” says Tracy. “You will have much better success since the soil is already formulated for growing plants in pots.”

Now it’s your turn to roll your sleeves up, get some containers, fill them with potting soil and plant the seeds of your favorite fruits, veggies and herbs. Don’t let space, or in this case, the lack thereof, prohibit you from eating fresh from the garden.

Posted on

Growing Tomato Plants

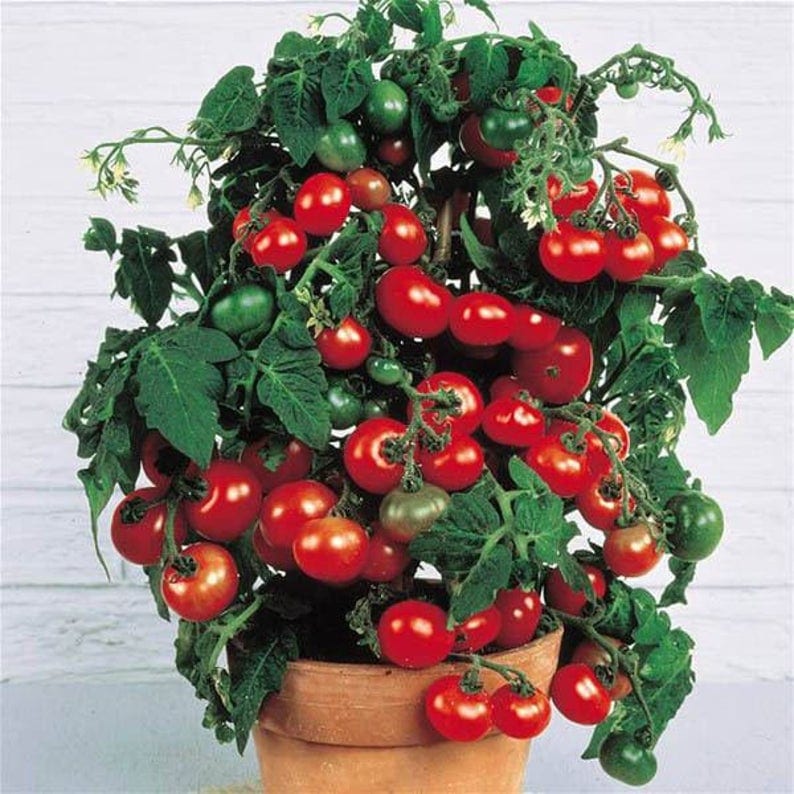
tomato-tiny-tim

Tomatoes from the grocery store shelves taste like-NOTHING! Why? Most of the tomatoes purchased from grocery stores have been harvested days before they reach the grocery, treated to turn red, and bred to stay firm and not bruise on the shelves. Plant breeding for the last fifty years has concentrated on producing a tomato that can survive anything-except for a taste test.

Growing Tomatoes – Heirloom Vs Hybrid Varieties

Gardeners and tomato aficionados alike have given up on the produce aisle for anything other than garnish. Instead, they turn to seed and plant catalogues to find tasty varieties to grow. When viewing a plant catalogue of tomato seed sources, you will be confronted with hundreds of varieties. Huge and tiny, purple, red, yellow and orange tomatoes. Perfectly round, almost flat, and lemon-shaped tomatoes. Seed catalogues highlight another variable to understand regarding tomato growing: heirloom versus hybrid tomatoes.

Heirloom Tomatoes

Tasty and unique, heirloom varieties are endless. This category of plant is where you will find purple, orange and yellow tomatoes sharing catalogue space with red ones. Heirloom varieties are “open pollinated” plants, which means that if you harvest seeds from a plant, prepare them, save them, and plant them next year, you will grow the same plant. Heirloom varieties were developed over time, in isolated gardens and communities, thus developing unique characteristics.

Heirlooms require particular growing conditions, and each variety is different. The key to success with heirlooms is choosing a variety that is well suited to your growing conditions. Because heirloom tomatoes have not been bred for generations to promote vigor and disease resistance, these varieties need a little bit of extra care. They are, however, worth the extra work. Heirlooms will produce lush, flavorful tomatoes of every shape, size and hue, for every culinary taste or need.

Hybrid Tomatoes

These tomatoes are the result of two different tomato varieties being “crossed” or joined, and the seeds harvested from the resulting plants. Hybrid tomato seeds will produce the tomato with hybrid characteristics for only one plant generation. If you harvest your tomatoes from the hybrid plant and plant those seeds next year, you will not have the same plant.

Hybrid tomatoes have been bred for disease resistance, uniformity, and ability to withstand mechanical harvesting, packing and shipping. Little time has been spent in enhancing flavor in hybrid tomatoes. Much like hybrid tea roses, hybrid tomatoes may be nice to look at, but they have few other desirable attributes.

For large-scale commercial tomato growers, hybrid tomatoes are a great help. For consumers expecting bright red tomatoes in the middle of winter, hybrids are a way to consume. For home gardeners, Heirloom varieties produce yields as large, and much more flavorful. Home gardeners have enough time an attention to successfully grow heirloom tomatoes and bring out their best qualities.

Choosing the Right Variety

Whether Heirlooms or Hybrids are your tomato of choice, you much choose tomato varieties that are well suited to your growing environment. Climates with high heat and humidity will help certain varieties flourish, while colder climates with shorter growing seasons require cultivation of plants that set fruit and mature faster.

What is the difference between determinate and indeterminate tomatoes?

When it comes to determinate and indeterminate tomatoes, the main difference is in how they grow. Determinate tomatoes are bred to grow a certain way and ripen all at once. They are mostly used for canning or sauces. Indeterminate tomatoes are bred to vine and grow continuously, so they are better for fresh eating.

Determinate tomatoes generally grow to be about two to four feet tall and have a compact, bushy growth habit. The fruit ripens all at once on these plants, making them ideal for canning or other recipes where you need a lot of ripe tomatoes all at once. Indeterminate tomatoes, on the other hand, can grow much larger, up to six feet or more. They have a vine-type growth habit and produce fruit throughout the season. Because of this, they are better suited for fresh eating.

When it comes to taste, there is no difference between determinate and indeterminate tomatoes. Both types can produce delicious fruits that are perfect for eating fresh or using in recipes. The only real difference is in how they are grown and how the fruit ripens. So, if you’re looking for a tomato plant that will produce a lot of fruit all at once, go with a determinate variety. If you want a plant that will keep producing fruit throughout the season, choose an indeterminate variety.

Container Gardening Ideas For Your Home

Many gardeners have given up on the idea of a garden because they lack space, time or lots of experience. But if growing plants is an interest of yours container gardening could be your answer. Container gardens will allow you to enjoy “playing in the dirt” without investing a lot of time or money. You can get very creative in container gardening using vegetables, decorative grasses or flowers and herbs. You can plant a container garden with any plant that would grow outside. The trick is to come up with some creative ideas for your container garden.

You should do some research at your local nursery or on the internet to choose the plants you wish to grow to help you come up with some ideas. Try to use plants that complement each other and have the same basic needs for water, air and light.

A container garden idea that has taken off recently is the landscape container. Some people plant a simple evergreen tree in a container with good drainage to place at their front door. Or you could plant an assortment of flowers for a bright and beautiful vista. If you do plant flowers, add plants that spill over the sides of the container to add more visuals and interest. What ever container gardening idea you can come up with can be placed on a deck, patio, and balcony or by the front doors. Put them somewhere that your family and friends can enjoy.

You can grow vegetables in containers but choose wisely. Vegetables like squash and pole beans need lots of space, while tomatoes need a deep pot. When you grow your own vegetables you will have tasty produce not the bland stuff that is in the grocery store. Nothing tastes better than a tomato right off the vine. There are many chefs and good home cooks that grow their own for just this reason. Don’t forget to pot some herbs, they are pretty plants and add zest to your meals.

But don’t just stick to vegetables and herbs; why not add fruit trees too? Instead of using an evergreen tree, pot a fruit tree instead. There are many dwarf varieties available that work best in pots since with pots there is less soil therefore less nutrients to draw from. If you live in a year round warm climate citrus trees are perfect. In other regions, stick to pear, apple and cherry trees. Another good container gardening idea is to grow strawberries. With strawberries climate does not matter since you can bring the container inside. Fresh strawberries are amazingly sweet and delicious. Imagine how good a bowl of fresh strawberries will be, strawberries that you have just picked.

Remember that container gardens dry out more quickly than traditional gardens. Be diligent about watering your plants if you don’t want your container gardening ideas to wither and die. Container gardens must be fertilized too. Keep a small notebook handy so you can write down the needs of your plant so you will always know when to water or feed. Keep an eye out for pests. If you find a container that has an infestation, isolate it immediately and treat it with a natural pesticide. You don’t want harsh chemicals on fruits, vegetables or herbs. A good natural pesticide recipe is:

In a jar, combine 1 teaspoon dishwashing liquid and 1 cup vegetable oil. Shake vigorously. In an empty spray bottle, combine 2 teaspoons of this mixture and 1 cup water. Use at ten-day intervals (or more often if needed) to rid plants of whiteflies, mites, aphids, scales, and other pests.
 
So, do some research, come up with your own unique container gardening ideas, gather your materials and get to work. The fruits of your labor will be amazing.

Happy Container Gardening!

Greenhouse Growing For Tomato Plants

There are a couple of ways for approaching tomato growing in a greenhouse, you can either dig and prepare the soil of the greenhouse ready to accept the tomato plants or you can grow the plants in a container such as a plant pot (12″ diameter) or growbag.

Realistically most growbags that are available which can be 3 to 7 gallons in size are only enough to support two plants. There are ways in which you can push this out to 3 plants but for the cost of a growbag its probably as well just to stick to 2 plants, particularly if you take good care of them and produce lots of fruit.

If you go for pots then you should sterilize them before use, to do this you can use a dilute solution of a suitable disinfectant, something like clorox fluid is perfect for this task.

While we are on this subject, you really should wipe down the inside of your greenhouse with disinfectant as well to ensure any residual contaminants that could also cause disease are removed from the glass.

One of the reasons I am suggesting using large pots or growbags for growing tomato plants is because the soil in the greenhouse is going to need to be dug out and replaced every 2 or 3 years anyway to ensure that you get rid of any build up of disease and also because the soil will be pretty much spent in terms of nutrients.

Space is limited in a greenhouse so the best option for plant varieties is to use the indeterminate variety of tomato plant i.e. a vine plant. You can prune the plant to the required size, leaving about 4 to 6 trusses on the main stem, which is about 6′ to 7′ in height, greenhouse size allowing. This will give you lots of fruit over an extended period. You will have to pinch out the main stem when you have enough trusses to stop further growth.

As an aside, using the bush variety is less convenient for greenhouses because they, as the name suggests, form a determinant size of bush without pruning which is probably a little too large in diameter for the average greenhouse. The fruit also has a tendency to all come at once.

Irrespective of the growing method you choose, you should start to feed the tomatoes at the first sign of fruit and for the duration of the growing period, twice a week should be sufficient. Also as you are in a greenhouse regular and consistent watering is also very important and I recommend 2 to 3 times a day with water that has been allowed to warm in the greenhouse.

As the end of the season nears a way of helping the last remaining fruit ripen is to hang a couple of bananas in the apex of the greenhouse. If that fails to ripen the last bit of fruit you can always use the green tomatoes for making a delicious chutney.

Posted on

Planting A Fall Vegetable Garden

If you’re like most gardeners, you probably consider August to be the tail end of the growing season. The truth of the matter is that it’s a great time to start your fall garden.

A fall garden can produce excellent vegetables and extend your crops long after your spring planted garden is finished. The vegetables you harvest from the fall garden are often sweeter and milder than those grown over the summer.

What type of vegetable plants you plant in your fall garden will depend on the space you have, as well as the types of vegetables you like. Be sure that you plant vegetables with the shortest growing season, this will increase the chances they will be full grown and harvested before the hard frost sets in. Starting your seeds indoors the first week of July will also give you a good head start.

Most seed packages will be labeled “early season”, or you can find the seeds that are labeled with the fewest days to harvest.  Since seeds are not usually kept in stock towards the end of summer, you will probably need to purchase seeds for your fall garden in the spring. You can also find them easily online.

Even vegetables that like the heat of summer, like tomatoes, sweet potatoes, and peppers, will produce nicely until harder frosts hit, which can be fairly late in the year in certain areas.

There are certain vegetable plants that normally stop producing towards the end of summer. These include snap-beans, summer squash, and cucumbers. Even these, if planted in the middle of summer, can produce nicely until the first frosts arrive. Many hardy vegetables will grow with temperatures as low as 20 degrees.

If you have root plants such as beets, carrots or radishes, that have the tops killed by a freeze, you can save them by applying a heavy layer of mulch.

For fall gardening you need to know approximately when the first hard frost normally hits your particular area.  The Farmer’s Almanac is a great resource for this type of information.  It will give you specific dates and is fairly accurate most of the time.  You also need to know approximately how long your plants will take to mature. As I said, this is available by reading the individual seed packets.

To prepare the soil for your fall garden, the first thing you will need to do is clear out leftover summer crops and weeds.  If you leave the leftover vines and plant debris from your summer crops, bacteria and diseases can develop from these leftover remnants.  If your spring plants were not fertilized heavily, you may want to spread a few inches of compost over the garden next.

Once that is done you will need to till the soil and wet it down. Now simply wait 24 hours and your ready to plant.

All too often gardeners will shy away from planting a fall garden, to avoid dealing with frosts. I can tell you from experience that sturdy and healthy vegetables can stand up to a few frosty nights, while producing wonderfully tasting produce.

Fall gardening is not for everyone, but why not give it a try? It can provide you with the opportunity to enjoy garden fresh vegetables for a little while longer each year.