Author: Wright Holdings, Inc.

  • From “GMO is Evil” to “GMO is Cute”: The Glow-in-the-Dark Firefly Petunia

    From “GMO is Evil” to “GMO is Cute”: The Glow-in-the-Dark Firefly Petunia

    In the world of modern gardening, innovation has taken an enchanting turn. Imagine stepping into your garden at dusk, and instead of fading into shadows, your petunias light up like fireflies, emitting a soft, ethereal glow. Meet the glow-in-the-dark firefly petunia, a genetically modified organism (GMO) that’s capturing the imagination of gardeners and sparking a fascinating cultural shift: the rebranding of GMOs from “evil” to “adorable.”

    The Science Behind the Glow

    The glow-in-the-dark firefly petunia is the result of blending botany with biotechnology. Scientists have introduced a gene responsible for bioluminescence—commonly found in jellyfish or fireflies, but this one happens to come from a mushroom—into the DNA of petunias. This enables the flowers to emit light after being exposed to sunlight during the day.

    The idea of glowing plants isn’t entirely new; researchers have long experimented with bioluminescence for practical applications like eco-friendly streetlights or indoor plant lighting. However, the glow-in-the-dark firefly petunia represents a more whimsical application, targeting home gardeners rather than industrial developers.

    From Fear to Fascination: The GMO Perception Shift

    A decade or two ago, GMOs were often painted as villains in the public imagination. Only a few years ago we had to get rid of several petunias because they held DNA from corn. Activists and media campaigns warned of “Frankenfoods,” ecological disasters, and corporate monopolies over food supplies. But today, the narrative around GMOs is evolving, and the glow-in-the-dark firefly petunia is a striking example of how consumer sentiment is softening. Now a GMO is on the cover of Time Magazine and everyone is fine with it.

    This shift can be attributed to several factors:

    1. Transparency and Education: Over the years, scientists and educators have worked hard to demystify genetic modification, emphasizing its benefits and safety. When people understand that GMOs can be both sustainable and innovative, fear gives way to curiosity.
    2. Creative Applications: The glow-in-the-dark petunia isn’t about solving world hunger or increasing crop yields—it’s about joy. It’s much harder to vilify a GMO that exists purely to make people smile.
    3. Social Media: The rise of platforms like Instagram and TikTok has amplified the appeal of visually stunning creations. A glowing petunia makes for a viral-worthy post, especially when juxtaposed with the hashtags #GardenGoals or #ScienceIsCool.

    Ethical and Environmental Considerations

    Even with their newfound popularity, GMOs like the firefly petunia do raise important questions. Could bioluminescent plants affect local ecosystems, attracting or deterring certain insects? How do we balance the novelty of such creations with the need for biodiversity? These are valid concerns that warrant continued research and thoughtful regulation.

    Yet, compared to the large-scale agricultural GMOs of the past, ornamental plants like the firefly petunia present relatively low risks. They don’t cross-pollinate with food crops, and their environmental footprint is manageable when grown responsibly.

    The Future of Cute GMOs

    The glow-in-the-dark firefly petunia is just the beginning of a broader trend. As biotechnology continues to advance, we’re likely to see more playful applications of genetic modification. Think roses that change color throughout the day, or succulents that glow under blacklight. These innovations have the potential to make gardening not just a hobby but an experience of wonder and discovery.

    A Glowing Example of Progress

    The glow-in-the-dark firefly petunia has turned a once-controversial topic into something approachable and magical. It shows how science can intersect with art to create something beautiful, shifting public perception in the process. While it may not solve global issues, it has illuminated a new path for GMOs—one where “genetically modified” can be synonymous with “delightfully charming.”

    So, next time you’re browsing the garden center, keep an eye out for those glowing petals. They might just light up more than your garden—they could spark a newfound appreciation for the marvels of science.

  • Why Bonide Captain Jack’s Neem Oil?

    Why Bonide Captain Jack’s Neem Oil?

    Pest control is the secret battleground of the green-thumbed community. A battleground where effectiveness meets environmental responsibility. Enter Bonide Captain Jack’s Neem Oil, a product that, in my personal experience, epitomizes this balance brilliantly. In a world where the echo of ‘organic’ and ‘eco-friendly’ sometimes drowns out actual impact, this oil stands as a safe and effective pioneer in safeguarding our gardens and homes without compromising on health or environmental ethos.

    Bonide Captain Jack's Neem Oil

    The first time I used Bonide’s Neem Oil, I was skeptical. My garden was besieged by aphids, and the promise of a natural solution seemed too good to be true. Yet, as I followed the instructions and sprayed the affected flora, the results were astonishing. Within days, the otherwise bustling colony of aphids had vanished, leaving my roses to bloom unharmed. My skepticism was not just quenched; it was replaced with admiration for a product that delivered on its promise, naturally.

    What sets neem oil apart is its source—direct from the seeds of the Neem tree, an emblem of ecological harmony. This isn’t just any pesticide; it’s a biodegradable substance documented to have minimal impact on non-target organisms. The safety it assures translates into peace of mind for the user. It doesn’t form a toxic cloud that lingers in the air, unlike its chemical counterparts, and when I use it, I’m not just protecting my plants, but my family, too.

    Beyond The Garden: A Promise to Behold

    Imagine a world where the traces of a pesticide used today don’t haunt our water systems tomorrow. That’s what neem oil offers—a futuristic approach in the present. It’s more than just a dream for sustainability enthusiasts; it’s a momentous stride towards it. I find solace in knowing that each application of Bonide Captain Jack’s Neem Oil upholds the sanctity of our ecosystem. The bees continue to buzz, the earth stays fertile, and my garden thrives organically.

    Traditional pesticides have their place, but when held against Bonide’s Captain Jack’s Neem Oil, they falter in the scales of safety. Synthetic pesticides, while potent, can cast a long shadow of potential harm. In contrast, neem oil is the embodiment of a long-term solution; it strikes the perfect chord between the now and the future of gardening practices. It invites gardeners to take a stand—quite literally— against the tide of harmful practices and opt for a more sustainable choice.

    Unleash Neem Oil

    In a market saturated with options, it’s easy to get lost in the noise. However, Bonide Captain Jack’s Neem Oil stands out as a beacon of safety, efficacy, and sustainability. My call to action is simple—give it a try. In using this product, you don’t just make a purchase; you become a part of the paradigm shift away from toxic residues and towards a greener, healthier environment. Give your trust to a product that has earnt mine a thousand times over. Your garden, and the world, will surely thank you for it.

    Bonide Captain Jack’s Neem Oil isn’t merely a pest control option; it’s a philosophy and a statement. It’s a pathway to an ecologically brighter future, available for application today. For those mindful of their garden’s health and the planet’s, it’s a no-brainer.

    Remember, in every drop of Captain Jack’s Neem Oil lies a story—an anecdote of greenness, and a testament to our pledge to nurture nature. Try it. And watch how one small choice can lead to a garden, and a world, brimming with life. After all, isn’t that what gardening is all about?

  • Beginner’s Guide to Organic Gardening: Tips and Tricks

    Beginner’s Guide to Organic Gardening: Tips and Tricks

    Are you ready to start your own organic garden and enjoy fresh, healthy produce right from your backyard? Organic gardening is a rewarding and sustainable way to grow your food, and it’s easier than you think. This beginner’s guide will walk you through all the essential steps, from choosing the right location and preparing the soil to selecting the best plants and controlling pests. With a little planning and effort, you’ll be well on your way to a bountiful harvest of organic vegetables, fruits, and herbs. Let’s get started!

    Choose the right location

    organic gardening tips for beginners

    Choosing the Right Location: A Foundation for Organic Gardening Success

    When embarking on your organic gardening journey, selecting the right location for your garden is paramount to its success. Several key factors should be taken into consideration to ensure your plants thrive and produce a bountiful harvest.

    Sunlight is essential for photosynthesis, the process by which plants convert sunlight into energy. Most vegetables, fruits, and herbs require at least six hours of direct sunlight per day. Choose a spot in your yard that receives ample sunlight throughout the day, ideally in the morning when the sun’s rays are less intense.

    Good drainage is crucial to prevent waterlogging, which can suffocate plant roots and lead to root rot. Inspect the area after heavy rain or watering to assess drainage. If water pools or takes a long time to drain, consider creating raised beds or amending the soil with organic matter to improve drainage.

    The microclimate of your chosen location also plays a significant role in plant growth. Factors such as frost pockets, wind exposure, and temperature fluctuations can impact plant survival and productivity. Observe your chosen area over several days to understand its microclimate and select plants accordingly.

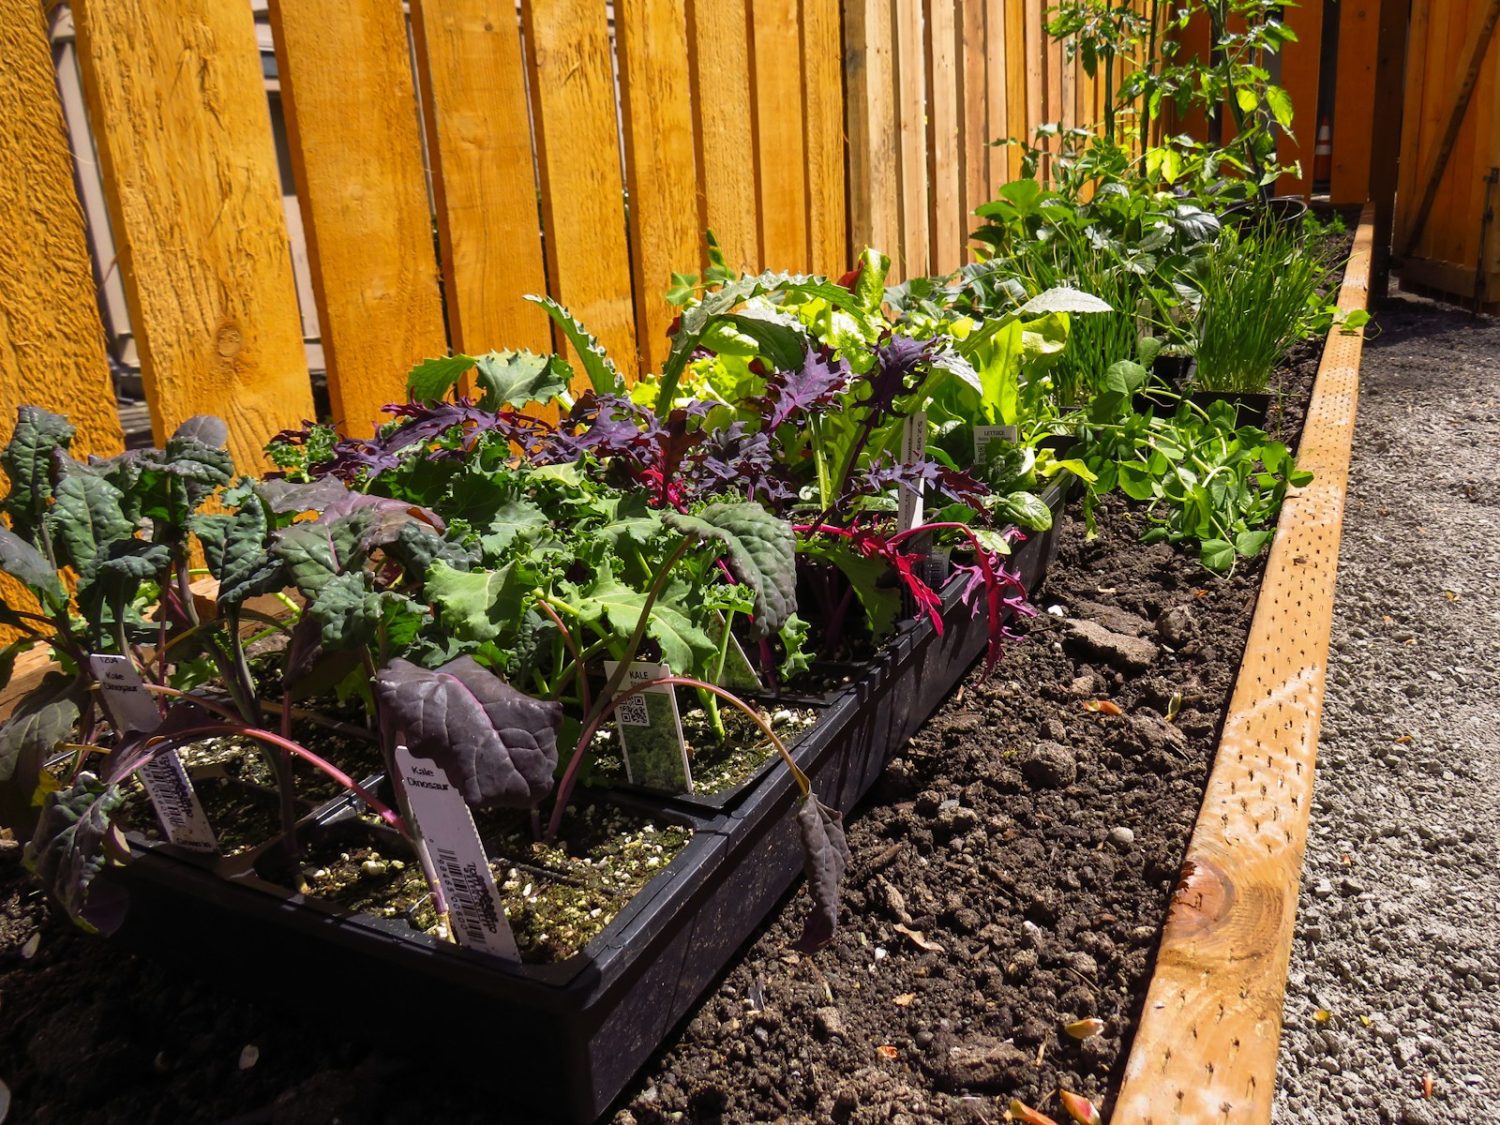
    In some cases, creating raised beds can be beneficial, especially if your soil has poor drainage or is compacted. Raised beds improve drainage, aeration, and soil temperature, providing an optimal environment for plant growth.

    By carefully considering these factors and choosing the right location, you lay the foundation for a thriving organic garden that rewards you with a bountiful harvest of fresh, healthy produce.

    Prepare the soil

    Preparing the soil is a crucial step in organic gardening, as it provides the foundation for healthy plant growth and a bountiful harvest. Before planting, it’s essential to remove any existing weeds or debris from the garden bed to prevent competition for nutrients and space. This can be done manually by pulling the weeds out by their roots or by using a hoe or weed trimmer. Next, adding compost or well-rotted manure to the soil helps improve its structure, fertility, and water-holding capacity. Compost also introduces beneficial microorganisms that contribute to overall soil health.

    Adequate watering is vital for seed germination and plant growth. Deep watering encourages strong root development and helps plants withstand dry spells. However, overwatering should be avoided, as it can lead to root rot and nutrient leaching. Monitoring the soil’s moisture levels and adjusting watering frequency accordingly is essential. Additionally, testing the soil pH is recommended to ensure it falls within the optimal range for the plants you intend to grow. Most vegetables and herbs prefer a slightly acidic to neutral pH level between 6.0 and 7.0. Adjusting the soil pH using organic amendments like lime or sulfur can be done if necessary.

    By following these soil preparation techniques, you can create an optimal environment for your organic plants to thrive, resulting in a bountiful and healthy harvest.

    Choose the right plants

    When choosing plants for your organic garden, it’s essential to select varieties that are well-suited to your specific climate and soil conditions. Consider the following factors when making your selections:

    **Climate:** Research the USDA plant hardiness zone for your area to determine which plants are likely to thrive in your local climate. Consider factors such as temperature, humidity, and rainfall. Choose plants that are adapted to your specific growing conditions to ensure their success.

    **Soil:** Different plants have different soil requirements. Some plants prefer acidic soil, while others prefer alkaline soil. Some plants require well-draining soil, while others can tolerate wet or compacted soil. Test your soil pH and texture to determine which plants are best suited for your garden.

    **Pest and disease resistance:** Choose plants that are known to be resistant to common pests and diseases in your area. This will help to reduce the need for chemical pesticides and fungicides, maintaining the organic integrity of your garden.

    **Companion planting:** Consider the concept of companion planting, which involves planting different plants together to benefit each other. Some plants, when grown together, can improve soil fertility, deter pests, or attract beneficial insects. Research companion planting techniques to optimize the growth and health of your plants.

    **Diversity:** Grow a diverse range of plants to enhance the resilience and sustainability of your garden. Monocultures (growing only one type of plant) can be more susceptible to pests and diseases. By growing a variety of plants, you create a more balanced ecosystem that can better withstand challenges.

    By carefully selecting plants that are suited to your climate, soil conditions, and specific needs, you can lay the foundation for a successful and bountiful organic garden.

    Organic pest control

    methods are essential for protecting your organic garden from pests without resorting to harmful chemicals. Several effective organic pest control methods are available, each with its benefits.

    Companion planting involves planting different types of plants together to benefit each other. For example, planting marigolds near tomatoes can help repel pests like aphids and whiteflies.

    Neem oil is a natural pesticide derived from the neem tree. It is effective against a wide range of pests, including aphids, mites, and whiteflies. Neem oil can be applied directly to plants or diluted with water and sprayed.

    Insecticidal soap is another natural pesticide effective against soft-bodied insects like aphids, mealybugs, and whiteflies. Insecticidal soap can be made at home or purchased from a garden supply store.

    Row covers are physical barriers placed over plants to protect them from pests. Row covers can be made of various materials, such as plastic, fabric, or netting.

    Beneficial insects are natural predators of pests. Encouraging beneficial insects into your garden can help control pest populations. Beneficial insects include ladybugs, lacewings, and parasitic wasps.

    By using these organic pest control methods, you can protect your organic garden from pests without harming the environment or your health.

    Harvesting and storing your crop

    is an important part of organic gardening. It is important to harvest your crops at the right time to ensure the best flavor and nutritional value. You should use sharp tools to avoid damaging the plants and handle your crops carefully to prevent bruising. There are several different ways to preserve your crops, such as canning, freezing, or drying them.

    Some methods of preservation are more suitable for certain types of produce. For example, canning is ideal for fruits and vegetables that are high in acidity, such as tomatoes, peaches, and pears. Freezing is a good option for fruits and vegetables that are high in moisture content, such as berries, corn, and peas. Drying is best suited for herbs, spices, and some fruits, such as raisins and apricots.

    Canning, freezing, and drying are all great ways to preserve your harvest and enjoy fresh, organic produce all year long. By following these tips, you can ensure that you get the most out of your organic garden.

  • Growing Your Garden: Tips and Tricks for American Gardeners

    Growing Your Garden: Tips and Tricks for American Gardeners

    Are you an American gardener looking to grow a successful garden? Look no further! This blog post will give you all the tips and tricks you need to get started. We’ll cover everything from planning and bed prep to choosing native plants and watering wisely. So, whether you’re a seasoned gardener or just starting, read on for some helpful advice.

    Planning and Bed Prep

    Growing Your Garden American Gardeners

    Planning and bed preparation are crucial steps in creating a successful garden. By following these simple tips, you can ensure your plants have the best chance to thrive.

    **Choose a location that receives at least 6 hours of direct sunlight daily.** Most vegetables and flowers need at least this much sunlight to grow well. If you don’t have a spot in your yard that gets this much sun, you can try growing some plants in containers to move around to follow the sun.

    **Amend the soil with compost or fertilizer to improve drainage and fertility.** Good drainage is essential for preventing root rot and other problems. Compost and fertilizer will help to improve the soil structure and provide nutrients for your plants.

    **Create a raised bed to improve drainage and aeration.** Raised beds are also a great way to warm the soil earlier in the spring, giving your plants a head start on the growing season.

    By following these tips, you can create a healthy and productive garden that will provide fresh, delicious produce all season long.

    Native plants: the best choices

    Native plants are the best choices for American gardeners because they are adapted to the local climate and soil conditions. This means they are more likely to thrive and require less water, fertilizer, and pesticides. Native plants also provide food and shelter for local wildlife, which can help to create a more balanced and sustainable ecosystem.

    In addition to these practical benefits, native plants can add beauty and interest to your garden. There are many native plants to choose from, so you can create a unique garden that reflects your style.

    When choosing native plants for your garden, it is essential to consider the following factors:

    – The climate and soil conditions in your area

    – The amount of sunlight your garden receives

    – The size and shape of your garden

    – Your personal preferences

    Once you have considered these factors, you can start to narrow down your choices and select the native plants that are right for your garden.

    Here are some tips for growing native plants in your American garden:

    – Start with a small garden. This will help you to learn how to care for native plants and to avoid making mistakes.

    – Choose plants that are well-suited to your climate and soil conditions.

    – Plant your plants in the right location. Make sure they receive the correct amount of sunlight and water.

    – Water your plants regularly, especially during dry spells.

    – Fertilize your plants according to their needs.

    – Prune your plants regularly to keep them healthy and looking their best.

    With some care and attention, you can grow a beautiful and sustainable garden filled with native plants.

    Watering Wisely

    Watering your plants deeply and infrequently encourages them to develop deep root systems, making them more drought-tolerant. Water early in the day so the leaves have time to dry before nightfall, reducing disease risk. Mulch around plants to help retain moisture and suppress weeds. Consider installing a drip irrigation system to deliver water directly to the roots of plants, minimizing evaporation and reducing water usage. Following these tips, you can water your garden wisely and help your plants thrive.

  • Silica: A Not-So-Magic Ingredient for Plant Health

    Silica: A Not-So-Magic Ingredient for Plant Health

    Silica: A Not-So-Magic Ingredient for Plant Health

    Silica has emerged as a topic of considerable interest and debate in plant health. This mineral, commonly found in the cell walls of plants, has been hailed for its potential to enhance plant strength, variegation, and resistance to pests and diseases. However, recent studies have shed light on a different side of silica, suggesting that it may not be the “magic ingredient” we once believed. Join us as we delve into the complexities of silica in plant health, examining its benefits and potential drawbacks and exploring the ongoing controversies surrounding its use.

    Silica in plant health

    Silica is a naturally occurring element abundant in the Earth’s crust. It is the second most abundant element in the Earth’s crust after oxygen. Silica is found in various forms, including sand, quartz, and opal. In plants, silica is located in the cell walls and helps to provide strength and rigidity. It also helps to protect plants from pests and diseases by acting as a physical barrier. Silica can also help to improve water uptake and nutrient transport within plants.

    Despite these benefits, some studies have suggested that silica can inhibit plant growth and development, mainly when applied in high concentrations. The effectiveness of silica in preventing or mitigating diseases is still debated, with some studies showing positive effects and others showing no significant impact. There is also some concern that silica can accumulate in soils and potentially affect soil health and microbial communities over time.

    The optimal application rates and methods for silica are still being researched, and there is a need for more standardized guidelines to ensure effective and safe use. Nevertheless, silica remains a topic of great interest in plant health, and ongoing research is shedding light on its complex role in plant biology.

    person watering plant with silica

    The controversies surrounding silica

    Utilizing silica in plant health has sparked considerable debate within the scientific community. While some studies have highlighted its beneficial effects, others have raised concerns regarding its potential adverse impact on plant growth and development. One of the primary controversies revolves around silica’s concentration-dependent effects. While moderate levels can enhance plant health, excessive amounts can hinder growth. High silica concentrations can impede root development, stunt plant growth, and diminish yields. This inhibitory effect stems from silica’s ability to bind with essential soil nutrients, rendering them less accessible to plants.

    Another contentious issue pertains to silica’s efficacy in disease prevention and mitigation. While specific studies have demonstrated its potential to bolster plant resistance against particular diseases, such as powdery mildew and blast, other investigations have yielded conflicting results, indicating no significant or detrimental impact. The effectiveness of silica in disease management appears to be influenced by a multitude of factors, including plant species, disease type, and environmental conditions.

    Furthermore, silica accumulation in soils and its subsequent impact on soil health and microbial communities have raised concerns. Silica’s inherent immobility in soils allows it to persist for extended periods, potentially altering soil structure and affecting drainage, aeration, and nutrient availability. Moreover, high silica levels can influence the composition and diversity of soil microbial communities, potentially disrupting crucial ecological processes.

    Despite these controversies, silica remains widely employed in agricultural practices, often incorporated into fertilizers and soil amendments. However, farmers and farming professionals must acknowledge the potential risks associated with silica application. Careful consideration of application rates and methods is crucial to minimize adverse effects on plant health, soil quality, and the environment. Further research is warranted to delve deeper into the intricate interactions between silica and plants and its long-term consequences on soil health and microbial communities.

  • Native American Gardening: The Three Sisters

    Native American Gardening: The Three Sisters

    Planting a garden with “The Three Sisters Crops” is a great way to incorporate Native American gardening practices into your outdoor space. The Three Sisters refers to the traditional companion planting technique of growing corn, squash, and beans together in the same plot. This method was used by many North American Indigenous peoples to ensure the plants worked symbiotically and yielded a larger harvest.

    The Three Sisters crops have an interesting history. According to some Native American creation stories, these three crops were given as gifts alongside fire and pottery from their respective creators. Corn, squash, and beans are all easy-to-grow vegetables that thrive in warm climates with plenty of sunshine. Growing them together can also help maximize space since they all take up relatively little room compared to other vegetables such as tomatoes or peppers.

    When cultivating the Three Sisters crops in a garden, it is important to remember that each plant has a place in the symbiotic relationship. Corn will provide the climbing pole for the bean plant and is the second crop to harvest. While squash is first to harvest, it prefers slightly cooler conditions of early Spring and will be finished producing before crowded out by the corn and beans. The bean plant will climb up the stalks of the corn, provide nitrogen fixation from the air and finish as the last crop harvested. All three sisters crops should be planted together.

    In addition to providing sustenance for human consumption, these three vegetables offer many benefits for wildlife. For example, pollinators such as bees are attracted to the flowers of both corn and squash while birds love snacking on bean seeds when they ripen in late summertime. Planting the Three Sisters together gives back to nature by providing food sources for beneficial creatures like these which can help maintain healthy ecosystems in our gardens year round.

    Finally, it’s worth noting that companion planting isn’t limited only to these three specific veggies; you can combine any number of compatible species in your garden plot. Experimenting with different combinations may yield additional benefits such as pest control since various plants can contain compounds that ward off insects or attract beneficial predators like ladybugs or lacewings! With this knowledge in hand you can tailor your outdoor space according to your own unique designs while still incorporating an essential aspect of Native American culture into your landscape design—a beautiful reminder of our shared history with nature’s gifts!

    Native American Gardening: The Three Sisters
    corn

    The Tall Sister: Corn

    Growing corn is a great way to enjoy fresh and delicious sweet corn right off the cob in your own backyard. With its long history of cultivation, growing corn is an easy and rewarding experience for gardeners of all skill levels. As the tall sister, it provides a climbing pole for the bean plant.

    When it comes to planting, you will want to find an open sunny area in your yard with plenty of space for your crop. Corn requires around three feet of space between each plant in order to reach full maturity; consider this when deciding how much land you’ll need to allocate for your crop. For best success, it is recommended that you prepare the soil by tilling it before planting. This ensures any weeds or pests are removed from the soil and helps create a more nutrient-rich environment for your plants to grow. Additionally, make sure that your soil has a pH level between 5.5 and 7.0, as this will help produce the most flavorful kernels that your family can enjoy!

    Once prepared, you can begin planting seeds directly into the ground about 1 inch deep every two or three inches apart; be sure not to overplant as overcrowding can reduce yields! Once planted, be sure to keep the soil moist at all times until sprouts appear above ground (about one-two weeks); then reduce waterings down to once per week while making sure they still receive one inch of water each time. If you’re looking for an added boost of nutrition later on during the growing season, consider using a light fertilizer roughly six weeks after planting; this helps ensure strong growth and increases yields come harvesting time!

    As far as selecting varieties go, there are four main types: standard (su), supersweet (sh2), low-sugar/starch (se) and small-kerneled (sd). Standard varieties have traditional corny flavor yet may not retain their sugar content as long after harvest; supersweet varieties offer extra sweetness but may not be as vigorous during growth; low-sugar/starch varieties have lower sugar content but greater starchiness; whereas small kerneled varieties are smaller in size with higher sugar content but lower yield potential overall. Be sure to pick the variety that suits your needs best for maximum enjoyment in the garden!

    Finally, come harvesting time – usually about two months after sowing – check ears regularly every few days by feeling them through their husks: if they feel plump and firm when gently squeezed then they’re ripe! Once harvested, eat them fresh off the cob within a few days– if not sooner–to ensure optimal flavor and texture before they start losing their sweetness due to starchy conversion.

    Overall, growing corn is an enjoyable experience both in terms of tending its development over time as well as ultimately savoring its delicious rewards at harvest time! By following these steps outlined above – along with some additional research – you can bring sweet corn straight from farm-to-table right in your own backyard!

    The Short Sister: Squash

    Growing squash is a great way to get delicious, healthy vegetables and can be done relatively easily – even by beginner gardeners! Squash plants are easy to grow, require minimal care and maintenance, and can be grown in both summer and winter.

    When it comes to growing squash, the most important thing to consider is location. Choose a spot that gets plenty of sunlight throughout the day and also has well-drained soil. To increase your chances of success, add compost or fertilizer to enrich the soil before planting. Make small mounds around where you plan on planting the squash to ensure proper drainage around the plant.

    If sowing from seeds, make sure to sow four or five seeds a few inches apart in each mound. Once the seedlings begin emerging, thin out any excess so that only one or two plants remain per mound – this will give them enough space for proper growth and development. If purchasing seedlings from a nursery instead of starting from seed, simply transplant them into the prepared mounds.

    In terms of care and maintenance, squash plants don’t require much attention after they have been planted. Water when necessary – usually once every one or two weeks depending on weather conditions – but avoid over-watering as it can lead to fungal diseases. Mulching around the plant can help retain moisture during dry spells too. You can also fertilize lightly once or twice during the season if desired; just make sure not to over-fertilize as this can lead to excessive vegetative growth (which means fewer flowers which leads to fewer fruits).

    Harvesting squash is simple — just wait until they reach their desired size then pick them off either right away or store them for use later in the year if needed. Knowing when exactly to harvest depends on what type of squash you’re growing; some types are meant for eating when young while others are best picked when more mature and full sized (for example pumpkins). In either case it’s best not to leave any fruits on the vine for too long since they will eventually start rotting and attract pests/diseases which could damage your crop further down the line.

    Overall, growing squash is an easy way for gardeners of all levels of experience to enjoy fresh produce with very little effort required! With some basic knowledge about where/when/how to plant them plus regular watering/mulching/fertilizing (if needed), you should have no problem producing a healthy crop of tasty winter or summer squash each year!

    The Other Sister: Beans

    Beans are one of the most popular vegetables grown in gardens, and with good reason – they’re easy to grow, require little maintenance and are highly nutritious. Not to mention that beans can be used for a variety of dishes, from soups and salads to stews and side dishes. Whether you choose pole or climbing beans, you can have a bumper crop of these tasty veggies in no time!

    Before getting started, it’s important to understand a few basics about bean growing. One key factor is soil temperature – beans prefer soil temperatures between 65°F (18°C) and 75°F (23°C). Soil should be well-draining but still moist. If your soil is too wet, your plants won’t do as well. It’s also important to keep weeds away; when left alone, they will consume the nutrients meant for your bean plants.

    If you’re new to growing beans, you may not know that there are two main types: pole beans and climbing beans. Pole beans need a trellis or support structure to grow up; this helps them stay upright and gives them something to climb on as they reach for sunlight. Climbing beans don’t require a support structure since they use their long tendrils to attach themselves onto whatever is available — like fences or posts — as they grow upward. Both types need space between each plant so that air can circulate freely; otherwise, heat can build up around the plants which can lead to disease issues.

    Legumes are an essential part of any garden because of their nitrogen-fixing capabilities. Legumes create a symbiotic relationship with bacteria called rhizobia that live inside nodules on the roots of the bean plant; this process is known as nitrogen fixation. The root provides food for the bacteria while the bacteria convert atmospheric nitrogen into ammonia which can then be absorbed by the plant and converted into nitrate – a form plants can use more efficiently than atmospheric nitrogen alone. Nitrogen is an essential nutrient for healthy plant growth so having legumes in your garden is hugely beneficial!

    Harvesting times will vary depending on what type of bean you’ve chosen; some varieties take 59 days while others take 79 days or more before they’re ready for picking! When picking your beans, make sure that they’re firm with no soft spots or discoloration; this indicates that they might be past their prime quality-wise and should probably be composted instead! Store freshly picked beans in an air-tight container either in your fridge or freezer—this will help protect them from spoiling quickly so you can enjoy them later!

    Growing your own beans at home has many benefits including getting fresh veggies straight from your garden as well as providing valuable nitrogen fixation for other non-legume crops surrounding them. There are two main types—pole and climbing—that all require adequate spacing between each plant and some kind of support if needed like a trellis for pole varieties. When harvested correctly at peak ripeness, store them properly for maximum shelf life enjoyment later down the line!

  • Grow Your Own Italian Herb Garden

    Grow Your Own Italian Herb Garden

    7 Essential Italian Herbs

    There are seven amazing herbs in an Italian herb garden that gives most Italian cuisine its rich, scrumptious flavors. I haven’t met anyone who doesn’t cook Italian dishes at home. Don’t you agree that it’s more practical and convenient to grow these plants in your garden so you’ll always have a flavorful and fresh supply every time you need to cook tasty Italian meals?

    Do you know that the most popular and the tastiest dishes come from Italy because they use herbs from their Italian herb garden? In fact, records in the culinary industry show that some of the best dishes in the world come from Italy.

    Italian herb garden

    Let’s go over the 7 essential herbs found in an Italian herb garden, and their uses and benefits:
    1. Basil is one of the most commonly used herbs. It is said that its distinct flavor is the soul of Italian cuisine. It is also beneficial to your garden — If you plant Basil with tomatoes and peppers, it will help improve the flavor of these plants. Basil is also a known repellent to mosquitoes and flies. Grow it with thyme, as they make a perfect pair, growing together.

    2. Parsley is known in the culinary industry as an excellent flavoring too. In ancient times, many people use Parsley as breath mints. Very nutritious, eating parsley raw also helps eradicate bad breath. This is why parsley is used as a wonderful garnish.

    3. Oregano on the other hand is used as decorative and has a distinct flavor that can complement many meals. This herb delivers the best flavor when harvested as soon as its beautiful purple flowers start to bloom. It also has great medicinal properties, and is widely used as an effective anti-oxidant, anti-fungal, as a digestive aid, and for relieving pain and inflammation.

    4. Fennel is another great Italian herb that is used in making Italian sausages. This perennial plant should be replanted and divided every two to three years, because it loses its flavor when it reaches maturity. Fennel leaves are used in soups, condiments and sauces, and its oil is used to flavor candy, liqueurs, medicine and fish. It is used to make soaps too!

    5. Another perennial plant that is noted for its numerous culinary contributions is Rosemary. It is very sensitive to frost and is known to attract bees. It’s a kind of shrub herb plant with color blue flowers. Use it as a gorgeous ornamental plant or as a welcome culinary flavoring.

    6. Garlic is one of the most popular herbs in any garden and is a basic ingredient in many Italian dishes. I’m sure of one thing – if you don’t grow garlic in your garden, it cannot be considered as an Italian garden! Garlic can thrive with very little attention. Once harvested, they can be pickled, frozen, or stored in the fridge for future use.

    7. Sage is a popular herb that graces countless Italian recipes, ranging from meats to salads. If you want to grow sage, I suggest that you keep your plants well trimmed so that you can take advantage of the new shoots – the most delicious plant part. Harvest these plants after they have bloomed. Sage is also known for its health benefits – it is a great memory enhancer, has anti-inflammatory properties and acts as a powerful antioxidant too!

    There are other herbs that can serve as a nice addition to your Italian herb garden but starting off with these 7 essential herbs is a great idea since they are used in a wide variety of recipes.

    The Benefits of Adding Organic Matter and Compost to Your Soil

    If you want your garden to be healthy and productive, it’s important to start with healthy soil. One of the best ways to improve the quality of your soil is by adding organic matter and compost. Here’s a look at some of the benefits of adding organic matter and compost to your soil.

    Improved Nutrient Content

    Organic matter and compost help to improve the nutrient content of your soil. This is because they add essential nutrients, such as nitrogen, phosphorus, and potassium, which are vital for plant growth. Adding organic matter and compost to your soil can also help to improve the overall structure of your soil, making it more loose and easy for plant roots to penetrate.

    Improved Water Retention

    One of the biggest benefits of adding organic matter and compost to your soil is improved water retention. This is because organic matter helps to hold water in the soil, making it available for plants to use when they need it most. This is especially beneficial during times of drought or extended periods of dry weather.

    Increased Soil Fertility

    Adding organic matter and compost to your soil can also help to increase its fertility. This is because organic matter helps to promote the growth of beneficial microorganisms in the soil, which can help improve plant growth. Additionally, organic matter and compost can help add essential nutrients back into the soil that may have been depleted by previous crops.

    As you can see, there are many benefits to adding organic matter and compost to your soil. If you want your garden to be healthy and productive, be sure to add these important ingredients!

    How to Plant and Care for Your Italian Herbs

    Growing your own Italian herbs can be a rewarding experience. Not only do you get to enjoy the delicious results of your labor, but you also get to control how your herbs are grown and cared for. Here are a few tips on how to get started.

    Choose the Right Location

    Herbs need plenty of sunlight to grow, so choose a spot in your yard or on your windowsill that gets at least six hours of direct sunlight each day. Once you’ve found the perfect spot, it’s time to prepare the soil.

    Prepare the Soil

    Herbs thrive in well-drained soil, so be sure to loosen the soil and remove any rocks or debris before planting. You can also improve drainage by mixing in some sand or organic matter. Once your soil is ready, it’s time to plant!

    Plant Your Italian Herbs

    When planting your herbs, be sure to give them plenty of space to grow. If you’re planting multiple herbs in one container, make sure each herb has its own individual pot. Once you’ve planted your herbs, water them regularly and fertilize them every two weeks with an all-purpose fertilizer.

    With a little care and attention, your herbs will thrive! Remember to choose a sunny location, prepare the soil before planting, and water and fertilize regularly. With these tips, you’ll be enjoying fresh herbs in no time!

    The Best Time to Harvest Herbs

    Do you love the taste of fresh Italian herbs in your cooking? Growing your own herbs is a great way to have them on hand whenever you need them. But when is the best time to harvest them? Read on to find out!

    Harvest the herbs when they are mature, but before they flower. This will give you the best flavor. Most herbs are ready to harvest 4-6 weeks after planting.

    To dry your herbs, tie them in small bundles and hang them upside down in a dark, dry place. Or, lay them out on a screen or paper towels in a single layer and set them in a warm, dry place out of direct sunlight. Once they’re dried, store them in an airtight container in a cool, dark place.

    If you want to freeze your herbs, wash and dry them thoroughly. Chop them finely and then put them into ice cube trays or freezer bags, pressing out as much air as possible before sealing. Label and date the containers, and then store them in the freezer for up to 6 months.

    Now that you know when to harvest your Italian herbs, get out there and start picking! Fresh (or frozen) herbs can really take your cooking to the next level. Bon appétit!

  • Pictures are Worth a Thousand Words, Photoshopped Pictures are Worthless!

    Pictures are Worth a Thousand Words, Photoshopped Pictures are Worthless!

    We’ve all been there. You see a picture that’s so good, you just have to share it with your friends or buy the item. But before you hit that share or buy button, ask yourself this: could this picture be fake? In the age of the internet, it’s getting harder and harder to tell what’s real and what’s been Photoshopped. Here are a few examples of recent viral pictures that turned out to be fake.

    Plants that Do Not Exist

    Changing colors of plants is a popular scam with pictures. Many are selling seeds and shipping from overseas. You may actually get some seeds, but they will not be as advertised and may be an invasive species. All these are fake plants that have been photoshopped and do not exist.

    The Loch Ness Monster…or a Log?

    In 2016, a grainy picture of the Loch Ness Monster supposedly surfaced online. The image, which was taken from a boat, showed a large creature swimming through the water. But upon closer inspection, skeptics pointed out that the supposed monster looked an awful lot like…a log. Sorry, Nessie fans! This one’s a fake.

    A Giant Spider Invasion…or Just Some Photoshop Skillz?

    In 2013, reports began circulating online about a massive spider invasion in Texas. Supposedly, these arachnids were so big they could kill human beings. The only problem? The pictures of these supposedly deadly spiders were later revealed to be doctored images of regular-sized spiders. So if you’re ever in Texas and see a spider the size of a small child, don’t worry—it’s not real!

    The Giant Bunny…or Another Ad?

    Perhaps the most famous example of a fake viral picture is the so-called “giant bunny.” This image, which originally circulated as an ad for Easter candy, shows an absolutely massive rabbit sitting in a living room. While there are such things as giant rabbits (they’re called Flemish Giants), the bunny in this picture is almost certainly not one of them. If you want to see a real giant rabbit, head to your local pet store—but don’t believe everything you see online!

    Fake pictures are becoming more and more common on the internet. So next time you see an incredible picture online, think twice before you hit that share button! Chances are, it might not be as amazing as it seems.

  • Plant Seeds: Pollination to Germination

    Plant Seeds: Pollination to Germination

    Seeds are one of the most important parts of a plant. Not only do they allow plants to reproduce, but they also contain the embryo that will grow into a new plant. Seeds are formed as part of the process of reproduction in seed plants, which includes both gymnosperms and angiosperms. In this blog post, we’ll take a closer look at how seeds are formed, and what goes into making them such an integral part of the plant reproductive process.

    When a seed plant is pollinated, the pollen grain germinates and produces a tube that grows down into the ovule. At the tip of this tube, the nucleus of the pollen grain – which contains the male gametes – enters the embryo sac. One of these gametes fertilizes the egg cell in the embryo sac, forming a zygote. The zygote then begins to divide, and the resulting cells begin to grow and differentiate.

    mixture of seeds
    mixture of seeds

    As the embryo grows, it starts to accumulate food reserves. These reserves are stored in the cotyledons, which are thickened leaves that form part of the seed coat. The seed coat itself develops from the integuments of the ovule, and serves to protect the embryo from damage. Once the seed coat is fully formed, the seed is complete.

    Seeds play a vital role in plant reproduction, and are essential for ensuring that new plants can grow and thrive. By understanding how they are formed, we can better appreciate the important role that they play in the life cycle of plants.

    Seed Dormancy

    Seeds can remain dormant – or inactive – for long periods of time. Dormancy is a survival mechanism that helps seeds to survive unfavorable conditions, such as drought or cold temperatures. Once the conditions become favorable again, the seed will germinate and start to grow.

    Dormancy can be broken by a number of different methods, including exposure to light, temperature changes, or chemicals. By understanding dormancy, we can better control the germination of seeds, and ensure that they grow when and where we want them to.

    Seed Dispersal

    Seeds need to be dispersed in order to find suitable conditions for germination. Dispersal can be achieved by a number of different means, including wind, water, animals, and humans.

    Wind dispersal is the most common form of seed dispersal. Seeds are carried away by the wind to other locations, where they may find suitable conditions for germination. Water dispersal is another common method, and involves seeds being carried away by water to other areas.

    Animals and humans can also play a role in seed dispersal. Animals may eat fruits or seeds and then defecate them in other locations, while humans may deliberately or accidentally transport seeds to new areas.

    Seed dispersal is essential for the survival of plants, and helps to ensure that new plants can germinate and grow in suitable areas. By understanding how it works, we can better appreciate the role that dispersal plays in the life cycle of plants.

    Seed germination

    Seed germination is the process by which a seed starts to grow into a new plant. It involves the growth of the embryo, and the development of the root system and the shoot system. The first step in germination is the activation of the seed, which is usually caused by water. Once the seed is activated, it begins to take in water and nutrients from the surrounding soil.

    The embryo then starts to grow, and the root system develops first. The root system anchors the plant in the soil and absorbs water and nutrients from the ground. The shoot system then develops, and the plant begins to grow taller. Once the seedlings have reached a certain size, they become self-sufficient and can start to produce their own food.

    Germination is an important step in the life cycle of plants, and is necessary for ensuring that new plants can be grown. By understanding how it works, we can better appreciate the process by which plants come into existence.

    Seed dormancy, germination, and dispersal are all essential steps in the life cycle of plants. By understanding how they work, we can better appreciate the role that seeds play in the reproduction of plants.

    Basic Seed Starting Steps

    There are a few basic steps you need to take in order to start seeds:

    1. Choose the right container: You’ll need something that has drainage holes in the bottom, and is big enough to fit all of the soil and seeds you’ll be planting.

    2. Choose the right soil: Use a quality potting mix that will allow your seeds to germinate and grow properly.

    3. Plant your seeds: Follow the specific instructions on the seed packet for how deep to plant your seeds and how far apart to space them.

    4. Water your plants: Seeds need water in order to germinate, so make sure to keep the soil moist but not soggy.

    5. Monitor your plants: Keep an eye on your plants and make sure they’re getting enough light, water, and nutrients.

    With a little care and attention, you can successfully start your own seeds at home! Follow these tips and you’ll be well on your way to growing your own plants from seed.

  • Fall Decorating Ideas for Your Outdoor Space

    Fall Decorating Ideas for Your Outdoor Space

    Fall is a time for cozy fires, pumpkin spice everything, and of course, beautiful decorations. If you’re looking to add some autumn flair to your outdoor space, we’ve got you covered! In this blog post, we’ll share some ideas for decorating your porch, patio, or yard in preparation for the fall season. So read on and get inspired to create a warm and inviting outdoor space for all to enjoy!

    Decorating with Garden Mums, Hay Bales and Corn Stalks

    Garden mums are beautiful flowers come in a variety of colors, and can be used to create stunning arrangements indoors or out. So if you’re looking for some easy and affordable ways to add some autumn flair to your décor, look no further than garden mums!

    Hay bales can be used to create a warm and inviting outdoor space for all to enjoy. You can use them as seating, decoration, or even as part of your landscaping! So read on to learn more about how you can use hay bales to decorate your yard this fall. Check the hay bales for ants and other critters before loading them in the car.

    Corn stalks are a classic fall decoration, and can be used in a variety of ways. You can use them as part of your landscaping, or as an accent in your décor. There are many different ways to incorporate corn stalks into your fall décor, so get creative and have fun!

    Enjoy a Patio Firepit or Fireplace

    Seasonal fall holiday decorating. Front door autumn decor.
    Seasonal fall holiday decorating. Front door autumn decor.

    Patio fire pits are a great way to enjoy the outdoors while staying warm. They can be used for cooking, warmth, or just to enjoy the flames. In this blog post, we’ll share some tips for using a patio fire pit, and we’ll also provide some ideas for how to decorate your outdoor space with one. So read on and learn more about how you can enjoy a cozy fire this fall!

    If you have a fireplace, you can also use it to decorate your outdoor space. You can hang stockings, garland, or even lights from your mantel. Or if you don’t have a mantel, you can use the ledge of your fireplace to display fall décor. Get creative and have fun!

    We hope you enjoyed these ideas for decorating your outdoor space for fall. If you have any questions, please feel free to contact us. We’re always happy to help!