Posted on

Low-Maintenance Perennials for Year-Round Color

Low-Maintenance Perennials for Year-Round Color

Creating a vibrant garden that stays beautiful through every season is easier than it sounds. The secret? Low-maintenance perennials. These plants return year after year with little effort, offering steady color and texture without constant replanting. Once you choose the right varieties and place them thoughtfully, your garden almost takes care of itself. Let’s explore some of the best perennials for long-lasting color and learn how to keep them thriving with minimal work.


Why Perennials Are Perfect for Easy Gardening

Perennials are plants that live for more than two years. Unlike annuals, which need replanting every season, perennials settle in and return on their own. Once established, many varieties handle drought, resist pests, and even thrive in poor soil. This means less watering, fewer replacements, and more time enjoying your garden instead of working in it.

Low-maintenance perennials are especially valuable for busy gardeners. They provide structure and reliability, acting as the backbone of your landscape. Even better, many bloom at different times of the year, creating a continuous wave of color.


Planning for Year-Round Color

A garden that shines in every season takes a little planning up front. The key is choosing perennials that bloom at different times and pairing them with plants that have colorful foliage or seed heads. This mix ensures there’s always something interesting happening, even in winter.

  • Spring: Focus on early bloomers like creeping phlox or columbine. Their flowers bring life after a long winter.
  • Summer: Introduce bold color with coneflowers, black-eyed Susans, and daylilies.
  • Fall: Asters and sedum extend the season with late flowers and warm hues.
  • Winter: Evergreens and ornamental grasses keep the garden lively with texture and structure.

By layering these types, you can create a garden that feels alive all year long.


Perennials for Spring Color

Spring marks the start of the show. After months of cold, early perennials deliver bursts of color that signal warmer days ahead.

Creeping Phlox (Phlox subulata)

This low-growing groundcover blankets the garden in carpets of pink, purple, or white flowers. It spreads easily, making it perfect for slopes or edging paths. Once established, it thrives with very little care.

Hellebores (Helleborus orientalis)

Known as Lenten roses, hellebores bloom in late winter to early spring. Their nodding flowers in soft pinks, purples, and creams are a welcome surprise during chilly days. These plants are evergreen and deer-resistant, making them perfect for shady spots.

Columbine (Aquilegia)

Delicate, nodding flowers appear in mid-spring, often in shades of blue, red, or yellow. Columbines reseed themselves and attract hummingbirds, adding life to your garden with little effort.


Perennials for Summer Brilliance

Summer is the season of abundance, and low-maintenance perennials ensure your garden stays lively during the hottest months.

Coneflower (Echinacea)

A true garden staple, coneflowers produce daisy-like blooms in purple, pink, and even orange or white. They are drought-tolerant, loved by pollinators, and bloom for weeks on end.

Black-Eyed Susan (Rudbeckia hirta)

Golden-yellow petals with dark centers make this plant a cheerful sight in midsummer. Black-eyed Susans are hardy, thrive in poor soil, and continue blooming into fall.

Daylily (Hemerocallis)

Often called the “perfect perennial,” daylilies tolerate neglect, poor soil, and drought. Their trumpet-shaped flowers come in countless colors, and many varieties rebloom later in the season.


Perennials for Fall Beauty

As temperatures cool, certain perennials step into the spotlight, keeping the garden vibrant long after summer’s peak.

Asters (Symphyotrichum spp.)

Asters are fall stars, offering daisy-like flowers in shades of purple, pink, and white. They’re pollinator magnets, especially for migrating butterflies.

Sedum (Sedum spectabile)

Also called stonecrop, sedum thrives in poor soil and full sun. Its succulent leaves turn deep red or bronze in fall, and its clusters of pink flowers transition into rich seed heads that last through winter.

Japanese Anemone (Anemone hupehensis)

Tall stems topped with soft pink or white blooms sway gracefully in autumn breezes. Japanese anemones spread gently over time, filling shady or partially sunny areas with elegance.


Perennials with Winter Interest

Winter doesn’t have to mean a dull garden. Many perennials and ornamental plants provide color and texture even in the coldest months.

Evergreen Heuchera (Coral Bells)

Heucheras are grown for their foliage, which comes in shades of burgundy, silver, and lime green. Their evergreen leaves keep beds colorful through winter and pair beautifully with spring bulbs.

Ornamental Grasses

Grasses like switchgrass or feather reed grass hold their plumes well into winter. Their golden stalks sway in the wind and catch frost beautifully on cold mornings.

Hellebores (Again!)

Because hellebores keep their foliage year-round and bloom early, they bridge the gap between winter and spring, providing color when little else does.


Tips to Keep Perennials Thriving with Minimal Effort

Even the easiest plants benefit from a few simple habits. These steps will keep your garden looking fresh without demanding constant work:

  • Start with the right plant in the right place. Match sun and soil conditions to what each plant prefers. This single step prevents most problems.
  • Water deeply but infrequently. Once perennials are established, they need far less water than annuals.
  • Mulch generously. A layer of mulch suppresses weeds, keeps soil moist, and adds organic matter as it breaks down.
  • Divide when necessary. Every few years, dig up and split crowded clumps to keep them vigorous and spread color to new areas of the garden.
  • Leave seed heads in winter. Many seed heads look beautiful against snow and provide food for birds. Cut them back in early spring for fresh growth.

Pairing Perennials with Evergreen Structure

For a garden that truly looks good year-round, pair perennials with evergreens. Shrubs like boxwood, dwarf holly, or juniper keep their shape and color, anchoring the design when flowers fade. This creates a sense of balance and makes the space feel intentional even in the off-season.


Why Low-Maintenance Gardens Matter

Life is busy. Gardens should be a joy, not a chore. By choosing resilient perennials, we create spaces that welcome us instead of demand from us. They save money, reduce waste, and support pollinators year after year. Most of all, they allow us to step outside and simply enjoy the beauty around us.


Welcoming Endless Color to Your Garden

With the right perennials, color never truly leaves your yard. It flows from spring flowers to summer blooms, from autumn tones to winter textures. Each season brings its own personality, yet the garden feels connected and whole. By planting thoughtfully now, you create a living canvas that changes but never fades—a space that gives joy in every month of the year.

Posted on

How to Start a Pollinator-Friendly Garden (Bees, Butterflies, and Hummingbirds)

How to Start a Pollinator-Friendly Garden (Bees, butterflies, and hummingbirds)

A pollinator-friendly garden is more than just beautiful flowers. It is a living space that supports bees, butterflies, hummingbirds, and other creatures that keep our ecosystems alive. These pollinators are vital for fruits, vegetables, and native plants to thrive. Without them, many of our favorite foods and flowers wouldn’t exist. Starting your own pollinator garden is easier than you might think, and the rewards are endless. You will see more life in your yard, enjoy colorful blooms, and know you’re helping nature in a powerful way.


Why Pollinators Matter

Pollinators move pollen from flower to flower. This simple act makes plants produce seeds and fruits. About one in every three bites of food you eat is thanks to a pollinator. Apples, tomatoes, blueberries, almonds, and even coffee depend on them. Yet, pollinator populations are in trouble. Habitat loss, pesticides, and climate changes have all reduced their numbers. Creating even a small garden space can make a big difference.


Choosing the Right Location

Start by picking a sunny spot. Most pollinator plants need six to eight hours of sunlight each day. A garden near your vegetables or fruit trees can boost harvests. Avoid areas with heavy foot traffic or where pets play often, so pollinators feel safe. If you only have a balcony or patio, don’t worry. A few containers with the right plants can still attract visitors.


Selecting Plants They Love

Pollinators need two things: nectar and pollen. The best gardens provide both all season long. Choose native plants whenever possible. Native flowers evolved alongside local pollinators and are their favorite food source.

Flowers for Bees

Bees love simple, open blooms they can land on. Good choices include:

  • Coneflowers (Echinacea)
  • Black-eyed Susans (Rudbeckia)
  • Bee balm (Monarda)
  • Goldenrod (Solidago)

Flowers for Butterflies

Butterflies are drawn to clusters of small flowers they can perch on. Try:

  • Milkweed (Asclepias) for monarchs
  • Zinnias for summer color
  • Lantana for constant nectar
  • Verbena for long bloom periods

Flowers for Hummingbirds

Hummingbirds love bright red, tubular flowers. Their long beaks are made for these blooms:

  • Trumpet vine
  • Salvia
  • Columbine
  • Cardinal flower

Mix these plants together so there’s food for every pollinator type.


Plant for Every Season

Pollinators are active from spring through fall. Plan your garden so something is always blooming.

  • Spring: Tulips, hyacinths, wild columbine
  • Summer: Sunflowers, bee balm, lavender
  • Fall: Asters, goldenrod, sedum

Layering blooms like this ensures pollinators never go hungry.


Provide More Than Flowers

A true pollinator garden offers food, water, and shelter.

  • Water: A shallow birdbath or dish with pebbles works perfectly. Pollinators need a place to land while they drink.
  • Shelter: Leave a few bare spots of soil for ground-nesting bees. Add small logs or branches for overwintering insects.
  • Host Plants: Caterpillars need food too. Milkweed feeds monarch caterpillars, parsley feeds swallowtails, and passion vine feeds Gulf fritillaries.

Skip the Chemicals

Pesticides and herbicides harm pollinators, even in tiny amounts. If you must treat pests, use natural methods like hand-picking bugs or introducing beneficial insects (ladybugs, lacewings). Avoid spraying while plants are in bloom.


Create a Welcoming Design

Pollinator gardens don’t need to be wild or messy. Plant in groups of three or more so pollinators notice them from afar. Combine tall and short plants for layers of color. Add paths or stepping stones for easy maintenance. If space is tight, vertical planters or hanging baskets can still help.


Attracting Pollinators Year After Year

Once your garden is established, it will get better each season. Perennials will grow larger, and pollinators will learn to return. Leave some seed heads standing through winter to provide food and shelter. Over time, you’ll notice more butterflies, more hummingbirds, and busier bees.


Benefits Beyond the Garden

A pollinator garden is not just for wildlife. It creates a peaceful space for you too. Watching butterflies drift from flower to flower or hearing hummingbirds buzz by is deeply calming. Children learn about nature firsthand. Neighbors may even be inspired to start their own gardens. Together, these small spaces form a network of safe havens for pollinators everywhere.


Small Steps Make Big Changes

You don’t need acres of land or a perfect plan. Start with a few native flowers in one sunny corner. Add a shallow dish of water. Skip the chemicals. Over time, expand with more plants and blooms for every season. Every patch of habitat helps. Pollinators will find it, and they will thank you with life, color, and movement all season long.


A Garden That Gives Back

When you plant for pollinators, you do more than decorate your yard. You give bees, butterflies, and hummingbirds a safe place to thrive. In return, they bring beauty, joy, and abundance to your world. This partnership is as old as nature itself. And it begins with a single flower in your hand.

Posted on

Best Vegetables for Container Gardening on Patios and Balconies

Best Vegetables for Container Gardening on Patios and Balconies

Container gardening has opened the door for anyone to grow fresh vegetables—even without a backyard. A sunny patio or small balcony can transform into a productive mini farm. With the right vegetable choices and simple care, you can enjoy crisp greens, colorful peppers, and juicy tomatoes right outside your door. This guide walks you through the best vegetables for container gardening, why they thrive in small spaces, and how to make your harvest abundant.


Why Container Gardening Works So Well

Container gardening is more than just a space-saver. It’s also about control. By growing vegetables in pots, buckets, or troughs, you can manage soil quality, water levels, and sunlight with ease. This reduces pests and diseases that often come with ground planting. It’s also ideal for renters or urban dwellers who don’t have access to traditional garden plots.

Most of all, container gardening is flexible. You can move plants to chase the sun, bring them inside during a cold snap, or rearrange them to create a living green screen for privacy.


What Makes a Vegetable Perfect for Containers?

Certain traits make some vegetables thrive in containers:

  • Compact growth habit – Plants that stay small or bushy do better than sprawling types.
  • Short growing season – Vegetables that mature quickly are easier to manage in limited space.
  • High productivity per plant – The more food one plant produces, the better for container gardeners.
  • Adaptability to shallow roots – Crops that don’t need deep soil thrive in pots.

Now let’s dive into the vegetables that check all these boxes.


Leafy Greens: Fast and Fuss-Free

Lettuce

Lettuce is a classic for container gardens. It grows quickly, tolerates partial shade, and offers endless harvests if you cut outer leaves instead of pulling the whole plant. Loose-leaf varieties like ‘Black Seeded Simpson’ or ‘Buttercrunch’ work especially well.

  • Container size: 6–8 inches deep
  • Sun: 4–6 hours
  • Tip: Sow every 2–3 weeks for nonstop salads.

Spinach

Spinach thrives in cool weather and grows fast, making it a perfect spring and fall crop. It does well even in shallow containers and can be harvested baby-leaf style.

  • Container size: 6–8 inches deep
  • Sun: 4–6 hours
  • Tip: Keep soil moist to prevent bolting (flowering too soon).

Kale

Kale’s sturdy leaves hold up well to container life and can be picked for months. Compact types like ‘Dwarf Blue Curled’ are ideal for tight spaces.

  • Container size: 8–10 inches deep
  • Sun: 6+ hours
  • Tip: Harvest outer leaves often to encourage new growth.

Compact Fruiting Vegetables

Cherry Tomatoes

Tomatoes are container favorites, and cherry types are the most forgiving. They ripen quickly, produce heavily, and don’t sprawl as much as big slicers. Look for dwarf or patio varieties like ‘Tiny Tim’ or ‘Tumbling Tom.’

  • Container size: 12–16 inches deep (5+ gallons)
  • Sun: 6–8 hours
  • Tip: Stake or cage early to support heavy fruit clusters.

Peppers (Sweet and Hot)

Peppers love the heat and stay compact, making them excellent for pots. Bell peppers, jalapeños, and even ornamental chilies do well in containers with full sun and rich soil.

  • Container size: 10–12 inches deep (3+ gallons)
  • Sun: 6–8 hours
  • Tip: Use a lightweight potting mix and water consistently to prevent blossom end rot.

Bush Beans

Bush beans don’t climb, so they fit nicely in small planters. They mature quickly and provide multiple harvests throughout summer.

  • Container size: 8–10 inches deep
  • Sun: 6–8 hours
  • Tip: Plant in batches for a steady supply of beans.

Root Vegetables for Deep Containers

Radishes

Radishes grow in just 3–4 weeks, making them perfect for impatient gardeners. They don’t need deep soil and are a great starter crop for beginners.

  • Container size: 6–8 inches deep
  • Sun: 4–6 hours
  • Tip: Keep soil loose so roots form evenly.

Carrots

Carrots thrive in containers, especially short or round types like ‘Parisian Market’ or ‘Little Finger.’ These varieties are bred for shallow soils.

  • Container size: 10–12 inches deep
  • Sun: 6–8 hours
  • Tip: Thin seedlings early for proper root development.

Beets

Beets give you both edible roots and leafy greens. They do well in deep containers and are tolerant of cooler weather.

  • Container size: 10–12 inches deep
  • Sun: 6+ hours
  • Tip: Harvest young greens as you thin seedlings for tender leaves.

Herbs: The Perfect Companion

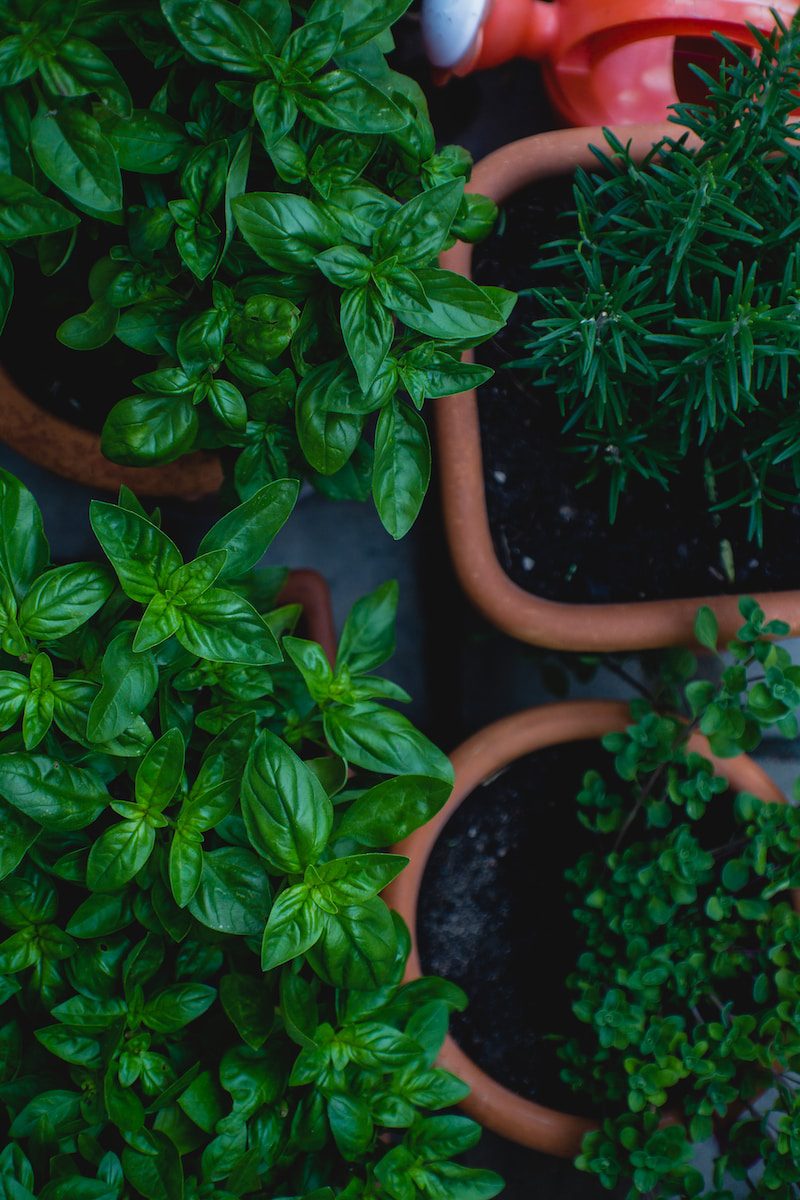
Though not technically vegetables, herbs pair beautifully with container veggies. Basil boosts tomato flavor, mint repels pests, and parsley thrives in partial shade. Mix herbs into your vegetable pots or give them their own containers.

  • Best herbs for containers: Basil, chives, cilantro, parsley, thyme, mint
  • Container size: 6–8 inches deep for most herbs
  • Tip: Pinch flowers to keep plants producing leaves longer.

Choosing the Right Containers

The container is just as important as the vegetable. Here’s what to look for:

  • Depth: Match pot depth to root needs. Leafy greens need 6–8 inches; tomatoes need 12–16 inches.
  • Drainage: Holes at the bottom are non-negotiable to prevent root rot.
  • Material: Plastic retains moisture, terracotta breathes, and fabric pots encourage strong roots.
  • Size: Bigger is better—more soil means fewer waterings and stronger plants.

Repurposed containers like buckets, crates, or old tubs also work well, as long as they drain properly.


Soil and Fertilizer Basics

Container veggies need light, airy soil—not heavy garden dirt. Use high-quality potting mix with added compost or slow-release fertilizer. During the growing season, supplement with liquid feed every 2–3 weeks, especially for heavy feeders like tomatoes and peppers.

  • Tip: Mix perlite or vermiculite into the soil to boost drainage and aeration.

Watering Made Simple

Containers dry out faster than garden beds. A consistent watering routine is key:

  • Check daily: Stick your finger in the soil—if dry 1 inch down, water deeply.
  • Morning watering: Best time to reduce evaporation and prevent fungal issues.
  • Self-watering pots: Great for balconies where you may forget to water.

Mulching with straw or shredded leaves also helps keep soil moist and cool.


Arranging Your Patio Garden

Think vertically. Use plant stands, shelves, or railing planters to maximize space. Group sun-loving plants together and keep shade-tolerant greens lower. Trailing plants like cherry tomatoes or strawberries look stunning cascading over the edges of hanging baskets.

Companion planting works beautifully in containers too. Pair basil with tomatoes, or tuck radishes around peppers to fill empty soil space.


Seasonal Planting Tips

  • Spring: Focus on greens, radishes, and peas.
  • Summer: Switch to heat lovers like tomatoes, peppers, and bush beans.
  • Fall: Bring back kale, spinach, and carrots for cooler weather harvests.
  • Winter (mild climates or indoors): Grow lettuce, herbs, and microgreens under grow lights or in sunny windows.

Troubleshooting Common Issues

  • Yellow leaves? Often a sign of overwatering or nutrient deficiency.
  • Wilting in heat? Provide afternoon shade or water more frequently.
  • Few fruits? Pollinate flowers manually with a small brush or shake the plant gently.
  • Pests like aphids? Spray with soapy water or introduce ladybugs.

Creating a Mini Oasis

Container gardening on patios and balconies is more than food—it’s an experience. You’ll notice bees visiting, the joy of plucking a tomato warm from the sun, and the scent of basil drifting in the air. These small gardens turn overlooked spaces into thriving retreats.


Harvest Abundance in Small Spaces

You don’t need acres to grow fresh vegetables. A few well-chosen plants, good soil, and thoughtful care can fill your kitchen with homegrown flavors all season long. Whether you’re growing crunchy carrots in a bucket or lush lettuce on a windowsill, container gardening proves that abundance can happen anywhere—even on a balcony high above the street.

Posted on

Beginner’s Guide to Growing Herbs Indoors (Basil, Mint, Oregano, and More)

Beginner’s Guide to Growing Herbs Indoors (Basil, Mint, Oregano, and More)

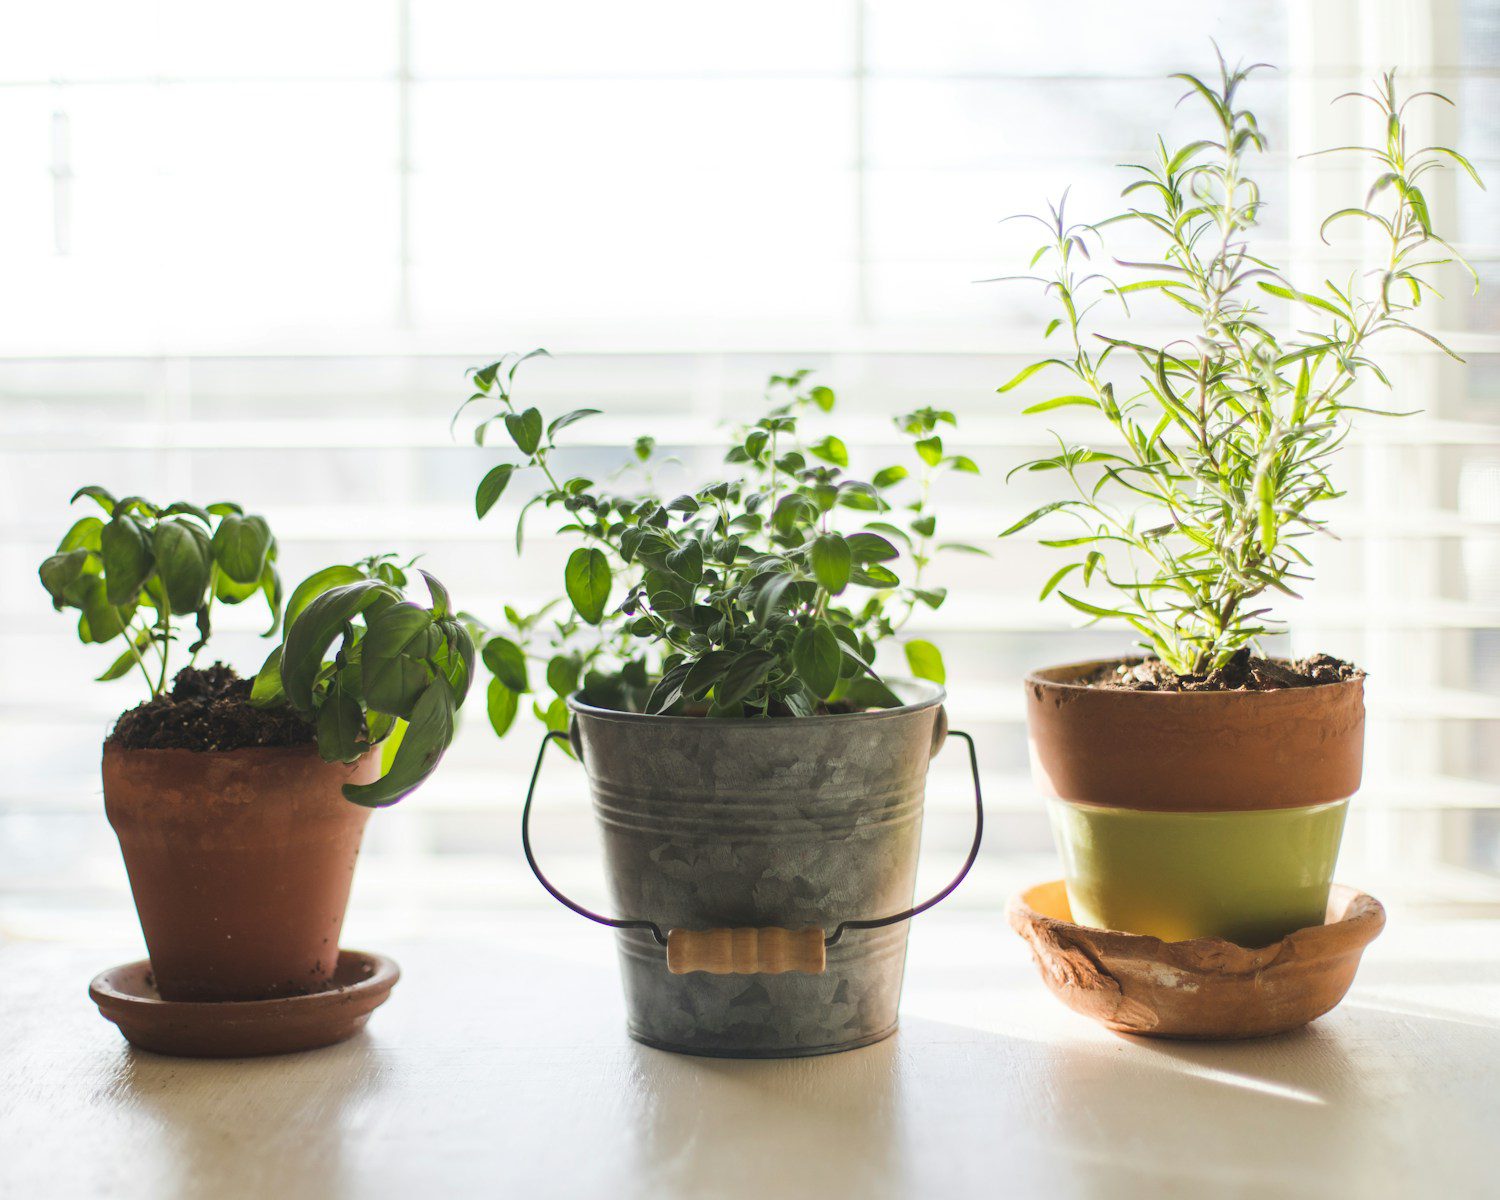
Growing fresh herbs inside your home feels like bringing a piece of the garden indoors. The vibrant scent of basil, the soothing aroma of mint, and the savory note of oregano turn everyday meals into something special. Best of all, indoor herb gardening is simple and rewarding—even if you’re new to plants.

This guide walks you through everything you need. From choosing the right herbs to creating the perfect growing space, you’ll learn step by step how to grow a thriving indoor herb garden that adds flavor and beauty to your kitchen.


Why Grow Herbs Indoors?

Herbs do more than season food. They transform your living space. Here’s why indoor herb gardening is so appealing:

  • Fresh flavor anytime: Snip what you need, when you need it. No more wilted herbs from the store.
  • Saves money: One healthy plant can supply months of harvest.
  • Compact and convenient: Even a sunny windowsill can become a tiny garden.
  • Aromatherapy at home: Basil, mint, and thyme release refreshing scents that uplift any room.
  • Year-round growth: Indoor plants aren’t limited by frost or scorching heat.

Choosing the Right Herbs for Indoors

Not all herbs behave the same. Some love the sun. Others tolerate shade. For beginners, start with herbs that adapt well to containers and indoor light.

Easy Herbs to Start With

  • Basil – Grows quickly and adds a sweet, peppery flavor to dishes. Loves warmth and sun.
  • Mint – Thrives in moderate light and stays lush with consistent moisture. Excellent for teas.
  • Oregano – Hardy and aromatic. Perfect for pizza, pasta, and roasted veggies.
  • Parsley – Slow to start but produces plenty once established. Great for soups and garnish.
  • Chives – Onion-like flavor and forgiving nature. Perfect for windowsill growing.
  • Thyme – Compact, drought-tolerant, and a staple in savory cooking.

Finding the Perfect Spot

Light is the most important factor in growing herbs indoors. Without enough light, plants become thin and weak.

Light Requirements

  • South-facing windows: Ideal. Provides 6–8 hours of sunlight daily.
  • East or west-facing windows: Good alternative. Plants may grow slower but still thrive.
  • North-facing windows: Usually too dim—supplement with grow lights.

Temperature and Humidity

  • Keep herbs in rooms between 65–75°F.
  • Avoid placing them near drafty windows, heaters, or air vents.
  • Mist leaves occasionally in winter to prevent dry air damage.

Choosing Containers and Soil

Containers and soil are the foundation of healthy herb growth.

Best Containers

  • Drainage holes are essential. Herbs hate soggy roots.
  • Terracotta, ceramic, or plastic pots all work—choose based on style and budget.
  • Small pots (4–6 inches) are great for single plants. Larger ones can hold mixed plantings.

Soil Mix

  • Use lightweight potting mix (not garden soil) for proper drainage.
  • Add a little perlite or sand for extra airflow around the roots.
  • Consider organic mixes if you plan to use herbs for cooking.

Planting Your Indoor Herbs

There are two main ways to start herbs indoors: from seeds or from starter plants.

Starting from Seeds

  • Inexpensive and rewarding, but takes patience.
  • Plant seeds ¼ inch deep in moist soil.
  • Keep soil consistently damp until seedlings sprout.
  • Place in warm, bright light to encourage growth.

Using Starter Plants

  • Easiest method for beginners.
  • Transplant young herbs from the nursery into your pots.
  • Water gently after planting to settle roots.

Caring for Your Herbs Day to Day

Consistency is key to healthy herbs. A simple routine keeps plants thriving for months.

Watering

  • Water when the top inch of soil feels dry.
  • Avoid letting pots sit in standing water.
  • Mint prefers slightly more moisture; oregano and thyme like drier soil.

Feeding

  • Use a liquid fertilizer every 4–6 weeks.
  • Choose an organic option safe for edible plants.
  • Don’t over-fertilize—too much can reduce flavor.

Pruning and Harvesting

  • Pinch back stems regularly to encourage bushy growth.
  • Always leave at least ⅓ of the plant when harvesting.
  • For basil, remove flower buds to keep leaves flavorful.

Common Problems and Easy Fixes

Even the best gardeners face challenges. Here’s how to handle them:

  • Leggy growth (tall and thin): Needs more light. Move to a sunnier spot or add a grow light.
  • Yellow leaves: Could be overwatering or nutrient deficiency. Check soil moisture first.
  • Wilting: Often caused by dry soil. Water deeply, then drain excess.
  • Pests (aphids or spider mites): Rinse leaves with water or use a mild insecticidal soap.

Using Grow Lights for Herbs

If your home lacks natural sunlight, grow lights make indoor gardening possible.

  • LED grow lights are energy-efficient and stay cool.
  • Position lights 6–12 inches above plants.
  • Run lights 12–16 hours daily for best results.
  • Choose full-spectrum bulbs to mimic natural sunlight.

Creative Ways to Display Indoor Herbs

Indoor herb gardens can double as décor. Here are fun ideas:

  • Windowsill row: Line matching pots along a sunny ledge.
  • Hanging planters: Save counter space and create a vertical garden.
  • Mason jars or recycled containers: Add rustic charm to your kitchen.
  • Tiered plant stands: Showcase multiple herbs in a small space.

Cooking With Fresh Herbs

Nothing beats the taste of freshly picked herbs. Add them at the right time to make meals shine:

  • Basil – Add at the end of cooking to preserve flavor. Perfect for pasta, salads, and pizza.
  • Mint – Brightens drinks, desserts, and Middle Eastern dishes.
  • Oregano – Robust enough for long simmers in sauces and soups.
  • Chives – Sprinkle fresh on eggs, potatoes, or dips.
  • Thyme – Excellent for roasting meats or vegetables.

Extending the Life of Your Indoor Herb Garden

  • Rotate pots every week so plants grow evenly toward light.
  • Refresh soil yearly to replace nutrients.
  • Propagate herbs by taking cuttings—especially mint and basil—for endless plants.
  • Combine herbs with similar needs in larger containers for convenience.

Herbs That Pair Well Together

Group herbs by similar light and water needs:

  • Dry-loving group: Rosemary, thyme, oregano, sage.
  • Moisture-loving group: Basil, mint, parsley, cilantro.

This makes watering easier and prevents plant stress.


Growing Through the Seasons

  • Spring and summer: Herbs grow fast—harvest frequently.
  • Fall and winter: Growth slows—reduce watering and fertilizing.
  • Supplement with grow lights during shorter days to keep plants producing.

Making Indoor Herbs Part of Your Lifestyle

Indoor herbs do more than feed your family. They become part of daily life. Imagine sipping mint tea you grew yourself, adding basil to homemade pizza, or gifting potted oregano to a friend. These small rituals turn a simple windowsill into a living kitchen companion.

With just a little care, your indoor herb garden can thrive year-round. It’s fresh flavor, fragrant air, and a daily connection to nature—all without stepping outside.


Flourish Year-Round With Your Indoor Herb Garden

Starting an indoor herb garden is simple, joyful, and endlessly rewarding. It’s about more than food—it’s about creating a living space full of green energy and flavor. With the tips in this guide, you can grow basil, mint, oregano, and more right on your windowsill.

Once you begin, you’ll never want to cook without them again.

Posted on

From “GMO is Evil” to “GMO is Cute”: The Glow-in-the-Dark Firefly Petunia

The Glow-in-the-Dark Firefly Petunia

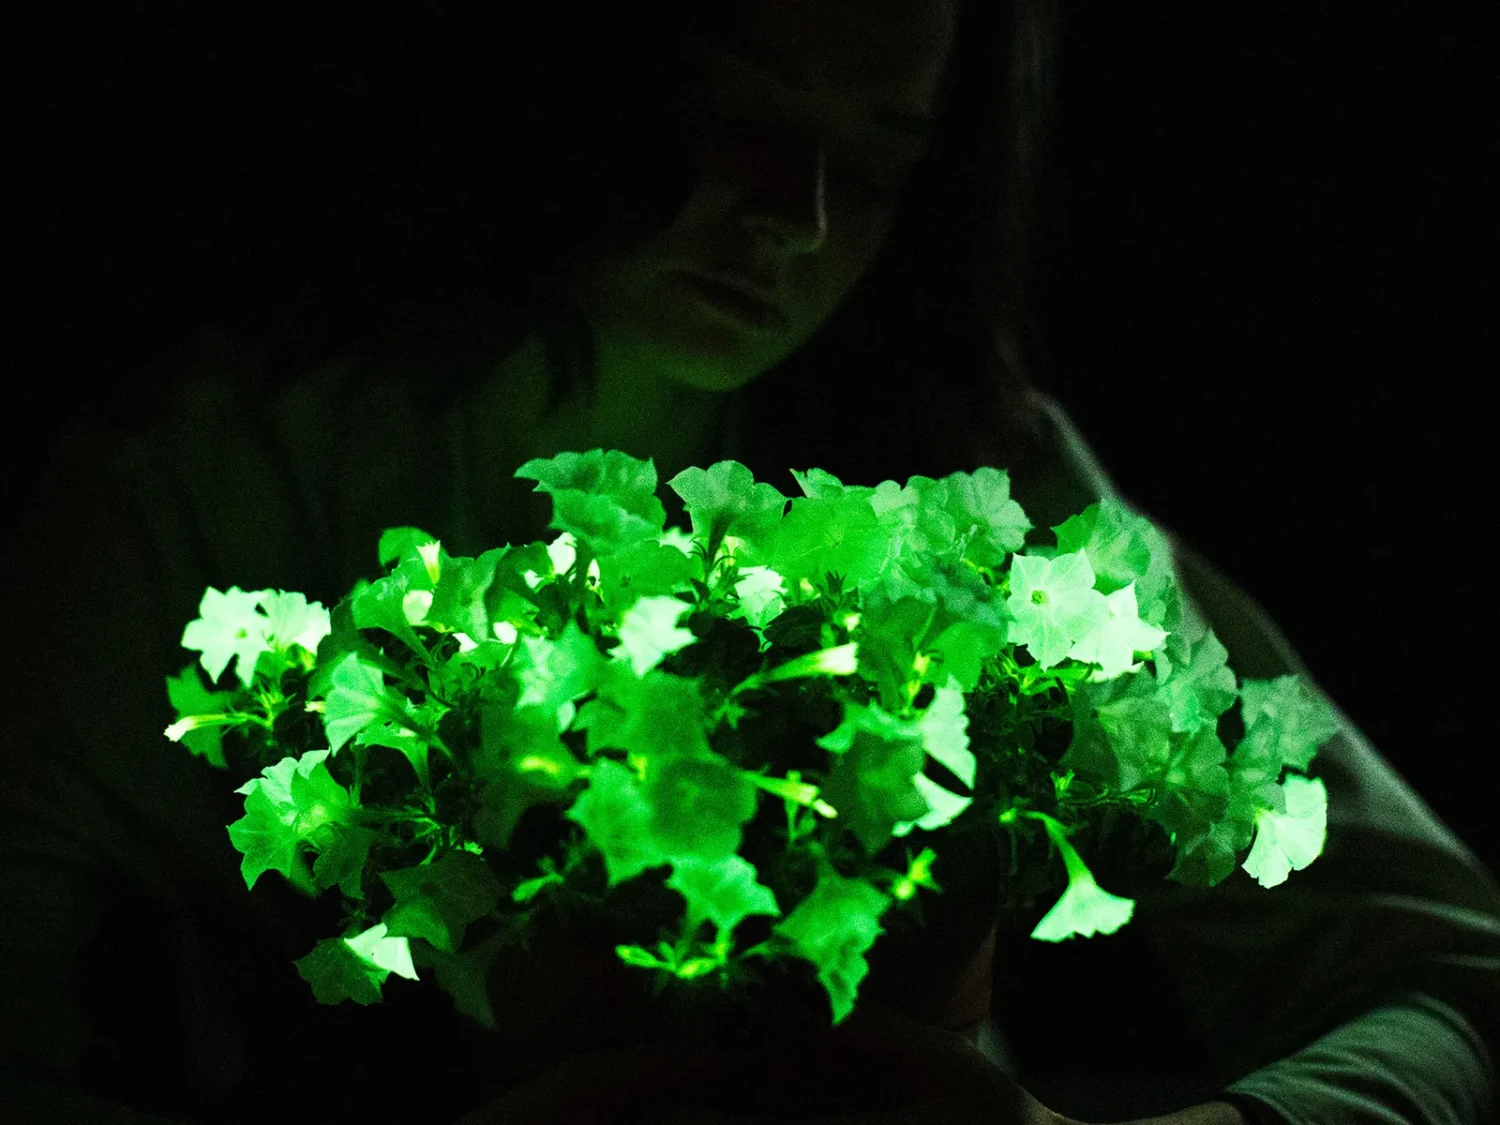
In modern gardening, innovation has taken a magical turn. Imagine stepping into your garden at dusk, and instead of fading into shadows, your petunias glow softly like fireflies. Meet the glow-in-the-dark firefly petunia¢â‚¬â€a genetically modified plant that is changing the way people think about GMOs. Instead of fear, it inspires wonder.

The Science Behind the Glow

The glow-in-the-dark firefly petunia is made using biotechnology. Scientists added a gene from a bioluminescent mushroom to the petunia’s DNA. This allows the flower to absorb sunlight during the day and glow at night.

Glowing plants aren¢â‚¬â„¢t new¢â‚¬â€scientists have explored bioluminescence for eco-friendly lighting and indoor plants. But this petunia is unique because it¢â‚¬â„¢s made for home gardeners, not industry.

From Fear to Fascination: The GMO Perception Shift

Years ago, GMOs were seen as dangerous. Activists warned about “Frankenfoods” and environmental harm. In fact, just a few years ago, some petunias had to be destroyed because they contained corn DNA. But things have changed. Now, a GMO is on the cover of Time Magazine, and people love it.

Why the change?

  • Education: Scientists have worked hard to explain genetic modification. When people learn about the benefits and safety, fear fades.
  • Fun Uses: This petunia isn¢â‚¬â„¢t about feeding the world. It¢â‚¬â„¢s about joy. It¢â‚¬â„¢s hard to hate something that makes people smile.
  • Social Media: Platforms like Instagram and TikTok love visually stunning plants. A glowing petunia is perfect for viral posts with hashtags like #GardenGoals.

Ethical and Environmental Considerations

Even with their charm, GMOs like the firefly petunia raise questions. Could they affect local ecosystems by attracting or deterring insects? How do we balance fun with biodiversity? These are important topics for further research.

However, compared to large-scale agricultural GMOs, ornamental plants pose low risks. They don¢â‚¬â„¢t mix with food crops, and when grown responsibly, their environmental impact is small.

The Future of Cute GMOs

The firefly petunia is just the beginning. With advancing science, we might soon see roses that change color or succulents that glow under blacklight. These plants could turn gardening into a magical experience.

A Glowing Example of Progress

The glow-in-the-dark firefly petunia takes a once-feared topic and makes it fun. It proves that science and art can create beauty and change minds. While it won¢â‚¬â„¢t solve global problems, it has lit up a new path for GMOs¢â‚¬â€one where “genetically modified” means “delightful.”

Next time you visit a garden center, look for glowing petals. They might not just brighten your garden¢â‚¬â€they could spark a new love for science.

Posted on

Native American Gardening: The Three Sisters

corn

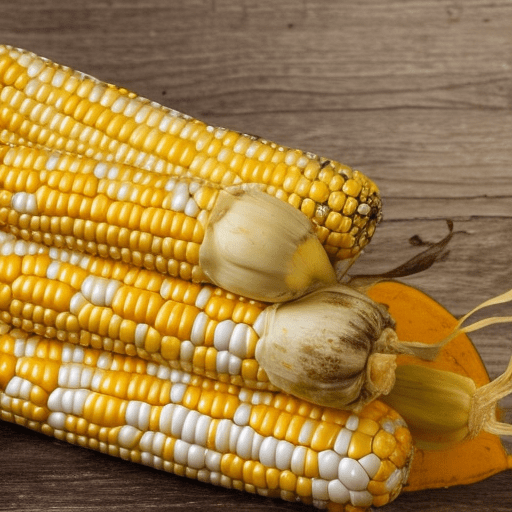
Planting a garden with ¢â‚¬Å“The Three Sisters Crops¢â‚¬Â is a great way to incorporate Native American gardening practices into your outdoor space. The Three Sisters refers to the traditional companion planting technique of growing corn, squash, and beans together in the same plot. This method was used by many North American Indigenous peoples to ensure the plants worked symbiotically and yielded a larger harvest.

The Three Sisters crops have an interesting history. According to some Native American creation stories, these three crops were given as gifts alongside fire and pottery from their respective creators. Corn, squash, and beans are all easy-to-grow vegetables that thrive in warm climates with plenty of sunshine. Growing them together can also help maximize space since they all take up relatively little room compared to other vegetables such as tomatoes or peppers.

When cultivating the Three Sisters crops in a garden, it is important to remember that each plant has a place in the symbiotic relationship. Corn will provide the climbing pole for the bean plant and is the second crop to harvest. While squash is first to harvest, it prefers slightly cooler conditions of early Spring and will be finished producing before crowded out by the corn and beans. The bean plant will climb up the stalks of the corn, provide nitrogen fixation from the air and finish as the last crop harvested. All three sisters crops should be planted together.

In addition to providing sustenance for human consumption, these three vegetables offer many benefits for wildlife. For example, pollinators such as bees are attracted to the flowers of both corn and squash while birds love snacking on bean seeds when they ripen in late summertime. Planting the Three Sisters together gives back to nature by providing food sources for beneficial creatures like these which can help maintain healthy ecosystems in our gardens year round.

Finally, it¢â‚¬â„¢s worth noting that companion planting isn¢â‚¬â„¢t limited only to these three specific veggies; you can combine any number of compatible species in your garden plot. Experimenting with different combinations may yield additional benefits such as pest control since various plants can contain compounds that ward off insects or attract beneficial predators like ladybugs or lacewings! With this knowledge in hand you can tailor your outdoor space according to your own unique designs while still incorporating an essential aspect of Native American culture into your landscape design¢â‚¬â€a beautiful reminder of our shared history with nature’s gifts!

Native American Gardening: The Three Sisters
corn

The Tall Sister: Corn

Growing corn is a great way to enjoy fresh and delicious sweet corn right off the cob in your own backyard. With its long history of cultivation, growing corn is an easy and rewarding experience for gardeners of all skill levels. As the tall sister, it provides a climbing pole for the bean plant.

When it comes to planting, you will want to find an open sunny area in your yard with plenty of space for your crop. Corn requires around three feet of space between each plant in order to reach full maturity; consider this when deciding how much land you¢â‚¬â„¢ll need to allocate for your crop. For best success, it is recommended that you prepare the soil by tilling it before planting. This ensures any weeds or pests are removed from the soil and helps create a more nutrient-rich environment for your plants to grow. Additionally, make sure that your soil has a pH level between 5.5 and 7.0, as this will help produce the most flavorful kernels that your family can enjoy!

Once prepared, you can begin planting seeds directly into the ground about 1 inch deep every two or three inches apart; be sure not to overplant as overcrowding can reduce yields! Once planted, be sure to keep the soil moist at all times until sprouts appear above ground (about one-two weeks); then reduce waterings down to once per week while making sure they still receive one inch of water each time. If you¢â‚¬â„¢re looking for an added boost of nutrition later on during the growing season, consider using a light fertilizer roughly six weeks after planting; this helps ensure strong growth and increases yields come harvesting time!

As far as selecting varieties go, there are four main types: standard (su), supersweet (sh2), low-sugar/starch (se) and small-kerneled (sd). Standard varieties have traditional corny flavor yet may not retain their sugar content as long after harvest; supersweet varieties offer extra sweetness but may not be as vigorous during growth; low-sugar/starch varieties have lower sugar content but greater starchiness; whereas small kerneled varieties are smaller in size with higher sugar content but lower yield potential overall. Be sure to pick the variety that suits your needs best for maximum enjoyment in the garden!

Finally, come harvesting time ¢â‚¬â€œ usually about two months after sowing ¢â‚¬â€œ check ears regularly every few days by feeling them through their husks: if they feel plump and firm when gently squeezed then they¢â‚¬â„¢re ripe! Once harvested, eat them fresh off the cob within a few days¢â‚¬â€œ if not sooner¢â‚¬â€œto ensure optimal flavor and texture before they start losing their sweetness due to starchy conversion.

Overall, growing corn is an enjoyable experience both in terms of tending its development over time as well as ultimately savoring its delicious rewards at harvest time! By following these steps outlined above – along with some additional research – you can bring sweet corn straight from farm-to-table right in your own backyard!

The Short Sister: Squash

Growing squash is a great way to get delicious, healthy vegetables and can be done relatively easily – even by beginner gardeners! Squash plants are easy to grow, require minimal care and maintenance, and can be grown in both summer and winter.

When it comes to growing squash, the most important thing to consider is location. Choose a spot that gets plenty of sunlight throughout the day and also has well-drained soil. To increase your chances of success, add compost or fertilizer to enrich the soil before planting. Make small mounds around where you plan on planting the squash to ensure proper drainage around the plant.

If sowing from seeds, make sure to sow four or five seeds a few inches apart in each mound. Once the seedlings begin emerging, thin out any excess so that only one or two plants remain per mound – this will give them enough space for proper growth and development. If purchasing seedlings from a nursery instead of starting from seed, simply transplant them into the prepared mounds.

In terms of care and maintenance, squash plants don’t require much attention after they have been planted. Water when necessary – usually once every one or two weeks depending on weather conditions – but avoid over-watering as it can lead to fungal diseases. Mulching around the plant can help retain moisture during dry spells too. You can also fertilize lightly once or twice during the season if desired; just make sure not to over-fertilize as this can lead to excessive vegetative growth (which means fewer flowers which leads to fewer fruits).

Harvesting squash is simple — just wait until they reach their desired size then pick them off either right away or store them for use later in the year if needed. Knowing when exactly to harvest depends on what type of squash you’re growing; some types are meant for eating when young while others are best picked when more mature and full sized (for example pumpkins). In either case it’s best not to leave any fruits on the vine for too long since they will eventually start rotting and attract pests/diseases which could damage your crop further down the line.

Overall, growing squash is an easy way for gardeners of all levels of experience to enjoy fresh produce with very little effort required! With some basic knowledge about where/when/how to plant them plus regular watering/mulching/fertilizing (if needed), you should have no problem producing a healthy crop of tasty winter or summer squash each year!

The Other Sister: Beans

Beans are one of the most popular vegetables grown in gardens, and with good reason ¢â‚¬â€œ they¢â‚¬â„¢re easy to grow, require little maintenance and are highly nutritious. Not to mention that beans can be used for a variety of dishes, from soups and salads to stews and side dishes. Whether you choose pole or climbing beans, you can have a bumper crop of these tasty veggies in no time!

Before getting started, it¢â‚¬â„¢s important to understand a few basics about bean growing. One key factor is soil temperature ¢â‚¬â€œ beans prefer soil temperatures between 65‚°F (18‚°C) and 75‚°F (23‚°C). Soil should be well-draining but still moist. If your soil is too wet, your plants won¢â‚¬â„¢t do as well. It¢â‚¬â„¢s also important to keep weeds away; when left alone, they will consume the nutrients meant for your bean plants.

If you¢â‚¬â„¢re new to growing beans, you may not know that there are two main types: pole beans and climbing beans. Pole beans need a trellis or support structure to grow up; this helps them stay upright and gives them something to climb on as they reach for sunlight. Climbing beans don’t require a support structure since they use their long tendrils to attach themselves onto whatever is available ¢â‚¬â€ like fences or posts ¢â‚¬â€ as they grow upward. Both types need space between each plant so that air can circulate freely; otherwise, heat can build up around the plants which can lead to disease issues.

Legumes are an essential part of any garden because of their nitrogen-fixing capabilities. Legumes create a symbiotic relationship with bacteria called rhizobia that live inside nodules on the roots of the bean plant; this process is known as nitrogen fixation. The root provides food for the bacteria while the bacteria convert atmospheric nitrogen into ammonia which can then be absorbed by the plant and converted into nitrate ¢â‚¬â€œ a form plants can use more efficiently than atmospheric nitrogen alone. Nitrogen is an essential nutrient for healthy plant growth so having legumes in your garden is hugely beneficial!

Harvesting times will vary depending on what type of bean you¢â‚¬â„¢ve chosen; some varieties take 59 days while others take 79 days or more before they’re ready for picking! When picking your beans, make sure that they¢â‚¬â„¢re firm with no soft spots or discoloration; this indicates that they might be past their prime quality-wise and should probably be composted instead! Store freshly picked beans in an air-tight container either in your fridge or freezer¢â‚¬â€this will help protect them from spoiling quickly so you can enjoy them later!

Growing your own beans at home has many benefits including getting fresh veggies straight from your garden as well as providing valuable nitrogen fixation for other non-legume crops surrounding them. There are two main types¢â‚¬â€pole and climbing¢â‚¬â€that all require adequate spacing between each plant and some kind of support if needed like a trellis for pole varieties. When harvested correctly at peak ripeness, store them properly for maximum shelf life enjoyment later down the line!

Posted on

Grow Your Own Italian Herb Garden

Italian herb garden

7 Essential Italian Herbs

There are seven amazing herbs in an Italian herb garden that gives most Italian cuisine its rich, scrumptious flavors. I haven’t met anyone who doesn’t cook Italian dishes at home. Don’t you agree that it’s more practical and convenient to grow these plants in your garden so you’ll always have a flavorful and fresh supply every time you need to cook tasty Italian meals?

Do you know that the most popular and the tastiest dishes come from Italy because they use herbs from their Italian herb garden? In fact, records in the culinary industry show that some of the best dishes in the world come from Italy.

Italian herb garden

Let’s go over the 7 essential herbs found in an Italian herb garden, and their uses and benefits:
1. Basil is one of the most commonly used herbs. It is said that its distinct flavor is the soul of Italian cuisine. It is also beneficial to your garden — If you plant Basil with tomatoes and peppers, it will help improve the flavor of these plants. Basil is also a known repellent to mosquitoes and flies. Grow it with thyme, as they make a perfect pair, growing together.

2. Parsley is known in the culinary industry as an excellent flavoring too. In ancient times, many people use Parsley as breath mints. Very nutritious, eating parsley raw also helps eradicate bad breath. This is why parsley is used as a wonderful garnish.

3. Oregano on the other hand is used as decorative and has a distinct flavor that can complement many meals. This herb delivers the best flavor when harvested as soon as its beautiful purple flowers start to bloom. It also has great medicinal properties, and is widely used as an effective anti-oxidant, anti-fungal, as a digestive aid, and for relieving pain and inflammation.

4. Fennel is another great Italian herb that is used in making Italian sausages. This perennial plant should be replanted and divided every two to three years, because it loses its flavor when it reaches maturity. Fennel leaves are used in soups, condiments and sauces, and its oil is used to flavor candy, liqueurs, medicine and fish. It is used to make soaps too!

5. Another perennial plant that is noted for its numerous culinary contributions is Rosemary. It is very sensitive to frost and is known to attract bees. It’s a kind of shrub herb plant with color blue flowers. Use it as a gorgeous ornamental plant or as a welcome culinary flavoring.

6. Garlic is one of the most popular herbs in any garden and is a basic ingredient in many Italian dishes. I’m sure of one thing – if you don’t grow garlic in your garden, it cannot be considered as an Italian garden! Garlic can thrive with very little attention. Once harvested, they can be pickled, frozen, or stored in the fridge for future use.

7. Sage is a popular herb that graces countless Italian recipes, ranging from meats to salads. If you want to grow sage, I suggest that you keep your plants well trimmed so that you can take advantage of the new shoots – the most delicious plant part. Harvest these plants after they have bloomed. Sage is also known for its health benefits – it is a great memory enhancer, has anti-inflammatory properties and acts as a powerful antioxidant too!

There are other herbs that can serve as a nice addition to your Italian herb garden but starting off with these 7 essential herbs is a great idea since they are used in a wide variety of recipes.

The Benefits of Adding Organic Matter and Compost to Your Soil

If you want your garden to be healthy and productive, it’s important to start with healthy soil. One of the best ways to improve the quality of your soil is by adding organic matter and compost. Here’s a look at some of the benefits of adding organic matter and compost to your soil.

Improved Nutrient Content

Organic matter and compost help to improve the nutrient content of your soil. This is because they add essential nutrients, such as nitrogen, phosphorus, and potassium, which are vital for plant growth. Adding organic matter and compost to your soil can also help to improve the overall structure of your soil, making it more loose and easy for plant roots to penetrate.

Improved Water Retention

One of the biggest benefits of adding organic matter and compost to your soil is improved water retention. This is because organic matter helps to hold water in the soil, making it available for plants to use when they need it most. This is especially beneficial during times of drought or extended periods of dry weather.

Increased Soil Fertility

Adding organic matter and compost to your soil can also help to increase its fertility. This is because organic matter helps to promote the growth of beneficial microorganisms in the soil, which can help improve plant growth. Additionally, organic matter and compost can help add essential nutrients back into the soil that may have been depleted by previous crops.

As you can see, there are many benefits to adding organic matter and compost to your soil. If you want your garden to be healthy and productive, be sure to add these important ingredients!

How to Plant and Care for Your Italian Herbs

Growing your own Italian herbs can be a rewarding experience. Not only do you get to enjoy the delicious results of your labor, but you also get to control how your herbs are grown and cared for. Here are a few tips on how to get started.

Choose the Right Location

Herbs need plenty of sunlight to grow, so choose a spot in your yard or on your windowsill that gets at least six hours of direct sunlight each day. Once you’ve found the perfect spot, it’s time to prepare the soil.

Prepare the Soil

Herbs thrive in well-drained soil, so be sure to loosen the soil and remove any rocks or debris before planting. You can also improve drainage by mixing in some sand or organic matter. Once your soil is ready, it’s time to plant!

Plant Your Italian Herbs

When planting your herbs, be sure to give them plenty of space to grow. If you’re planting multiple herbs in one container, make sure each herb has its own individual pot. Once you’ve planted your herbs, water them regularly and fertilize them every two weeks with an all-purpose fertilizer.

With a little care and attention, your herbs will thrive! Remember to choose a sunny location, prepare the soil before planting, and water and fertilize regularly. With these tips, you’ll be enjoying fresh herbs in no time!

The Best Time to Harvest Herbs

Do you love the taste of fresh Italian herbs in your cooking? Growing your own herbs is a great way to have them on hand whenever you need them. But when is the best time to harvest them? Read on to find out!

Harvest the herbs when they are mature, but before they flower. This will give you the best flavor. Most herbs are ready to harvest 4-6 weeks after planting.

To dry your herbs, tie them in small bundles and hang them upside down in a dark, dry place. Or, lay them out on a screen or paper towels in a single layer and set them in a warm, dry place out of direct sunlight. Once they’re dried, store them in an airtight container in a cool, dark place.

If you want to freeze your herbs, wash and dry them thoroughly. Chop them finely and then put them into ice cube trays or freezer bags, pressing out as much air as possible before sealing. Label and date the containers, and then store them in the freezer for up to 6 months.

Now that you know when to harvest your Italian herbs, get out there and start picking! Fresh (or frozen) herbs can really take your cooking to the next level. Bon appƒÂ©tit!

Posted on

Plant Seeds: Pollination to Germination

mixture of seeds

Seeds are one of the most important parts of a plant. Not only do they allow plants to reproduce, but they also contain the embryo that will grow into a new plant. Seeds are formed as part of the process of reproduction in seed plants, which includes both gymnosperms and angiosperms. In this blog post, we’ll take a closer look at how seeds are formed, and what goes into making them such an integral part of the plant reproductive process.

When a seed plant is pollinated, the pollen grain germinates and produces a tube that grows down into the ovule. At the tip of this tube, the nucleus of the pollen grain – which contains the male gametes – enters the embryo sac. One of these gametes fertilizes the egg cell in the embryo sac, forming a zygote. The zygote then begins to divide, and the resulting cells begin to grow and differentiate.

mixture of seeds
mixture of seeds

As the embryo grows, it starts to accumulate food reserves. These reserves are stored in the cotyledons, which are thickened leaves that form part of the seed coat. The seed coat itself develops from the integuments of the ovule, and serves to protect the embryo from damage. Once the seed coat is fully formed, the seed is complete.

Seeds play a vital role in plant reproduction, and are essential for ensuring that new plants can grow and thrive. By understanding how they are formed, we can better appreciate the important role that they play in the life cycle of plants.

Seed Dormancy

Seeds can remain dormant – or inactive – for long periods of time. Dormancy is a survival mechanism that helps seeds to survive unfavorable conditions, such as drought or cold temperatures. Once the conditions become favorable again, the seed will germinate and start to grow.

Dormancy can be broken by a number of different methods, including exposure to light, temperature changes, or chemicals. By understanding dormancy, we can better control the germination of seeds, and ensure that they grow when and where we want them to.

Seed Dispersal

Seeds need to be dispersed in order to find suitable conditions for germination. Dispersal can be achieved by a number of different means, including wind, water, animals, and humans.

Wind dispersal is the most common form of seed dispersal. Seeds are carried away by the wind to other locations, where they may find suitable conditions for germination. Water dispersal is another common method, and involves seeds being carried away by water to other areas.

Animals and humans can also play a role in seed dispersal. Animals may eat fruits or seeds and then defecate them in other locations, while humans may deliberately or accidentally transport seeds to new areas.

Seed dispersal is essential for the survival of plants, and helps to ensure that new plants can germinate and grow in suitable areas. By understanding how it works, we can better appreciate the role that dispersal plays in the life cycle of plants.

Seed germination

Seed germination is the process by which a seed starts to grow into a new plant. It involves the growth of the embryo, and the development of the root system and the shoot system. The first step in germination is the activation of the seed, which is usually caused by water. Once the seed is activated, it begins to take in water and nutrients from the surrounding soil.

The embryo then starts to grow, and the root system develops first. The root system anchors the plant in the soil and absorbs water and nutrients from the ground. The shoot system then develops, and the plant begins to grow taller. Once the seedlings have reached a certain size, they become self-sufficient and can start to produce their own food.

Germination is an important step in the life cycle of plants, and is necessary for ensuring that new plants can be grown. By understanding how it works, we can better appreciate the process by which plants come into existence.

Seed dormancy, germination, and dispersal are all essential steps in the life cycle of plants. By understanding how they work, we can better appreciate the role that seeds play in the reproduction of plants.

Basic Seed Starting Steps

There are a few basic steps you need to take in order to start seeds:

1. Choose the right container: You’ll need something that has drainage holes in the bottom, and is big enough to fit all of the soil and seeds you’ll be planting.

2. Choose the right soil: Use a quality potting mix that will allow your seeds to germinate and grow properly.

3. Plant your seeds: Follow the specific instructions on the seed packet for how deep to plant your seeds and how far apart to space them.

4. Water your plants: Seeds need water in order to germinate, so make sure to keep the soil moist but not soggy.

5. Monitor your plants: Keep an eye on your plants and make sure they’re getting enough light, water, and nutrients.

With a little care and attention, you can successfully start your own seeds at home! Follow these tips and you’ll be well on your way to growing your own plants from seed.

Posted on

Planting, Growing and Caring for Alliums: The Ultimate Guide

Allium, Serendipity

Looking to add some vibrant color and texture to your garden? Alliums are the perfect plants for you! With their globe-shaped flowers and interesting foliage, they can really make a statement. In this guide, we will teach you everything you need to know about planting, growing and caring for alliums. So whether you’re a beginner or a seasoned pro, read on for tips and advice that will help you get the most out of these beautiful plants!

Types of Alliums

There are many different types of alliums. Some have flowers that are shaped like a ball and some have leaves that are interesting.

Some of the most common alliums are:

Allium schoenoprasum – This is the most common type of allium. It has a round, globe-shaped flower and interesting foliage.

Allium cepa – This allium is also known as the onion plant. It has a round, globe-shaped flower and interesting foliage.

Allium sativum – This allium is also known as garlic. It has a round, globe-shaped flower and interesting foliage.

Planting Alliums

When planting alliums, it is important to choose a location that has well-drained soil. Alliums do not like to sit in wet or soggy soil. They also prefer full sun, but can tolerate partial shade.

To plant alliums, dig a hole that is twice the width and depth of the bulb. Plant the bulb with the pointy end facing up. Cover with soil and water well.

Caring for Alliums

Once your alliums are planted, they will need regular watering. Water them when the soil is dry to the touch. Alliums are not drought tolerant, so make sure to keep an eye on the soil and water as needed.

Fertilize your alliums once a month with a balanced fertilizer. This will help them to grow and bloom.

Alliums are not susceptible to many pests or diseases, but they can be affected by rust. Rust is a fungus that can cause the leaves of the allium to turn yellow and eventually fall off. If you notice rust on your alliums, remove any affected leaves and dispose of them. You can also treat the plant with a fungicide.

Once your alliums have finished blooming, cut off the flower heads. This will encourage the plant to put its energy into next year’s bloom.

Alliums are beautiful plants that add color and texture to any garden. With their globe-shaped flowers and interesting foliage, they are sure to make a statement. By following the tips in this guide, you will be able to successfully plant, grow and care for alliums. So get out there and enjoy these beautiful plants!

We hope you enjoyed this guide on planting, growing and caring for alliums. For more gardening tips and advice, be sure to check out our blog. Thanks for reading!

Posted on

Growing Olive Trees: Everything You Need to Know

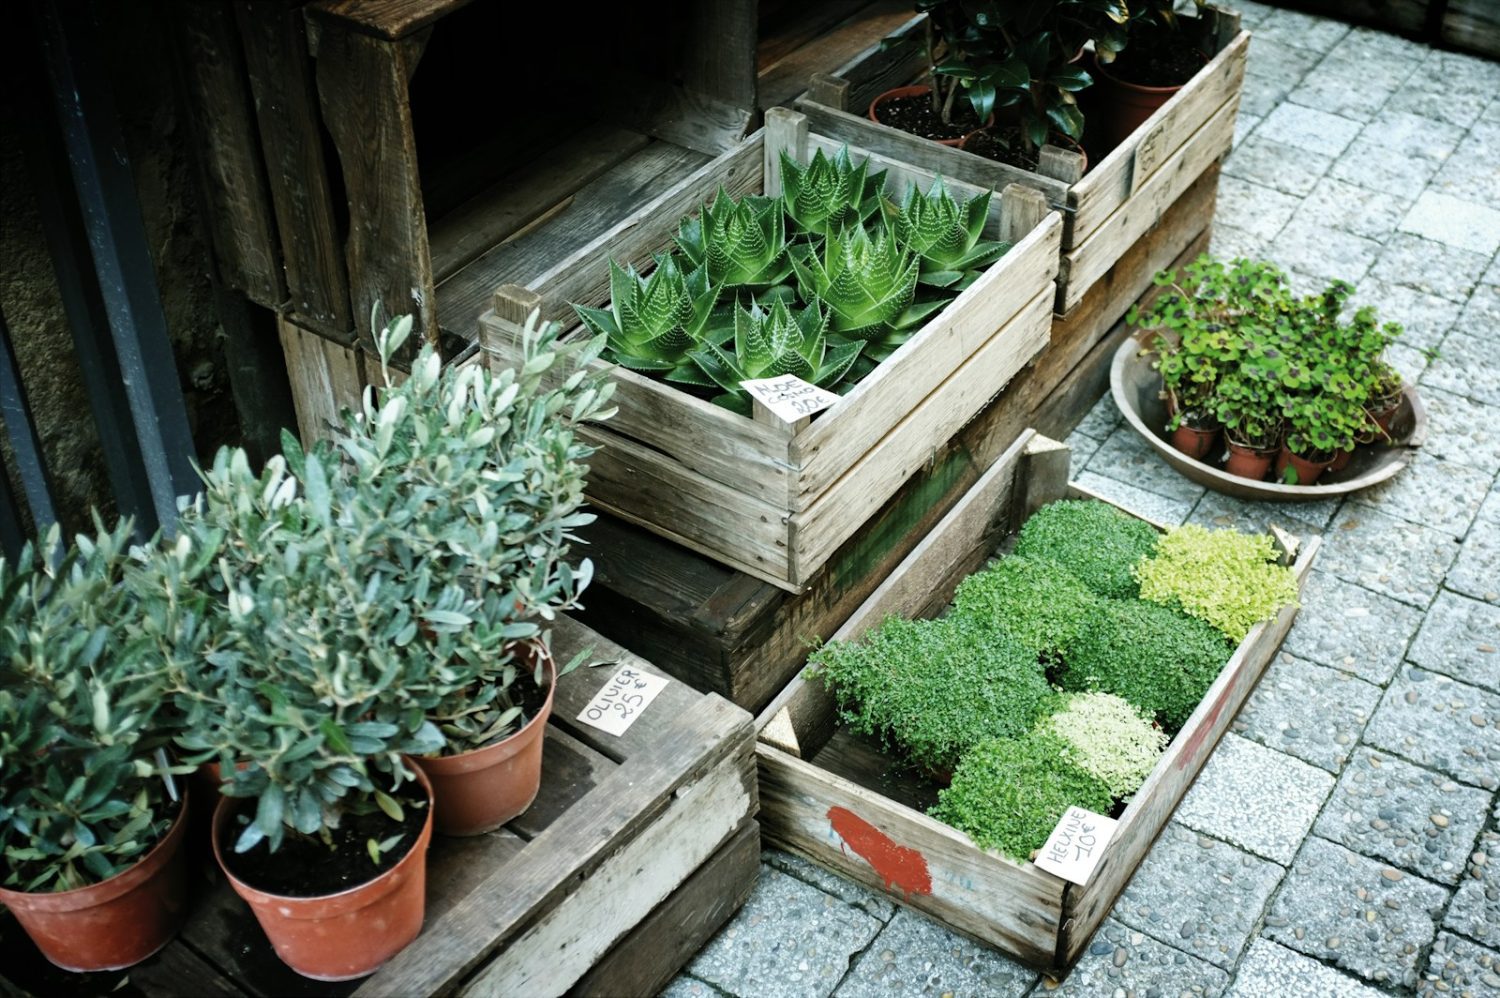
olive trees

Well, maybe not everything you will need to know. But this is a good start. Olive trees are a popular choice for the garden, as they are drought tolerant and can thrive in a variety of climates. They are also relatively easy to care for, making them a good option for novice gardeners.

When growing olive trees in the garden, it is important to choose a sunny spot with well-drained soil. These trees do not tolerate wet soil, so make sure to plant them in an area that will drain properly. Olive trees can be planted outdoors in USDA zones 7b+. Indoor planting in a large pot is an option for cooler climates and can be moved outdoors during the summer.

Once you have chosen a spot for your olive tree, it is time to plant it. Be sure to dig a hole that is twice the size of the tree’s container. If you are planting a bare root olive tree, make sure to soak it in water for at least 12 hours before planting. Then, place the tree in the hole and fill in with soil, making sure to pack it down firmly. Water well after planting.

Olive trees do not need much attention once they are established, but they will benefit from regular watering during periods of drought. Fertilize your olive tree once a year with a balanced fertilizer. Prune lightly every few years to keep the tree healthy and shapely.

If you live in an area where temperatures drop below freezing, you will need to protect your olive tree during winter months. One option is to wrap the trunk in insulation; another is to bring the tree indoors and place it in a sunny spot.

Shop for Olive Trees

Growing Olive Trees Indoors

In order to grow an olive tree indoors, you will need a pot that is at least 12 inches wide and 12 inches deep. You will also need to make sure that the pot has a drainage hole in the bottom so that the water can drain out. The pot should also be placed in a sunny location.

Once you have found the right pot, you will need to fill it with a soil mix that is light and well drained. You can either make your own soil mix or buy a premade mix from a garden center. Be sure to add some organic matter to the mix, such as compost, to help improve the soil’s fertility and drainage.

Once you have the pot ready, plant the olive tree in it. Be sure to spread the roots out evenly and then cover them with soil. Water thoroughly and then continue to water regularly, keeping the soil moist but not wet.

If you live in a cold climate, you will need to bring your olive tree inside during the winter months. Place it in a sunny location near a south-facing window. Avoid placing near heater vents.