Posted on

Low-Maintenance Perennials for Year-Round Color

Low-Maintenance Perennials for Year-Round Color

Creating a vibrant garden that stays beautiful through every season is easier than it sounds. The secret? Low-maintenance perennials. These plants return year after year with little effort, offering steady color and texture without constant replanting. Once you choose the right varieties and place them thoughtfully, your garden almost takes care of itself. Let’s explore some of the best perennials for long-lasting color and learn how to keep them thriving with minimal work.


Why Perennials Are Perfect for Easy Gardening

Perennials are plants that live for more than two years. Unlike annuals, which need replanting every season, perennials settle in and return on their own. Once established, many varieties handle drought, resist pests, and even thrive in poor soil. This means less watering, fewer replacements, and more time enjoying your garden instead of working in it.

Low-maintenance perennials are especially valuable for busy gardeners. They provide structure and reliability, acting as the backbone of your landscape. Even better, many bloom at different times of the year, creating a continuous wave of color.


Planning for Year-Round Color

A garden that shines in every season takes a little planning up front. The key is choosing perennials that bloom at different times and pairing them with plants that have colorful foliage or seed heads. This mix ensures there’s always something interesting happening, even in winter.

  • Spring: Focus on early bloomers like creeping phlox or columbine. Their flowers bring life after a long winter.
  • Summer: Introduce bold color with coneflowers, black-eyed Susans, and daylilies.
  • Fall: Asters and sedum extend the season with late flowers and warm hues.
  • Winter: Evergreens and ornamental grasses keep the garden lively with texture and structure.

By layering these types, you can create a garden that feels alive all year long.


Perennials for Spring Color

Spring marks the start of the show. After months of cold, early perennials deliver bursts of color that signal warmer days ahead.

Creeping Phlox (Phlox subulata)

This low-growing groundcover blankets the garden in carpets of pink, purple, or white flowers. It spreads easily, making it perfect for slopes or edging paths. Once established, it thrives with very little care.

Hellebores (Helleborus orientalis)

Known as Lenten roses, hellebores bloom in late winter to early spring. Their nodding flowers in soft pinks, purples, and creams are a welcome surprise during chilly days. These plants are evergreen and deer-resistant, making them perfect for shady spots.

Columbine (Aquilegia)

Delicate, nodding flowers appear in mid-spring, often in shades of blue, red, or yellow. Columbines reseed themselves and attract hummingbirds, adding life to your garden with little effort.


Perennials for Summer Brilliance

Summer is the season of abundance, and low-maintenance perennials ensure your garden stays lively during the hottest months.

Coneflower (Echinacea)

A true garden staple, coneflowers produce daisy-like blooms in purple, pink, and even orange or white. They are drought-tolerant, loved by pollinators, and bloom for weeks on end.

Black-Eyed Susan (Rudbeckia hirta)

Golden-yellow petals with dark centers make this plant a cheerful sight in midsummer. Black-eyed Susans are hardy, thrive in poor soil, and continue blooming into fall.

Daylily (Hemerocallis)

Often called the “perfect perennial,” daylilies tolerate neglect, poor soil, and drought. Their trumpet-shaped flowers come in countless colors, and many varieties rebloom later in the season.


Perennials for Fall Beauty

As temperatures cool, certain perennials step into the spotlight, keeping the garden vibrant long after summer’s peak.

Asters (Symphyotrichum spp.)

Asters are fall stars, offering daisy-like flowers in shades of purple, pink, and white. They’re pollinator magnets, especially for migrating butterflies.

Sedum (Sedum spectabile)

Also called stonecrop, sedum thrives in poor soil and full sun. Its succulent leaves turn deep red or bronze in fall, and its clusters of pink flowers transition into rich seed heads that last through winter.

Japanese Anemone (Anemone hupehensis)

Tall stems topped with soft pink or white blooms sway gracefully in autumn breezes. Japanese anemones spread gently over time, filling shady or partially sunny areas with elegance.


Perennials with Winter Interest

Winter doesn’t have to mean a dull garden. Many perennials and ornamental plants provide color and texture even in the coldest months.

Evergreen Heuchera (Coral Bells)

Heucheras are grown for their foliage, which comes in shades of burgundy, silver, and lime green. Their evergreen leaves keep beds colorful through winter and pair beautifully with spring bulbs.

Ornamental Grasses

Grasses like switchgrass or feather reed grass hold their plumes well into winter. Their golden stalks sway in the wind and catch frost beautifully on cold mornings.

Hellebores (Again!)

Because hellebores keep their foliage year-round and bloom early, they bridge the gap between winter and spring, providing color when little else does.


Tips to Keep Perennials Thriving with Minimal Effort

Even the easiest plants benefit from a few simple habits. These steps will keep your garden looking fresh without demanding constant work:

  • Start with the right plant in the right place. Match sun and soil conditions to what each plant prefers. This single step prevents most problems.
  • Water deeply but infrequently. Once perennials are established, they need far less water than annuals.
  • Mulch generously. A layer of mulch suppresses weeds, keeps soil moist, and adds organic matter as it breaks down.
  • Divide when necessary. Every few years, dig up and split crowded clumps to keep them vigorous and spread color to new areas of the garden.
  • Leave seed heads in winter. Many seed heads look beautiful against snow and provide food for birds. Cut them back in early spring for fresh growth.

Pairing Perennials with Evergreen Structure

For a garden that truly looks good year-round, pair perennials with evergreens. Shrubs like boxwood, dwarf holly, or juniper keep their shape and color, anchoring the design when flowers fade. This creates a sense of balance and makes the space feel intentional even in the off-season.


Why Low-Maintenance Gardens Matter

Life is busy. Gardens should be a joy, not a chore. By choosing resilient perennials, we create spaces that welcome us instead of demand from us. They save money, reduce waste, and support pollinators year after year. Most of all, they allow us to step outside and simply enjoy the beauty around us.


Welcoming Endless Color to Your Garden

With the right perennials, color never truly leaves your yard. It flows from spring flowers to summer blooms, from autumn tones to winter textures. Each season brings its own personality, yet the garden feels connected and whole. By planting thoughtfully now, you create a living canvas that changes but never fades—a space that gives joy in every month of the year.

Posted on

Best Vegetables for Container Gardening on Patios and Balconies

Best Vegetables for Container Gardening on Patios and Balconies

Container gardening has opened the door for anyone to grow fresh vegetables—even without a backyard. A sunny patio or small balcony can transform into a productive mini farm. With the right vegetable choices and simple care, you can enjoy crisp greens, colorful peppers, and juicy tomatoes right outside your door. This guide walks you through the best vegetables for container gardening, why they thrive in small spaces, and how to make your harvest abundant.


Why Container Gardening Works So Well

Container gardening is more than just a space-saver. It’s also about control. By growing vegetables in pots, buckets, or troughs, you can manage soil quality, water levels, and sunlight with ease. This reduces pests and diseases that often come with ground planting. It’s also ideal for renters or urban dwellers who don’t have access to traditional garden plots.

Most of all, container gardening is flexible. You can move plants to chase the sun, bring them inside during a cold snap, or rearrange them to create a living green screen for privacy.


What Makes a Vegetable Perfect for Containers?

Certain traits make some vegetables thrive in containers:

  • Compact growth habit – Plants that stay small or bushy do better than sprawling types.
  • Short growing season – Vegetables that mature quickly are easier to manage in limited space.
  • High productivity per plant – The more food one plant produces, the better for container gardeners.
  • Adaptability to shallow roots – Crops that don’t need deep soil thrive in pots.

Now let’s dive into the vegetables that check all these boxes.


Leafy Greens: Fast and Fuss-Free

Lettuce

Lettuce is a classic for container gardens. It grows quickly, tolerates partial shade, and offers endless harvests if you cut outer leaves instead of pulling the whole plant. Loose-leaf varieties like ‘Black Seeded Simpson’ or ‘Buttercrunch’ work especially well.

  • Container size: 6–8 inches deep
  • Sun: 4–6 hours
  • Tip: Sow every 2–3 weeks for nonstop salads.

Spinach

Spinach thrives in cool weather and grows fast, making it a perfect spring and fall crop. It does well even in shallow containers and can be harvested baby-leaf style.

  • Container size: 6–8 inches deep
  • Sun: 4–6 hours
  • Tip: Keep soil moist to prevent bolting (flowering too soon).

Kale

Kale’s sturdy leaves hold up well to container life and can be picked for months. Compact types like ‘Dwarf Blue Curled’ are ideal for tight spaces.

  • Container size: 8–10 inches deep
  • Sun: 6+ hours
  • Tip: Harvest outer leaves often to encourage new growth.

Compact Fruiting Vegetables

Cherry Tomatoes

Tomatoes are container favorites, and cherry types are the most forgiving. They ripen quickly, produce heavily, and don’t sprawl as much as big slicers. Look for dwarf or patio varieties like ‘Tiny Tim’ or ‘Tumbling Tom.’

  • Container size: 12–16 inches deep (5+ gallons)
  • Sun: 6–8 hours
  • Tip: Stake or cage early to support heavy fruit clusters.

Peppers (Sweet and Hot)

Peppers love the heat and stay compact, making them excellent for pots. Bell peppers, jalapeños, and even ornamental chilies do well in containers with full sun and rich soil.

  • Container size: 10–12 inches deep (3+ gallons)
  • Sun: 6–8 hours
  • Tip: Use a lightweight potting mix and water consistently to prevent blossom end rot.

Bush Beans

Bush beans don’t climb, so they fit nicely in small planters. They mature quickly and provide multiple harvests throughout summer.

  • Container size: 8–10 inches deep
  • Sun: 6–8 hours
  • Tip: Plant in batches for a steady supply of beans.

Root Vegetables for Deep Containers

Radishes

Radishes grow in just 3–4 weeks, making them perfect for impatient gardeners. They don’t need deep soil and are a great starter crop for beginners.

  • Container size: 6–8 inches deep
  • Sun: 4–6 hours
  • Tip: Keep soil loose so roots form evenly.

Carrots

Carrots thrive in containers, especially short or round types like ‘Parisian Market’ or ‘Little Finger.’ These varieties are bred for shallow soils.

  • Container size: 10–12 inches deep
  • Sun: 6–8 hours
  • Tip: Thin seedlings early for proper root development.

Beets

Beets give you both edible roots and leafy greens. They do well in deep containers and are tolerant of cooler weather.

  • Container size: 10–12 inches deep
  • Sun: 6+ hours
  • Tip: Harvest young greens as you thin seedlings for tender leaves.

Herbs: The Perfect Companion

Though not technically vegetables, herbs pair beautifully with container veggies. Basil boosts tomato flavor, mint repels pests, and parsley thrives in partial shade. Mix herbs into your vegetable pots or give them their own containers.

  • Best herbs for containers: Basil, chives, cilantro, parsley, thyme, mint
  • Container size: 6–8 inches deep for most herbs
  • Tip: Pinch flowers to keep plants producing leaves longer.

Choosing the Right Containers

The container is just as important as the vegetable. Here’s what to look for:

  • Depth: Match pot depth to root needs. Leafy greens need 6–8 inches; tomatoes need 12–16 inches.
  • Drainage: Holes at the bottom are non-negotiable to prevent root rot.
  • Material: Plastic retains moisture, terracotta breathes, and fabric pots encourage strong roots.
  • Size: Bigger is better—more soil means fewer waterings and stronger plants.

Repurposed containers like buckets, crates, or old tubs also work well, as long as they drain properly.


Soil and Fertilizer Basics

Container veggies need light, airy soil—not heavy garden dirt. Use high-quality potting mix with added compost or slow-release fertilizer. During the growing season, supplement with liquid feed every 2–3 weeks, especially for heavy feeders like tomatoes and peppers.

  • Tip: Mix perlite or vermiculite into the soil to boost drainage and aeration.

Watering Made Simple

Containers dry out faster than garden beds. A consistent watering routine is key:

  • Check daily: Stick your finger in the soil—if dry 1 inch down, water deeply.
  • Morning watering: Best time to reduce evaporation and prevent fungal issues.
  • Self-watering pots: Great for balconies where you may forget to water.

Mulching with straw or shredded leaves also helps keep soil moist and cool.


Arranging Your Patio Garden

Think vertically. Use plant stands, shelves, or railing planters to maximize space. Group sun-loving plants together and keep shade-tolerant greens lower. Trailing plants like cherry tomatoes or strawberries look stunning cascading over the edges of hanging baskets.

Companion planting works beautifully in containers too. Pair basil with tomatoes, or tuck radishes around peppers to fill empty soil space.


Seasonal Planting Tips

  • Spring: Focus on greens, radishes, and peas.
  • Summer: Switch to heat lovers like tomatoes, peppers, and bush beans.
  • Fall: Bring back kale, spinach, and carrots for cooler weather harvests.
  • Winter (mild climates or indoors): Grow lettuce, herbs, and microgreens under grow lights or in sunny windows.

Troubleshooting Common Issues

  • Yellow leaves? Often a sign of overwatering or nutrient deficiency.
  • Wilting in heat? Provide afternoon shade or water more frequently.
  • Few fruits? Pollinate flowers manually with a small brush or shake the plant gently.
  • Pests like aphids? Spray with soapy water or introduce ladybugs.

Creating a Mini Oasis

Container gardening on patios and balconies is more than food—it’s an experience. You’ll notice bees visiting, the joy of plucking a tomato warm from the sun, and the scent of basil drifting in the air. These small gardens turn overlooked spaces into thriving retreats.


Harvest Abundance in Small Spaces

You don’t need acres to grow fresh vegetables. A few well-chosen plants, good soil, and thoughtful care can fill your kitchen with homegrown flavors all season long. Whether you’re growing crunchy carrots in a bucket or lush lettuce on a windowsill, container gardening proves that abundance can happen anywhere—even on a balcony high above the street.

Posted on

Small Garden Design Ideas for Maximum Impact

Small Garden Design Ideas for Maximum Impact

Designing a small garden is like painting on a tiny canvas. Every choice matters. Every inch has potential. When done well, a small garden can feel lush, inviting, and even larger than it is. The key is knowing how to combine space-saving layouts, bold focal points, and clever plant choices to create harmony. Here is how you can transform even the tiniest outdoor space into a vibrant retreat.


Think Big in a Small Space

The size of your garden does not limit its impact. In fact, small spaces invite creativity. A narrow courtyard, balcony, or compact backyard can still feel expansive when designed with intention. The trick is to make every detail count. Choose fewer elements, but make them bold. Use striking colors, unusual textures, or statement pieces to draw the eye and create a sense of abundance.


Create Zones for Different Uses

Even the smallest garden benefits from clear zones. A single bench tucked into a corner can feel like its own room. A cluster of pots can become a tiny herb kitchen. Defining zones gives structure and encourages you to use the entire space.

  • Relaxation Zone: Add a bench, hammock chair, or low seating under a tree or pergola.
  • Plant Showcase: Group favorite plants in one area for visual impact.
  • Dining Nook: Place a bistro table or folding chairs where you can enjoy morning coffee.

The secret is to keep zones connected. Use paths, stepping stones, or even potted plants to guide movement between them.


Go Vertical to Multiply Space

When floor space is limited, look up. Vertical gardening adds life to walls, fences, and railings while freeing up ground space for walking or seating. Options include:

  • Living Walls: Use modular planters or pockets filled with ferns, herbs, or succulents.
  • Trellises and Arches: Train climbing roses, jasmine, or beans to create fragrant green curtains.
  • Hanging Baskets: Layer trailing flowers like petunias or ivy above eye level.

Vertical layers draw the eye upward and give the illusion of height and depth.


Choose Scaled-Down Furniture

Oversized furniture can overwhelm a small garden. Look for compact, foldable, or multipurpose pieces. A bench with built-in storage, for example, saves space and keeps tools out of sight. Bistro sets, nesting tables, and lightweight chairs also work well. Keeping furniture low to the ground can make a space feel larger and more open.


Add a Bold Focal Point

A strong focal point grounds the design. It might be a large potted plant, a water feature, or a piece of garden art. In small spaces, one or two statement pieces are often enough. The key is placement—position focal points where they naturally draw the eye, such as at the end of a path or in the center of a seating area.


Play with Color and Texture

Color has a powerful effect on perception. Cool hues like blues and greens make spaces feel calm and spacious. Bright accents like yellow or red add energy and pull focus to certain areas.

Texture is just as important. Combine smooth leaves with feathery grasses, glossy pots with rough stone, or wooden decks with metal accents. Contrasting textures make even small gardens feel layered and rich.


Incorporate Mirrors and Reflective Surfaces

Mirrors are a secret weapon in small garden design. A well-placed mirror doubles the visual space and reflects light into shady corners. Other reflective elements, like shiny water bowls or glass lanterns, can also add sparkle and depth. Always position mirrors to reflect greenery rather than blank walls for the most natural effect.


Use Pathways to Guide Movement

Even a short path creates a sense of journey. Curved paths feel longer and more intriguing than straight ones. Materials like gravel, stepping stones, or wood slices add texture and charm. Pathways also help define zones and make small gardens feel organized rather than cluttered.


Embrace Container Gardening

Containers are flexible and space-saving. They let you grow flowers, herbs, and even small shrubs without permanent planting beds. Group containers of varying sizes for a lush, layered look. Use lightweight materials like fiberglass or resin for easy rearranging. Vertical stacks of pots or tiered plant stands maximize space further.


Grow Plants with Multiple Purposes

In a small garden, every plant should earn its spot. Choose varieties that offer more than one benefit—fragrance, beauty, and food, for example.

  • Lavender: Fragrant, attracts pollinators, and dries well for sachets.
  • Blueberries: Decorative flowers, tasty fruit, and stunning fall foliage.
  • Rosemary: Evergreen structure plus culinary use.

Plants with long bloom times or year-round interest are especially valuable.


Add Subtle Lighting

Lighting transforms a garden after sunset. String lights overhead make spaces feel magical. Solar lanterns along paths add safety and glow. Spotlights aimed at trees or walls create dramatic shadows and highlight textures. In small gardens, even one or two light sources can create a warm, inviting atmosphere.


Use Water for Calm and Sound

Water features bring movement and soothing sound to small gardens. A tabletop fountain, wall-mounted spout, or tiny pond can turn an ordinary corner into a calming retreat. The gentle trickle of water also masks nearby traffic noise, adding to the sense of escape.


Keep It Simple and Uncluttered

Small gardens can quickly feel crowded. Edit often. Choose a few key plants or features and repeat them for harmony. Store tools and extras out of sight. Use neutral tones for large surfaces and introduce color in accents or flowers. A clean design helps every detail shine.


Experiment with Seasonal Interest

Plan for beauty in every season. Evergreens provide structure in winter. Spring bulbs add early cheer. Summer annuals bring bright color, and fall foliage offers warmth. Swapping container plants seasonally is an easy way to refresh the garden without major replanting.


Invite Wildlife

Even the tiniest garden can support pollinators and birds. Plant nectar-rich flowers for bees and butterflies. Include a shallow water dish for birds. Native plants often provide food and shelter naturally, while also being easier to maintain.


Make the Most of Every Corner

Unused corners can become highlights. Add a vertical planter, a cozy chair, or a single dramatic plant. Corners also work well for storage, compost bins, or small sheds when screened with trellises or tall grasses.


Blend Indoors and Outdoors

When the garden connects visually to indoor living areas, the whole space feels bigger. Use similar materials or colors for continuity. Position seating near doors or windows to extend your living space outside. Sliding glass doors or wide windowsills create seamless transitions.


Layer Heights for Depth

Arrange plants in layers: tall at the back, medium in the middle, and short in front. This mimics natural growth patterns and adds depth. Combine upright plants with trailing ones to soften edges and create flow. Layering works especially well in containers and narrow beds.


Celebrate Personal Style

Small gardens are perfect for personal expression. Use art, handmade planters, or meaningful objects to make the space feel yours. Whether your style is modern, rustic, or whimsical, lean into it. Consistency creates harmony and helps the garden feel cohesive.


Quiet Corners of Beauty

Designing a small garden is an exercise in focus. Instead of filling every inch, you choose what matters most. A bold plant. A cozy seat. A path that leads you somewhere unexpected. In doing so, you create a space that feels complete and deeply personal—no matter its size.

When every detail works together, a small garden does more than look pretty. It becomes a retreat, a place to slow down, and a reminder that beauty thrives even in the smallest spaces.

Posted on

Beginner’s Guide to Growing Herbs Indoors (Basil, Mint, Oregano, and More)

Beginner’s Guide to Growing Herbs Indoors (Basil, Mint, Oregano, and More)

Growing fresh herbs inside your home feels like bringing a piece of the garden indoors. The vibrant scent of basil, the soothing aroma of mint, and the savory note of oregano turn everyday meals into something special. Best of all, indoor herb gardening is simple and rewarding—even if you’re new to plants.

This guide walks you through everything you need. From choosing the right herbs to creating the perfect growing space, you’ll learn step by step how to grow a thriving indoor herb garden that adds flavor and beauty to your kitchen.


Why Grow Herbs Indoors?

Herbs do more than season food. They transform your living space. Here’s why indoor herb gardening is so appealing:

  • Fresh flavor anytime: Snip what you need, when you need it. No more wilted herbs from the store.
  • Saves money: One healthy plant can supply months of harvest.
  • Compact and convenient: Even a sunny windowsill can become a tiny garden.
  • Aromatherapy at home: Basil, mint, and thyme release refreshing scents that uplift any room.
  • Year-round growth: Indoor plants aren’t limited by frost or scorching heat.

Choosing the Right Herbs for Indoors

Not all herbs behave the same. Some love the sun. Others tolerate shade. For beginners, start with herbs that adapt well to containers and indoor light.

Easy Herbs to Start With

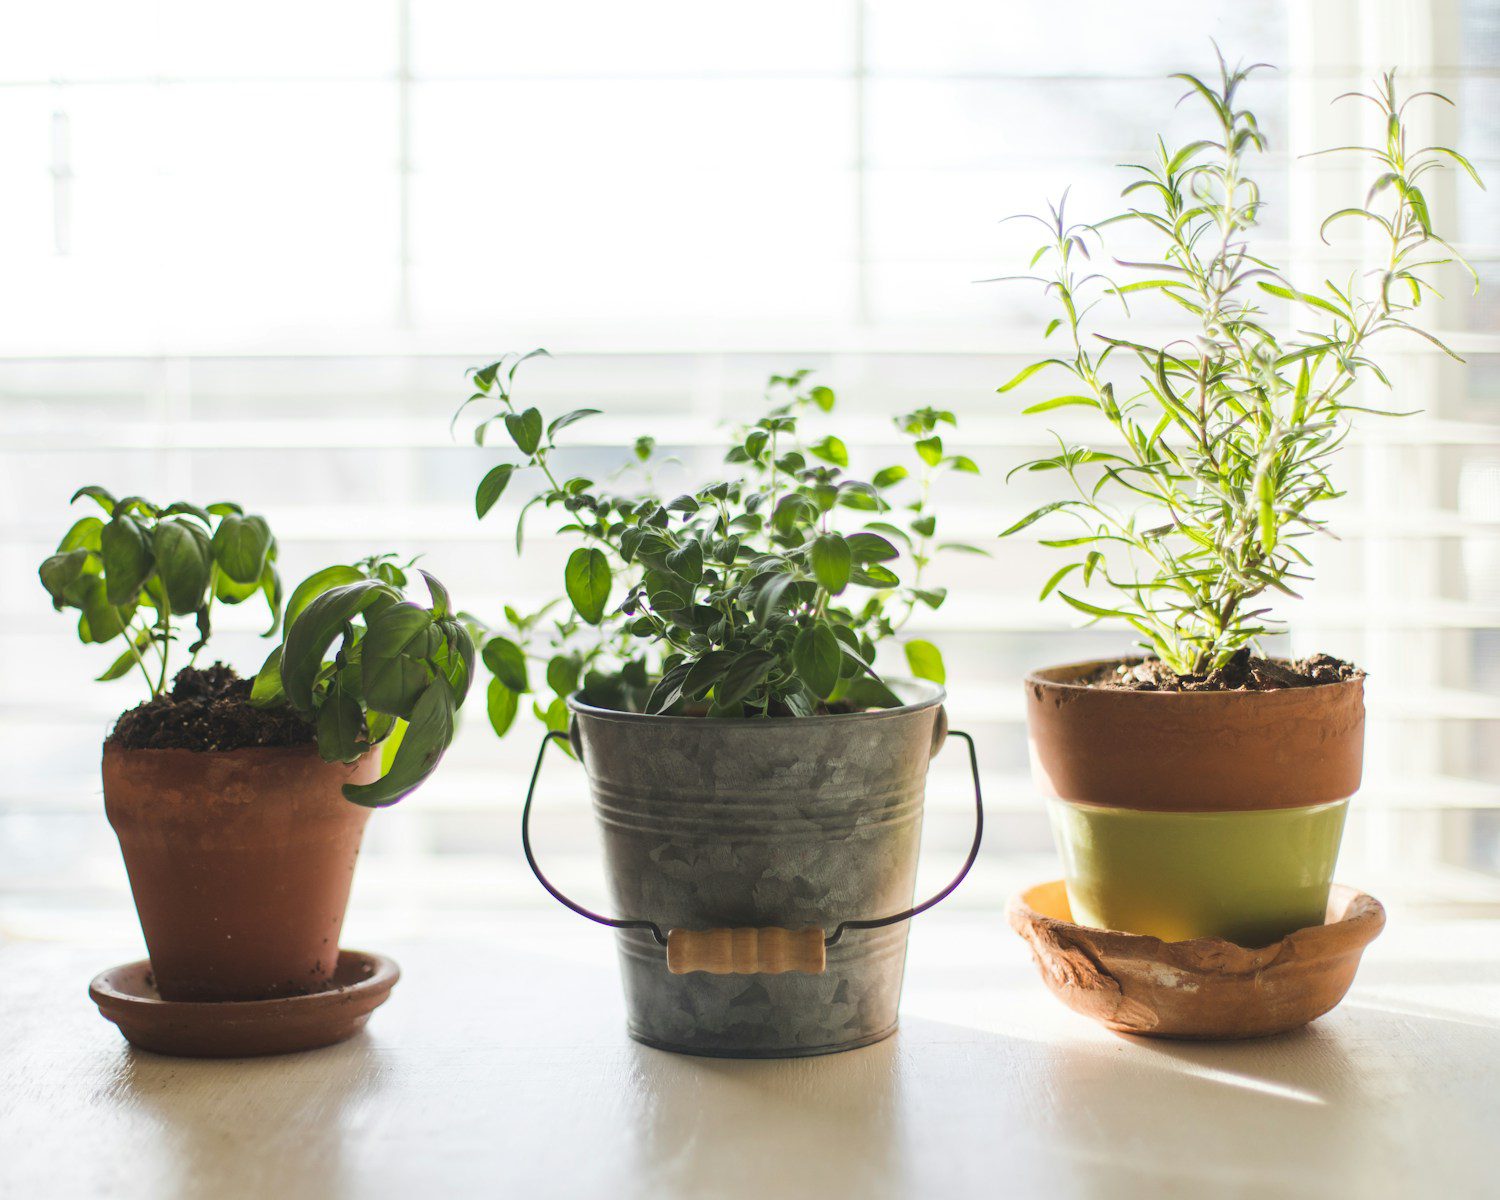
  • Basil – Grows quickly and adds a sweet, peppery flavor to dishes. Loves warmth and sun.
  • Mint – Thrives in moderate light and stays lush with consistent moisture. Excellent for teas.
  • Oregano – Hardy and aromatic. Perfect for pizza, pasta, and roasted veggies.
  • Parsley – Slow to start but produces plenty once established. Great for soups and garnish.
  • Chives – Onion-like flavor and forgiving nature. Perfect for windowsill growing.
  • Thyme – Compact, drought-tolerant, and a staple in savory cooking.

Finding the Perfect Spot

Light is the most important factor in growing herbs indoors. Without enough light, plants become thin and weak.

Light Requirements

  • South-facing windows: Ideal. Provides 6–8 hours of sunlight daily.
  • East or west-facing windows: Good alternative. Plants may grow slower but still thrive.
  • North-facing windows: Usually too dim—supplement with grow lights.

Temperature and Humidity

  • Keep herbs in rooms between 65–75°F.
  • Avoid placing them near drafty windows, heaters, or air vents.
  • Mist leaves occasionally in winter to prevent dry air damage.

Choosing Containers and Soil

Containers and soil are the foundation of healthy herb growth.

Best Containers

  • Drainage holes are essential. Herbs hate soggy roots.
  • Terracotta, ceramic, or plastic pots all work—choose based on style and budget.
  • Small pots (4–6 inches) are great for single plants. Larger ones can hold mixed plantings.

Soil Mix

  • Use lightweight potting mix (not garden soil) for proper drainage.
  • Add a little perlite or sand for extra airflow around the roots.
  • Consider organic mixes if you plan to use herbs for cooking.

Planting Your Indoor Herbs

There are two main ways to start herbs indoors: from seeds or from starter plants.

Starting from Seeds

  • Inexpensive and rewarding, but takes patience.
  • Plant seeds ¼ inch deep in moist soil.
  • Keep soil consistently damp until seedlings sprout.
  • Place in warm, bright light to encourage growth.

Using Starter Plants

  • Easiest method for beginners.
  • Transplant young herbs from the nursery into your pots.
  • Water gently after planting to settle roots.

Caring for Your Herbs Day to Day

Consistency is key to healthy herbs. A simple routine keeps plants thriving for months.

Watering

  • Water when the top inch of soil feels dry.
  • Avoid letting pots sit in standing water.
  • Mint prefers slightly more moisture; oregano and thyme like drier soil.

Feeding

  • Use a liquid fertilizer every 4–6 weeks.
  • Choose an organic option safe for edible plants.
  • Don’t over-fertilize—too much can reduce flavor.

Pruning and Harvesting

  • Pinch back stems regularly to encourage bushy growth.
  • Always leave at least ⅓ of the plant when harvesting.
  • For basil, remove flower buds to keep leaves flavorful.

Common Problems and Easy Fixes

Even the best gardeners face challenges. Here’s how to handle them:

  • Leggy growth (tall and thin): Needs more light. Move to a sunnier spot or add a grow light.
  • Yellow leaves: Could be overwatering or nutrient deficiency. Check soil moisture first.
  • Wilting: Often caused by dry soil. Water deeply, then drain excess.
  • Pests (aphids or spider mites): Rinse leaves with water or use a mild insecticidal soap.

Using Grow Lights for Herbs

If your home lacks natural sunlight, grow lights make indoor gardening possible.

  • LED grow lights are energy-efficient and stay cool.
  • Position lights 6–12 inches above plants.
  • Run lights 12–16 hours daily for best results.
  • Choose full-spectrum bulbs to mimic natural sunlight.

Creative Ways to Display Indoor Herbs

Indoor herb gardens can double as décor. Here are fun ideas:

  • Windowsill row: Line matching pots along a sunny ledge.
  • Hanging planters: Save counter space and create a vertical garden.
  • Mason jars or recycled containers: Add rustic charm to your kitchen.
  • Tiered plant stands: Showcase multiple herbs in a small space.

Cooking With Fresh Herbs

Nothing beats the taste of freshly picked herbs. Add them at the right time to make meals shine:

  • Basil – Add at the end of cooking to preserve flavor. Perfect for pasta, salads, and pizza.
  • Mint – Brightens drinks, desserts, and Middle Eastern dishes.
  • Oregano – Robust enough for long simmers in sauces and soups.
  • Chives – Sprinkle fresh on eggs, potatoes, or dips.
  • Thyme – Excellent for roasting meats or vegetables.

Extending the Life of Your Indoor Herb Garden

  • Rotate pots every week so plants grow evenly toward light.
  • Refresh soil yearly to replace nutrients.
  • Propagate herbs by taking cuttings—especially mint and basil—for endless plants.
  • Combine herbs with similar needs in larger containers for convenience.

Herbs That Pair Well Together

Group herbs by similar light and water needs:

  • Dry-loving group: Rosemary, thyme, oregano, sage.
  • Moisture-loving group: Basil, mint, parsley, cilantro.

This makes watering easier and prevents plant stress.


Growing Through the Seasons

  • Spring and summer: Herbs grow fast—harvest frequently.
  • Fall and winter: Growth slows—reduce watering and fertilizing.
  • Supplement with grow lights during shorter days to keep plants producing.

Making Indoor Herbs Part of Your Lifestyle

Indoor herbs do more than feed your family. They become part of daily life. Imagine sipping mint tea you grew yourself, adding basil to homemade pizza, or gifting potted oregano to a friend. These small rituals turn a simple windowsill into a living kitchen companion.

With just a little care, your indoor herb garden can thrive year-round. It’s fresh flavor, fragrant air, and a daily connection to nature—all without stepping outside.


Flourish Year-Round With Your Indoor Herb Garden

Starting an indoor herb garden is simple, joyful, and endlessly rewarding. It’s about more than food—it’s about creating a living space full of green energy and flavor. With the tips in this guide, you can grow basil, mint, oregano, and more right on your windowsill.

Once you begin, you’ll never want to cook without them again.

Posted on

Beginner’s Guide to Organic Gardening: Tips and Tricks

organic gardening tips for beginners

Are you ready to start your own organic garden and enjoy fresh, healthy produce right from your backyard? Organic gardening is a rewarding and sustainable way to grow your food, and it’s easier than you think. This beginner’s guide will walk you through all the essential steps, from choosing the right location and preparing the soil to selecting the best plants and controlling pests. With a little planning and effort, you’ll be well on your way to a bountiful harvest of organic vegetables, fruits, and herbs. Let’s get started!

Choose the right location

organic gardening tips for beginners

Choosing the Right Location: A Foundation for Organic Gardening Success

When embarking on your organic gardening journey, selecting the right location for your garden is paramount to its success. Several key factors should be taken into consideration to ensure your plants thrive and produce a bountiful harvest.

Sunlight is essential for photosynthesis, the process by which plants convert sunlight into energy. Most vegetables, fruits, and herbs require at least six hours of direct sunlight per day. Choose a spot in your yard that receives ample sunlight throughout the day, ideally in the morning when the sun’s rays are less intense.

Good drainage is crucial to prevent waterlogging, which can suffocate plant roots and lead to root rot. Inspect the area after heavy rain or watering to assess drainage. If water pools or takes a long time to drain, consider creating raised beds or amending the soil with organic matter to improve drainage.

The microclimate of your chosen location also plays a significant role in plant growth. Factors such as frost pockets, wind exposure, and temperature fluctuations can impact plant survival and productivity. Observe your chosen area over several days to understand its microclimate and select plants accordingly.

In some cases, creating raised beds can be beneficial, especially if your soil has poor drainage or is compacted. Raised beds improve drainage, aeration, and soil temperature, providing an optimal environment for plant growth.

By carefully considering these factors and choosing the right location, you lay the foundation for a thriving organic garden that rewards you with a bountiful harvest of fresh, healthy produce.

Prepare the soil

Preparing the soil is a crucial step in organic gardening, as it provides the foundation for healthy plant growth and a bountiful harvest. Before planting, it’s essential to remove any existing weeds or debris from the garden bed to prevent competition for nutrients and space. This can be done manually by pulling the weeds out by their roots or by using a hoe or weed trimmer. Next, adding compost or well-rotted manure to the soil helps improve its structure, fertility, and water-holding capacity. Compost also introduces beneficial microorganisms that contribute to overall soil health.

Adequate watering is vital for seed germination and plant growth. Deep watering encourages strong root development and helps plants withstand dry spells. However, overwatering should be avoided, as it can lead to root rot and nutrient leaching. Monitoring the soil’s moisture levels and adjusting watering frequency accordingly is essential. Additionally, testing the soil pH is recommended to ensure it falls within the optimal range for the plants you intend to grow. Most vegetables and herbs prefer a slightly acidic to neutral pH level between 6.0 and 7.0. Adjusting the soil pH using organic amendments like lime or sulfur can be done if necessary.

By following these soil preparation techniques, you can create an optimal environment for your organic plants to thrive, resulting in a bountiful and healthy harvest.

Choose the right plants

When choosing plants for your organic garden, it’s essential to select varieties that are well-suited to your specific climate and soil conditions. Consider the following factors when making your selections:

**Climate:** Research the USDA plant hardiness zone for your area to determine which plants are likely to thrive in your local climate. Consider factors such as temperature, humidity, and rainfall. Choose plants that are adapted to your specific growing conditions to ensure their success.

**Soil:** Different plants have different soil requirements. Some plants prefer acidic soil, while others prefer alkaline soil. Some plants require well-draining soil, while others can tolerate wet or compacted soil. Test your soil pH and texture to determine which plants are best suited for your garden.

**Pest and disease resistance:** Choose plants that are known to be resistant to common pests and diseases in your area. This will help to reduce the need for chemical pesticides and fungicides, maintaining the organic integrity of your garden.

**Companion planting:** Consider the concept of companion planting, which involves planting different plants together to benefit each other. Some plants, when grown together, can improve soil fertility, deter pests, or attract beneficial insects. Research companion planting techniques to optimize the growth and health of your plants.

**Diversity:** Grow a diverse range of plants to enhance the resilience and sustainability of your garden. Monocultures (growing only one type of plant) can be more susceptible to pests and diseases. By growing a variety of plants, you create a more balanced ecosystem that can better withstand challenges.

By carefully selecting plants that are suited to your climate, soil conditions, and specific needs, you can lay the foundation for a successful and bountiful organic garden.

Organic pest control

methods are essential for protecting your organic garden from pests without resorting to harmful chemicals. Several effective organic pest control methods are available, each with its benefits.

Companion planting involves planting different types of plants together to benefit each other. For example, planting marigolds near tomatoes can help repel pests like aphids and whiteflies.

Neem oil is a natural pesticide derived from the neem tree. It is effective against a wide range of pests, including aphids, mites, and whiteflies. Neem oil can be applied directly to plants or diluted with water and sprayed.

Insecticidal soap is another natural pesticide effective against soft-bodied insects like aphids, mealybugs, and whiteflies. Insecticidal soap can be made at home or purchased from a garden supply store.

Row covers are physical barriers placed over plants to protect them from pests. Row covers can be made of various materials, such as plastic, fabric, or netting.

Beneficial insects are natural predators of pests. Encouraging beneficial insects into your garden can help control pest populations. Beneficial insects include ladybugs, lacewings, and parasitic wasps.

By using these organic pest control methods, you can protect your organic garden from pests without harming the environment or your health.

Harvesting and storing your crop

is an important part of organic gardening. It is important to harvest your crops at the right time to ensure the best flavor and nutritional value. You should use sharp tools to avoid damaging the plants and handle your crops carefully to prevent bruising. There are several different ways to preserve your crops, such as canning, freezing, or drying them.

Some methods of preservation are more suitable for certain types of produce. For example, canning is ideal for fruits and vegetables that are high in acidity, such as tomatoes, peaches, and pears. Freezing is a good option for fruits and vegetables that are high in moisture content, such as berries, corn, and peas. Drying is best suited for herbs, spices, and some fruits, such as raisins and apricots.

Canning, freezing, and drying are all great ways to preserve your harvest and enjoy fresh, organic produce all year long. By following these tips, you can ensure that you get the most out of your organic garden.

Posted on

Growing Your Garden: Tips and Tricks for American Gardeners

Growing Your Garden American Gardeners

Are you an American gardener looking to grow a successful garden? Look no further! This blog post will give you all the tips and tricks you need to get started. We’ll cover everything from planning and bed prep to choosing native plants and watering wisely. So, whether you’re a seasoned gardener or just starting, read on for some helpful advice.

Planning and Bed Prep

Growing Your Garden American Gardeners

Planning and bed preparation are crucial steps in creating a successful garden. By following these simple tips, you can ensure your plants have the best chance to thrive.

**Choose a location that receives at least 6 hours of direct sunlight daily.** Most vegetables and flowers need at least this much sunlight to grow well. If you don’t have a spot in your yard that gets this much sun, you can try growing some plants in containers to move around to follow the sun.

**Amend the soil with compost or fertilizer to improve drainage and fertility.** Good drainage is essential for preventing root rot and other problems. Compost and fertilizer will help to improve the soil structure and provide nutrients for your plants.

**Create a raised bed to improve drainage and aeration.** Raised beds are also a great way to warm the soil earlier in the spring, giving your plants a head start on the growing season.

By following these tips, you can create a healthy and productive garden that will provide fresh, delicious produce all season long.

Native plants: the best choices

Native plants are the best choices for American gardeners because they are adapted to the local climate and soil conditions. This means they are more likely to thrive and require less water, fertilizer, and pesticides. Native plants also provide food and shelter for local wildlife, which can help to create a more balanced and sustainable ecosystem.

In addition to these practical benefits, native plants can add beauty and interest to your garden. There are many native plants to choose from, so you can create a unique garden that reflects your style.

When choosing native plants for your garden, it is essential to consider the following factors:

– The climate and soil conditions in your area

– The amount of sunlight your garden receives

– The size and shape of your garden

– Your personal preferences

Once you have considered these factors, you can start to narrow down your choices and select the native plants that are right for your garden.

Here are some tips for growing native plants in your American garden:

– Start with a small garden. This will help you to learn how to care for native plants and to avoid making mistakes.

– Choose plants that are well-suited to your climate and soil conditions.

– Plant your plants in the right location. Make sure they receive the correct amount of sunlight and water.

– Water your plants regularly, especially during dry spells.

– Fertilize your plants according to their needs.

– Prune your plants regularly to keep them healthy and looking their best.

With some care and attention, you can grow a beautiful and sustainable garden filled with native plants.

Watering Wisely

Watering your plants deeply and infrequently encourages them to develop deep root systems, making them more drought-tolerant. Water early in the day so the leaves have time to dry before nightfall, reducing disease risk. Mulch around plants to help retain moisture and suppress weeds. Consider installing a drip irrigation system to deliver water directly to the roots of plants, minimizing evaporation and reducing water usage. Following these tips, you can water your garden wisely and help your plants thrive.

Posted on

Native American Gardening: The Three Sisters

corn

Planting a garden with ¢â‚¬Å“The Three Sisters Crops¢â‚¬Â is a great way to incorporate Native American gardening practices into your outdoor space. The Three Sisters refers to the traditional companion planting technique of growing corn, squash, and beans together in the same plot. This method was used by many North American Indigenous peoples to ensure the plants worked symbiotically and yielded a larger harvest.

The Three Sisters crops have an interesting history. According to some Native American creation stories, these three crops were given as gifts alongside fire and pottery from their respective creators. Corn, squash, and beans are all easy-to-grow vegetables that thrive in warm climates with plenty of sunshine. Growing them together can also help maximize space since they all take up relatively little room compared to other vegetables such as tomatoes or peppers.

When cultivating the Three Sisters crops in a garden, it is important to remember that each plant has a place in the symbiotic relationship. Corn will provide the climbing pole for the bean plant and is the second crop to harvest. While squash is first to harvest, it prefers slightly cooler conditions of early Spring and will be finished producing before crowded out by the corn and beans. The bean plant will climb up the stalks of the corn, provide nitrogen fixation from the air and finish as the last crop harvested. All three sisters crops should be planted together.

In addition to providing sustenance for human consumption, these three vegetables offer many benefits for wildlife. For example, pollinators such as bees are attracted to the flowers of both corn and squash while birds love snacking on bean seeds when they ripen in late summertime. Planting the Three Sisters together gives back to nature by providing food sources for beneficial creatures like these which can help maintain healthy ecosystems in our gardens year round.

Finally, it¢â‚¬â„¢s worth noting that companion planting isn¢â‚¬â„¢t limited only to these three specific veggies; you can combine any number of compatible species in your garden plot. Experimenting with different combinations may yield additional benefits such as pest control since various plants can contain compounds that ward off insects or attract beneficial predators like ladybugs or lacewings! With this knowledge in hand you can tailor your outdoor space according to your own unique designs while still incorporating an essential aspect of Native American culture into your landscape design¢â‚¬â€a beautiful reminder of our shared history with nature’s gifts!

Native American Gardening: The Three Sisters
corn

The Tall Sister: Corn

Growing corn is a great way to enjoy fresh and delicious sweet corn right off the cob in your own backyard. With its long history of cultivation, growing corn is an easy and rewarding experience for gardeners of all skill levels. As the tall sister, it provides a climbing pole for the bean plant.

When it comes to planting, you will want to find an open sunny area in your yard with plenty of space for your crop. Corn requires around three feet of space between each plant in order to reach full maturity; consider this when deciding how much land you¢â‚¬â„¢ll need to allocate for your crop. For best success, it is recommended that you prepare the soil by tilling it before planting. This ensures any weeds or pests are removed from the soil and helps create a more nutrient-rich environment for your plants to grow. Additionally, make sure that your soil has a pH level between 5.5 and 7.0, as this will help produce the most flavorful kernels that your family can enjoy!

Once prepared, you can begin planting seeds directly into the ground about 1 inch deep every two or three inches apart; be sure not to overplant as overcrowding can reduce yields! Once planted, be sure to keep the soil moist at all times until sprouts appear above ground (about one-two weeks); then reduce waterings down to once per week while making sure they still receive one inch of water each time. If you¢â‚¬â„¢re looking for an added boost of nutrition later on during the growing season, consider using a light fertilizer roughly six weeks after planting; this helps ensure strong growth and increases yields come harvesting time!

As far as selecting varieties go, there are four main types: standard (su), supersweet (sh2), low-sugar/starch (se) and small-kerneled (sd). Standard varieties have traditional corny flavor yet may not retain their sugar content as long after harvest; supersweet varieties offer extra sweetness but may not be as vigorous during growth; low-sugar/starch varieties have lower sugar content but greater starchiness; whereas small kerneled varieties are smaller in size with higher sugar content but lower yield potential overall. Be sure to pick the variety that suits your needs best for maximum enjoyment in the garden!

Finally, come harvesting time ¢â‚¬â€œ usually about two months after sowing ¢â‚¬â€œ check ears regularly every few days by feeling them through their husks: if they feel plump and firm when gently squeezed then they¢â‚¬â„¢re ripe! Once harvested, eat them fresh off the cob within a few days¢â‚¬â€œ if not sooner¢â‚¬â€œto ensure optimal flavor and texture before they start losing their sweetness due to starchy conversion.

Overall, growing corn is an enjoyable experience both in terms of tending its development over time as well as ultimately savoring its delicious rewards at harvest time! By following these steps outlined above – along with some additional research – you can bring sweet corn straight from farm-to-table right in your own backyard!

The Short Sister: Squash

Growing squash is a great way to get delicious, healthy vegetables and can be done relatively easily – even by beginner gardeners! Squash plants are easy to grow, require minimal care and maintenance, and can be grown in both summer and winter.

When it comes to growing squash, the most important thing to consider is location. Choose a spot that gets plenty of sunlight throughout the day and also has well-drained soil. To increase your chances of success, add compost or fertilizer to enrich the soil before planting. Make small mounds around where you plan on planting the squash to ensure proper drainage around the plant.

If sowing from seeds, make sure to sow four or five seeds a few inches apart in each mound. Once the seedlings begin emerging, thin out any excess so that only one or two plants remain per mound – this will give them enough space for proper growth and development. If purchasing seedlings from a nursery instead of starting from seed, simply transplant them into the prepared mounds.

In terms of care and maintenance, squash plants don’t require much attention after they have been planted. Water when necessary – usually once every one or two weeks depending on weather conditions – but avoid over-watering as it can lead to fungal diseases. Mulching around the plant can help retain moisture during dry spells too. You can also fertilize lightly once or twice during the season if desired; just make sure not to over-fertilize as this can lead to excessive vegetative growth (which means fewer flowers which leads to fewer fruits).

Harvesting squash is simple — just wait until they reach their desired size then pick them off either right away or store them for use later in the year if needed. Knowing when exactly to harvest depends on what type of squash you’re growing; some types are meant for eating when young while others are best picked when more mature and full sized (for example pumpkins). In either case it’s best not to leave any fruits on the vine for too long since they will eventually start rotting and attract pests/diseases which could damage your crop further down the line.

Overall, growing squash is an easy way for gardeners of all levels of experience to enjoy fresh produce with very little effort required! With some basic knowledge about where/when/how to plant them plus regular watering/mulching/fertilizing (if needed), you should have no problem producing a healthy crop of tasty winter or summer squash each year!

The Other Sister: Beans

Beans are one of the most popular vegetables grown in gardens, and with good reason ¢â‚¬â€œ they¢â‚¬â„¢re easy to grow, require little maintenance and are highly nutritious. Not to mention that beans can be used for a variety of dishes, from soups and salads to stews and side dishes. Whether you choose pole or climbing beans, you can have a bumper crop of these tasty veggies in no time!

Before getting started, it¢â‚¬â„¢s important to understand a few basics about bean growing. One key factor is soil temperature ¢â‚¬â€œ beans prefer soil temperatures between 65‚°F (18‚°C) and 75‚°F (23‚°C). Soil should be well-draining but still moist. If your soil is too wet, your plants won¢â‚¬â„¢t do as well. It¢â‚¬â„¢s also important to keep weeds away; when left alone, they will consume the nutrients meant for your bean plants.

If you¢â‚¬â„¢re new to growing beans, you may not know that there are two main types: pole beans and climbing beans. Pole beans need a trellis or support structure to grow up; this helps them stay upright and gives them something to climb on as they reach for sunlight. Climbing beans don’t require a support structure since they use their long tendrils to attach themselves onto whatever is available ¢â‚¬â€ like fences or posts ¢â‚¬â€ as they grow upward. Both types need space between each plant so that air can circulate freely; otherwise, heat can build up around the plants which can lead to disease issues.

Legumes are an essential part of any garden because of their nitrogen-fixing capabilities. Legumes create a symbiotic relationship with bacteria called rhizobia that live inside nodules on the roots of the bean plant; this process is known as nitrogen fixation. The root provides food for the bacteria while the bacteria convert atmospheric nitrogen into ammonia which can then be absorbed by the plant and converted into nitrate ¢â‚¬â€œ a form plants can use more efficiently than atmospheric nitrogen alone. Nitrogen is an essential nutrient for healthy plant growth so having legumes in your garden is hugely beneficial!

Harvesting times will vary depending on what type of bean you¢â‚¬â„¢ve chosen; some varieties take 59 days while others take 79 days or more before they’re ready for picking! When picking your beans, make sure that they¢â‚¬â„¢re firm with no soft spots or discoloration; this indicates that they might be past their prime quality-wise and should probably be composted instead! Store freshly picked beans in an air-tight container either in your fridge or freezer¢â‚¬â€this will help protect them from spoiling quickly so you can enjoy them later!

Growing your own beans at home has many benefits including getting fresh veggies straight from your garden as well as providing valuable nitrogen fixation for other non-legume crops surrounding them. There are two main types¢â‚¬â€pole and climbing¢â‚¬â€that all require adequate spacing between each plant and some kind of support if needed like a trellis for pole varieties. When harvested correctly at peak ripeness, store them properly for maximum shelf life enjoyment later down the line!

Posted on

Grow Your Own Italian Herb Garden

Italian herb garden

7 Essential Italian Herbs

There are seven amazing herbs in an Italian herb garden that gives most Italian cuisine its rich, scrumptious flavors. I haven’t met anyone who doesn’t cook Italian dishes at home. Don’t you agree that it’s more practical and convenient to grow these plants in your garden so you’ll always have a flavorful and fresh supply every time you need to cook tasty Italian meals?

Do you know that the most popular and the tastiest dishes come from Italy because they use herbs from their Italian herb garden? In fact, records in the culinary industry show that some of the best dishes in the world come from Italy.

Italian herb garden

Let’s go over the 7 essential herbs found in an Italian herb garden, and their uses and benefits:
1. Basil is one of the most commonly used herbs. It is said that its distinct flavor is the soul of Italian cuisine. It is also beneficial to your garden — If you plant Basil with tomatoes and peppers, it will help improve the flavor of these plants. Basil is also a known repellent to mosquitoes and flies. Grow it with thyme, as they make a perfect pair, growing together.

2. Parsley is known in the culinary industry as an excellent flavoring too. In ancient times, many people use Parsley as breath mints. Very nutritious, eating parsley raw also helps eradicate bad breath. This is why parsley is used as a wonderful garnish.

3. Oregano on the other hand is used as decorative and has a distinct flavor that can complement many meals. This herb delivers the best flavor when harvested as soon as its beautiful purple flowers start to bloom. It also has great medicinal properties, and is widely used as an effective anti-oxidant, anti-fungal, as a digestive aid, and for relieving pain and inflammation.

4. Fennel is another great Italian herb that is used in making Italian sausages. This perennial plant should be replanted and divided every two to three years, because it loses its flavor when it reaches maturity. Fennel leaves are used in soups, condiments and sauces, and its oil is used to flavor candy, liqueurs, medicine and fish. It is used to make soaps too!

5. Another perennial plant that is noted for its numerous culinary contributions is Rosemary. It is very sensitive to frost and is known to attract bees. It’s a kind of shrub herb plant with color blue flowers. Use it as a gorgeous ornamental plant or as a welcome culinary flavoring.

6. Garlic is one of the most popular herbs in any garden and is a basic ingredient in many Italian dishes. I’m sure of one thing – if you don’t grow garlic in your garden, it cannot be considered as an Italian garden! Garlic can thrive with very little attention. Once harvested, they can be pickled, frozen, or stored in the fridge for future use.

7. Sage is a popular herb that graces countless Italian recipes, ranging from meats to salads. If you want to grow sage, I suggest that you keep your plants well trimmed so that you can take advantage of the new shoots – the most delicious plant part. Harvest these plants after they have bloomed. Sage is also known for its health benefits – it is a great memory enhancer, has anti-inflammatory properties and acts as a powerful antioxidant too!

There are other herbs that can serve as a nice addition to your Italian herb garden but starting off with these 7 essential herbs is a great idea since they are used in a wide variety of recipes.

The Benefits of Adding Organic Matter and Compost to Your Soil

If you want your garden to be healthy and productive, it’s important to start with healthy soil. One of the best ways to improve the quality of your soil is by adding organic matter and compost. Here’s a look at some of the benefits of adding organic matter and compost to your soil.

Improved Nutrient Content

Organic matter and compost help to improve the nutrient content of your soil. This is because they add essential nutrients, such as nitrogen, phosphorus, and potassium, which are vital for plant growth. Adding organic matter and compost to your soil can also help to improve the overall structure of your soil, making it more loose and easy for plant roots to penetrate.

Improved Water Retention

One of the biggest benefits of adding organic matter and compost to your soil is improved water retention. This is because organic matter helps to hold water in the soil, making it available for plants to use when they need it most. This is especially beneficial during times of drought or extended periods of dry weather.

Increased Soil Fertility

Adding organic matter and compost to your soil can also help to increase its fertility. This is because organic matter helps to promote the growth of beneficial microorganisms in the soil, which can help improve plant growth. Additionally, organic matter and compost can help add essential nutrients back into the soil that may have been depleted by previous crops.

As you can see, there are many benefits to adding organic matter and compost to your soil. If you want your garden to be healthy and productive, be sure to add these important ingredients!

How to Plant and Care for Your Italian Herbs

Growing your own Italian herbs can be a rewarding experience. Not only do you get to enjoy the delicious results of your labor, but you also get to control how your herbs are grown and cared for. Here are a few tips on how to get started.

Choose the Right Location

Herbs need plenty of sunlight to grow, so choose a spot in your yard or on your windowsill that gets at least six hours of direct sunlight each day. Once you’ve found the perfect spot, it’s time to prepare the soil.

Prepare the Soil

Herbs thrive in well-drained soil, so be sure to loosen the soil and remove any rocks or debris before planting. You can also improve drainage by mixing in some sand or organic matter. Once your soil is ready, it’s time to plant!

Plant Your Italian Herbs

When planting your herbs, be sure to give them plenty of space to grow. If you’re planting multiple herbs in one container, make sure each herb has its own individual pot. Once you’ve planted your herbs, water them regularly and fertilize them every two weeks with an all-purpose fertilizer.

With a little care and attention, your herbs will thrive! Remember to choose a sunny location, prepare the soil before planting, and water and fertilize regularly. With these tips, you’ll be enjoying fresh herbs in no time!

The Best Time to Harvest Herbs

Do you love the taste of fresh Italian herbs in your cooking? Growing your own herbs is a great way to have them on hand whenever you need them. But when is the best time to harvest them? Read on to find out!

Harvest the herbs when they are mature, but before they flower. This will give you the best flavor. Most herbs are ready to harvest 4-6 weeks after planting.

To dry your herbs, tie them in small bundles and hang them upside down in a dark, dry place. Or, lay them out on a screen or paper towels in a single layer and set them in a warm, dry place out of direct sunlight. Once they’re dried, store them in an airtight container in a cool, dark place.

If you want to freeze your herbs, wash and dry them thoroughly. Chop them finely and then put them into ice cube trays or freezer bags, pressing out as much air as possible before sealing. Label and date the containers, and then store them in the freezer for up to 6 months.

Now that you know when to harvest your Italian herbs, get out there and start picking! Fresh (or frozen) herbs can really take your cooking to the next level. Bon appƒÂ©tit!

Posted on

Outdoor Planter Boxes for Highlighting The Landscape

Outdoor planter boxes can be used for highlighting a landscape, garden, patio, balcony and the inside of your home. Outdoor planter boxes are generally used in a container garden to grow flowers, vegetables, or herbs. Most of these containers are constructed of weather resistant materials that will withstand the outdoor elements.

https://www.youtube.com/watch?v=-I6I0Q6Kp3k

Wood outdoor garden boxes that hold up to outdoor conditions are mostly made of redwood, cedar, or teak. You can find them in different shapes and sizes and can be used almost anywhere particularly a rustic outdoor setting. Many raised beds are constructed of these in the natural state or they can be painted to match any area of your garden. Raised beds are convenient for gardeners with knee or back problems and they are excellent for drainage.

PVC is a very durable material used in the construction of planter boxes. They sometimes give the appearance of beautiful wood or clay and you cannot tell the difference until pick one up and realize it is PVC. They are inexpensive lightweight containers that will last through many seasons of harsh weather and they do not need very much care. Some of these containers are so beautiful and self-watering they can be used on a front porch or door step to enhance the landscape in front of your house. Clay planter boxes are good for your plants health but the soil will dry out much quicker than other planters. They can be very heavy and are fragile so are best if used in a location where you do not have to move them around. They are also available in various sizes, shapes, and styles; you may even find some to match some of your outdoor yard decorations.

Some outdoor planter boxes are constructed of metal and are quite common. Some have decorative feet to lift them off the ground for drainage. Some may come with an inner lining or you can use a plastic liner for protection. You can find many window-boxes that are constructed of metal and are self-watering. Hanging planters are also classified as planter boxes for planting flowers that drape or hang over the side. Hanging planters can be hung from house eaves or patio covers and are available as self-watering.

Almost anything can be used as a planter box for growing vegetables, herbs, or flowers. You just need to find one large enough to handle the root system of what you intend to plant such as plastic milk containers, bushel baskets, large pressed fiber pots or even an old wheel barrow. If you want to plant tomatoes the container should be very deep but to plant radishes you only need about a 6-inch deep container. The larger the container and the more soil used will give the roots more room to spread and less watering on the gardeners’ part.

Be sure the containers you use have ample holes for drainage; they can be on the bottom or on the sides. The excess water needs to drain out so the roots do not get waterlogged. Most large containers have the holes on the bottom so elevating them on blocks or bricks will give the water a place to go. The larger the container the more drainage holes it will need. A well-aerated soil will not need any stones in the bottom because you want as much room as possible for the roots of the plant.

You need to check your containers a couple times a day, especially during the hotter days of summer, for moisture if you do not have self-watering planters or are not using a drip watering system. Your large containers can use a layer of mulch to help retain some of the moisture. You need to use outside water that has not been through a water softener; the salts used in a softener can be toxic to your plants. Collected rainwater is the best and cheapest water that can be used for your outdoor planter boxes.

Posted on

Garden Shrubs for Different Seasons of the Year

Shrubs are a useful asset to any garden. They add height and architectural interest. Evergreen shrubs added to herbaceous borders can give substance to a border and hold interest during winter months when most perennials die down. For the most part they are hardy and easy to maintain, requiring little pruning, and long lived. Here is a guide to a few of my favorite shrubs which will add interest to a garden at different times of the year.

Shrubs for a winter garden

Hamamelis or Witch Hazel has to be a favorite to add winter interest to any garden. It is a winter flowering shrub with spidery flowers and a spicy scent. Flowers come in shades of yellow, orange and reds. Witch Hazel will thrive in any garden but an open sunny position is best. It is quite a large shrub and can grow up to 4m in height. They require little pruning, especially if you have the room to let them grow to their full potential. Just remove any dead or diseased wood. They also have few problems with disease, but look out for honey fungus and vine weevil larvae amongst those grown in containers. Particularly good varieties include Hamamelis x intermedia ‘Barmstedt Gold’ with bright yellow flowers and Hamamelis x intermedia ‘Diane’ with its rich red spidery flowers.

Daphne is one of the best shrubs you can buy for winter scent. It flowers in January/February and has scented pink or white flowers. This shrub is very hardy and can grow up to 2m in height. They grow very well in borders and also in semi-woodland areas. Place them near to paths where their fragrance can be easily enjoyed. But beware, once planted they do not like to be moved. Daphne prefers a well-drained lime-free soil in a sunny spot, although it will tolerate semi-shade. They have few problems, but watch out for aphids and leaf spot. Two lovely varieties include Daphne bholua which has high scent pinkish white flowers, and Daphne odora ‘Aureomarginata’ which has pretty evergreen leaves and fragrant white flowers.

There are some shrubby climbers you can buy to add winter color to deciduous trees. Lonicera standishii ‘Budapest’ is one such example. Semi-evergreen this shrubby honeysuckle has many scented pink-tinged white flowers in mid-winter, followed by red berries. It will grow up to 2m in height and prefers a sheltered position.

Shrubs for spring

Camellias are probably one of the most popular shrubs for early spring flowers. They can be problematic as they need acidic soil, but they can easily be grown in containers in the right compost. Because Camellias are native woodland plants, they grow best in shade or semi-shade. They prefer free-draining conditions with plenty of organic matter and can grow up to 3m in height. Perhaps the main problem for Camellias is frost which can damage flowers. A Good variety is Camellia x williamsii ‘Saint Ewe’ which has rose-pink flowers from January to April and seems to be quite resistant to frost. Azaleas are beautiful spring flowering shrubs. Growing in sun or shade in well-drained soil, varieties can grow up to 15ft and have flowers ranging from white to deep purple/pink. Azalea ‘Adonis’ has gorgeous white flowers in May and grows up to 75cm. Azalea ‘Aladdin’ also flowers in May but has strong red flowers. You just can’t ignore the gorgeous yellow flowers of Forsythia in early spring. It can be grown as a stand-alone specimen or as part of a border and is a useful shrub for hedging. It likes moist but well-drained soil but will grow well anywhere. Forsythia x intermedia ‘Spectabilis’ is a vigorous variety which has deep yellow flowers from mid to late spring and grows up to 300cm in height. Kerria Japonica or Japanese Yellow Rose is another spring flowering shrub with sunny yellow flowers. Varieties can have either single or double flowers. It is suitable for a border or a woodland garden and grows to around 2m in height. Pieris Japonica is an all-year-round shrub, with attractive foliage in summer and slightly fragrant clusters of bell-shaped white, pink or red flowers in early spring. They can be grown in a shrub border but are just as at home in garden planters. ‘Mountain Fire’ has particularly attractive glossy red leaves.

Summer flowering shrubs

Hydrangea is a deciduous shrub that can suit any type of garden. There are many varieties that are divided up into two main groups. ‘Lacecaps’ that have flattened flower heads, and ‘Hortensias’ that have spherical flower heads of large flowers. Flower colors range from pinks to blues. He more acidic the soil, the bluer the flower will be. Hydrangea paniculata ‘Limelight’ is a spectacular variety, with large conical blooms from July to September which open in a soft shade of pea green and gradually change to cream and finally a delicate soft pink as they mature. It will grow to up to 250cm. Hibiscus syriacus, also called Rose of Sharon, is a deciduous flowering shrub that can reach a height of around 4m. It likes very warm conditions in full sun where it displays an abundance of attractive white, pink, red, lavender, or purple flowers. It is an easy plant to grow as it develops quickly once planted and doesn’t mind being moved. Buddleja’s are also very easy to grow. They like well drained soil and plenty of sunshine. Their flowers of pink to blue/purple provide a summer spectacle in August when they are covered in butterflies which feed on their nectar. They do require hard pruning in spring to encourage plenty of new growth. ‘Pink Delight’ has conical spikes of claret buds opening to produce lovely, orange-eyed flowers in a strong pink.

Shrubs for autumn interest

Euonymus can be deciduous or evergreen shrubs or small trees, often with fine autumn color. The leaves of Euonymus alatus turn a beautiful rosy-crimson in autumn. It is very hardy and grows up to 2.5m in height and spread. Cotinus or Smoke Tree is a true delight. They are large deciduous shrubs or small trees whose leaves produce wonderful autumn color from yellow to deep reds. Very hardy, they have a bushy habit and can grow up to 8m in height. Berberis can also be large deciduous shrubs or small trees with spiny shoots bearing tiny leaves. Berberis thunbergii has leaves that turn a deep orange/red in autumn followed by red fruit. It has an ultimate height and spread of around 1.5m and is therefore suitable form most gardens.